wikiHow is a “wiki,” similar to Wikipedia, which means that many of our articles are co-written by multiple authors. To create this article, volunteer authors worked to edit and improve it over time.
This article has been viewed 53,884 times.
Learn more...
Coarse wooden or slim hangers can be unpleasant for hanging clothes from. By covering them, you can make them softer, nicer to the touch and more likely to keep clothes hanging on them. These patterns are suitable for single length/bar hangers only. Explanations of abbreviations and techniques are provided after the patterns. If you have a similar pattern to share, click to Edit and add or ask for help here.
Steps
Knitted coat hanger #1
This is a single colour cover for a single bar wooden coat hanger.
Coat hanger cover
-
1Cast on 29 sts.
-
21st row (right side) K.Advertisement
-
32nd row * K1, tw3; rep from * to last st, k1. (Tw3 is explained in Tips, below.)
-
43rd row, K.
-
54th row, P2, * k1, tw3; rep from * last 3 sts, k1, p2.
-
6Pattern is formed by these four rows. Continue in pattern until the work measures the same length as the coat hanger.
-
7Cast off.


Knitting the hanger's hook cover
This step is optional and can be replaced with the hook covering measure explained in Method 2 below, if preferred.


Assembling the cover
-
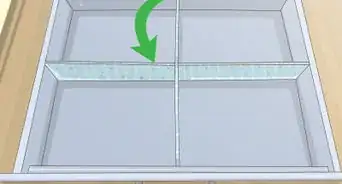
1Pad the hanger with the wadding. The wadding can be glued in place or use rubber bands to hold.
-
2Fold the main knitted piece in half lengthwise. Sew the side edges.
-
3Slipping the hook through the center of the folded edge, place the main knitted piece on the hanger. Join the edges by sewing neatly together.
-
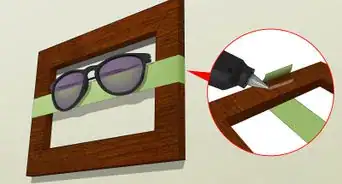
4Fold the hook cover in half lengthwise. Leave one short end open. Then sew all around, using the open end to slip over the hook. Stitch to the main piece.
- Or, use the alternative suggested in Method 2, of wrapping yarn around the hook, gluing it in place.
-
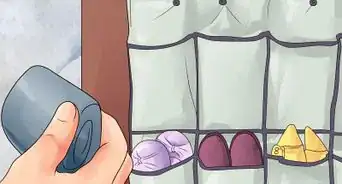
5Use as required. The hanger is now thoroughly covered and be used to hang your clothes.
- A ribbon can be tied in place on the hook, for a final pretty touch.


Coat hanger knitted cover #2
This produces a three-colour knitted cover, select the colours according to your preference. Just ensure that they match nicely. They are known as colours #1, #2 and #3 in the pattern; it's up to you as to which order you wish them to be in.
Knitting the cover
-
1Use colour #1 ball. Cast on 18sts. in this colour.
-
2Knit the 1st row. Knit this in colour #1.
-
3Knit the 2nd row. Purl in colour #1.
-
4Knit the 3rd and 4th rows. Knit in colour #2.
-
5Knit the 5th and 6th rows as for the 1st and 2nd rows.
-
6Knit the 7th and 8th rows in colour #3.
-
7Treat these first 8 rows as the pattern. Repeat until the pattern measures 44cm in length (or make adjustments for the length of coat hanger you have). End on the 6th pattern row. Cast off.


Making up the hanger cover
-
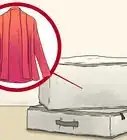
1Fold the cover in half along the length. Have the right side facing inside.
-
2Stitch along the two short ends only, to join. Turn the cover the right side facing outward.
-
3Remove the hook from the wooden hanger. Place the wooden hanger inside of the just-knitted cover. The long seam should be placed underneath the hanger.
-
4Stitch the long seam together, along the underside of the wooden hanger.
-
5Restore the hook to its original position. Cover the hanger with craft glue, just a light layer. Wind yarn in colour #3 around the hook, to wrap and cover it completely. Allow to dry in place.
- Cut off any excess yarn and darn in place.
-
6Done. The coat hanger is now covered and ready for use. Just be certain that the glue has completely dried.


Community Q&A
-
QuestionWhat does tw3 mean in knitting?
 Marshy_NekoCommunity AnswerTW3 means to twist three. Slip two stitches and knit the third stitch on left-hand needle, knit the second stitch, then knit the first stitch, then you slip all three stitches from the needle together.
 -
QuestionCan I knit with lace?
 Community AnswerSure. You can knit with anything that is long enough, narrow enough, and flexible enough.
 -
QuestionWhat size knitting needle was used?Community Answer5 mm for lacy knits, 4 mm for 11/12 WPI.
Abbreviations
- K = knit
- P = purl
- St(s) = stitches
- Rep = repeat
- Tw3 = twist stitch; p3 together but don't slip stitches off the needle (yarn around the needle)
Warnings
- Needle sizes are best measured by their millimetres, as size numbers for knitting needles vary around the world.⧼thumbs_response⧽
Things You'll Need
-
Method 1
- Wooden clothes hanger, single length/width with hanger hook already installed (from clothing stores, thrift stores, charity shops, home décor stores, etc.)
- 1 ball wool/yarn (around 8 ply)
- 2 knitting needles (no. 8/ 4mm needles)
- Wadding
- Sewing thread and needle
- Ribbon as decoration
- Scissors
-
Method 2
- Wooden clothes hanger, single bar type, around 40-43cm in length
- 4 ply wool - 3 25g balls each of a differing color of choice (make them match though)
- 2 knitting needles (no. 10/3.25mm)
- Sewing thread and needle
- Scissors