This article was co-authored by wikiHow Staff. Our trained team of editors and researchers validate articles for accuracy and comprehensiveness. wikiHow's Content Management Team carefully monitors the work from our editorial staff to ensure that each article is backed by trusted research and meets our high quality standards.
The wikiHow Video Team also followed the article's instructions and verified that they work.
This article has been viewed 33,973 times.
Learn more...
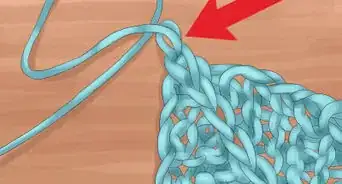
Increases allow you to expand the total number of stitches in a row or round. This is useful for shaping fitted knit items, such as sweaters, hats, and mittens. However, you may see instructions for increases in almost any type of knitting project. Learn the most common forms of knitting increases so you will know exactly what to do when they come up in a knitting pattern.
Steps
Knitting Front and Back
-
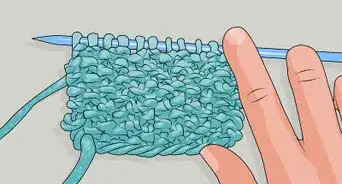
1Use knit front and back when you don’t mind leaving a bump. Knitting front and back is an easy way to increase. However, increasing this way leaves a visible bump in your knitting, so it is not ideal for all projects.[1]
- For example, you might use this method of increasing when you are using a textured stitch, such as the garter stitch.
- It is also fine to use when the area with the increases will be hidden, such as on the underside of a sleeve.
-
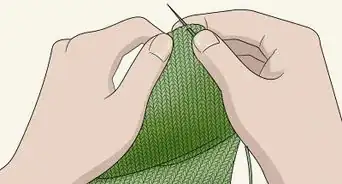
2Knit the stitch without letting the old stitch slip off. Push the right-hand needle into the front of the stitch on the left-hand needle and loop the yarn over the end of the needle.[2] Then, pull the yarn through, but do not allow the old stitch to slip off the needle yet.[3]
- If you are purling this row, then purl this first stitch without letting the old stitch slip off.
Advertisement -
3Insert the right-hand needle into the back of the same stitch and knit. Wrap the yarn wound the end of the needle after inserting it into the stitch. Then, pull through to complete the stitch. Let the old stitch slip off the end of the needle at this point.[4]
- If you are purling, then you can purl into this stitch instead.

Making a Stitch (M1)
-
1Insert the left-hand needle under the strand between stitches. There should be a visible strand between the 2 stitches on the right-hand and left-hand needles. Locate this strand and use the tip of the left-hand needle to lift it up.[5]
- You may need to separate the stitches with your fingers to find the strand.
-
2Use your fingers to twist the strand and put it back on the needle. Grasp the strand on the left-hand needle with your index finger and thumb and slip it off the needle. Then, twist it 1 time and slide it back onto the needle in this twisted position.[6]
-
3Knit into the new loop as usual to make a stitch. Insert the right-hand needle into the loop you just twisted, and yarn over the end of the needle. Then, pull this loop through the twisted loop to create a new stitch.[7]
- If you need to purl this stitch, then you can purl into the stitch as you normally would.[8]
-
4Work the stitch in the back as well if you need to make 2. If you need to make 2 stitches out of the twisted loop, don’t let the loop slide off of your needle after you knit into it. Instead, knit into the back of the loop, and then let the loop slide off.[9]
- If you are purling, purl into the back of the stitch after purling into the front of the stitch.
Creating a Yarn Forward Increase
-
1Knit a stitch as you normally would. Insert the right-hand needle into the stitch going from front to back. Then, loop the yarn over the end of the needle and pull it through to create a new stitch.[10]
- If you are on a purl stitch or row, then purl the stitch instead.
-
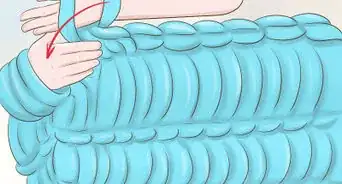
2Bring the working yarn to the front of your work. Grasp the strand of working yarn and bring it up and over your work. The yarn should be hanging down in front of your knitting as if you were going to purl.[11]
- If you are purling, bring the yarn to the back as if to knit.
-
3Wrap the yarn over the top of your right-hand knitting needle and knit. Lift the strand up and over the right-hand needle before knitting the next stitch. Then, knit the stitch as usual.[12]
- If you are purling, wrap the yarn under the right-hand needle and then purl.
Community Q&A
-
QuestionWhich is the least-visible increase for stockinette knitting?
 T. ChinsenTop AnswererIncreasing purlwise hides the horizontal bar that occurs in increasing knitwise. This keeps the front more consistent in appearance. It is possible to make invisible increases on the knit side using variations of the increase methods but it needs more steps to maintain the stockinette appearance.
References
- ↑ https://www.craftyarncouncil.com/mar06_increasing.html
- ↑ https://www.craftyarncouncil.com/instructions_kn.php3
- ↑ https://www.craftyarncouncil.com/mar06_increasing.html
- ↑ https://www.craftyarncouncil.com/mar06_increasing.html
- ↑ https://www.craftyarncouncil.com/mar06_increasing.html
- ↑ https://www.craftyarncouncil.com/mar06_increasing.html
- ↑ https://www.craftyarncouncil.com/mar06_increasing.html
- ↑ http://www.learn2knit.co.uk/knitting/increasing.php
- ↑ http://www.learn2knit.co.uk/knitting/increasing.php
About This Article

To knit an increase stitch, you can try simply knitting front and back, if you don't mind leaving a visible bump. Push the right-handed needle into the front of the stitch on the left-hand needle, then loop the yarn over the end of the needle and pull it through. Before you let the old stitch slip off the needle, insert the right-hand needle into the back of the same stitch and pull it through to complete the stitch. For more tips, including how to create a yarn forward increase stitch, keep reading!