This article was co-authored by wikiHow staff writer, Jessica Gibson. Jessica Gibson is a Writer and Editor who's been with wikiHow since 2014. After completing a year of art studies at the Emily Carr University in Vancouver, she graduated from Columbia College with a BA in History. Jessica also completed an MA in History from The University of Oregon in 2013.
The wikiHow Video Team also followed the article's instructions and verified that they work.
This article has been viewed 24,105 times.
Learn more...
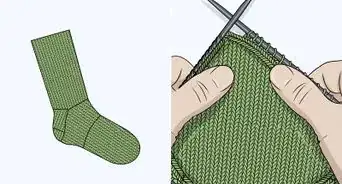
If you'd love to knit sleeves or socks, knitting in the round is a great skill to have. Decide if you want to knit on circular needles so you can easily knit tubular shapes. If you prefer, you could use several double pointed needles to knit in the round and shape your fabric. Using a magic loop method is another popular way to knit in the round using circular needles since it's a quick way to knit several rows.
Steps
Using Circular Needles
-
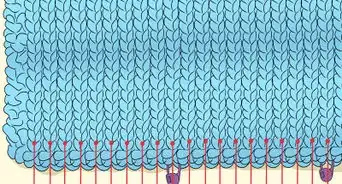
1Cast your stitches onto a circular needle. Select any circular cable that you're comfortable with using as long as it's not too long for your project. Use a circular needle with a cable that's shorter than the diameter of what you're knitting. For example, if you're knitting a sweater with a 34-inch (86-cm) diameter, use a needle with a cable that's no longer than 29-inches (76-cm) long. Cast on as many stitches as you need for your knitting project.
- You can buy cables from 9 to 60-inches (22 cm to 1.5-meters) long.
-
2Slide the stitches onto the cable and needle with the working yarn. Once you've cast on as many stitches as you need, slide the stitches down onto the cable. The stitches will be near the tip of the left needle.Advertisement
-
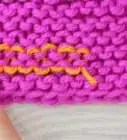
3Check for twisted stitches. Smooth the stitches so they're facing the same way and aren't twisted. The cast on stitches shouldn't loop or twist over the cable. It's important to do this before you begin knitting, or the fabric will have a warped shape that you can't undo later.[1]
-
4Put a stitch marker on your needle. When you're ready to start knitting, put a stitch marker on the right needle. The stitch marker will help you keep track of how many rows you've created.
- You can buy simple stitch markers at craft supply stores, sewing shops, and even some grocery stores.
-
5Knit the first row. Insert the right needle tip into the stitch on the left needle. Wrap the working yarn around the needle and move the completed knit stitch onto the right needle. Keep knitting until you've knit the entire row and are back at the stitch marker.
- Ensure that you're knitting with the working yarn and not the yarn tail.
-
6Continue to knit until you've reached the desired length. Keep knitting every row until your fabric measures as long as your pattern recommends. Remember that every time you reach the stitch marker, you've finished another row.
- If you're working from a pattern, remember that you're always working on the right side of the fabric.
Knitting with Double Pointed Needles
-
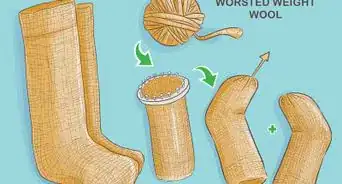
1Cast your stitches onto 1 of the double pointed needles. Follow your pattern and cast on as many stitches as it calls for. Read the pattern to see how many double pointed needles you'll need to knit in the round.
-
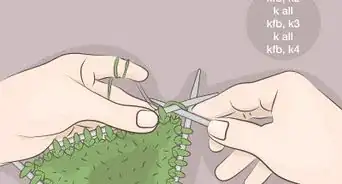
2Divide the stitches between the other double pointed needles. Evenly split the number of stitches onto the number of needles your pattern calls for. For example, if you cast on 15 stitches and the pattern requires you to use 3 double pointed needles, slip 5 stitches onto each needle.[2]
- Keep in mind that you'll need an extra double pointed needle that you'll use to knit with.
- If you can't divide the stitches evenly, the pattern should specify how to divide the stitches between all of the double pointed needles.
-
3Shape the needles into a triangle. Move the needles so they're all touching each other and connected in a triangle shape. The working yarn should hang from the needle that's on the right side.[3]
- Ensure that the stitches aren't twisted. They should lie flat and the edge that you cast on should face the center of the triangle.
-
4Use an extra double pointed needle to knit the stitches on the left needle. Insert an empty double pointed needle into the first stitch on the left needle. This is the first needle that you cast on. Knit the stitch and move the stitch onto the empty needle. Pull the yarn tightly so there isn't a gap between the stitches on the 2 needles. Keep knitting until there aren't any stitches left on the left needle.[4]
- If you want to easily keep track of how many rows you've worked, insert a stitch marker before you begin the row.
-
5Use the empty double pointed needle to knit from the next needle. Once you've knit all the stitches on the left needle, you can remove the empty needle. Turn the triangle of double pointed needles a little so you can insert the empty needle into the next double pointed needle with stitches. Knit all of these stitches and transfer them to the empty needle.[5]
- You'll always want to move on to the needle to the left of the one you just finished stitching.
-
6Knit in the round until you reach the desired length. Keep knitting into the stitches on the double pointed needles using the extra, empty double pointed needle. Knit according to your pattern or until the fabric is as long as you like.[6]
Making the Magic Loop
-
1Cast your stitches onto a flexible circular needle. Choose a circular needle with a flexible cable that you can easily bend. The cable should be at least 32-inches (81-cm) long. Cast on as many stitches as you need for your pattern.[7]
- You can usually buy cables up to 60-inches (1.5-meters) long.
- The first stitch that you cast on should be on the bottom needle tip that's closest to you.
-
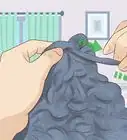
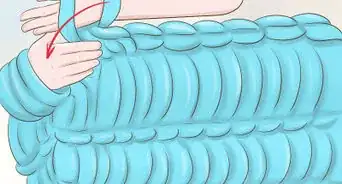
2Slide the stitches to the center of the cable and divide them. Use your fingers to slide the stitches down to the middle of the flexible cable. Count the stitches to determine where the middle of the stitches is. Squeeze the palm of your hand while you hold the cable. This will bend the cable so it forms a loop. Half of the stitches should be on 1 side of the loop while the rest of the stitches will be on the other side of the loop.[8]
-
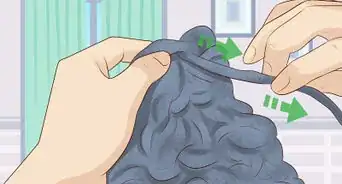
3Pull the cable and check the number of stitches. Use the index finger and thumb of your hand that's not holding the circular needle to pull the loop of the cable. Keep pulling gently so the stitches slide down onto the needles. Count the number of stitches on each needle to ensure that they're even.
-
4Hold the needles so the working yarn is ready for knitting. Move the hand holding the circular needle so the tips of both needles are level and pointing to the right. Ensure that the working yarn is hanging over the back needle.
-
5Slide the stitches from the back needle onto the cable. Pull the back needle out so the yarn slips onto the cable. Pull on the back needle so you can bring it around and stitch into the other needle. Hold the empty needle in your right hand and keep the thumb of your other hand on the stitches on that needle. You're ready to begin knitting in the round.[9]
- Keep the working yarn toward the back of your needles.
-
6Knit your first row. Follow your pattern and knit the first row of stitches as usual. Ensure that the stitches don't get twisted when you transfer them to the back needle. The row of stitches that you cast on will become the bottom edge of your knitting project.
-
7Slide the stitches back to the 2 needle tips. Use your fingers to slide the stitches so an even number are on each circular needle tip. You'll need to pull the cable from 1 of the needle tips in order to move the stitches back.
-
8Continue to knit as many rows as you need. Follow your knitting pattern to knit as many rows in the round as it requires. Remember to slide the finished stitches back down onto the 2 needle tips before starting a new row.[10]
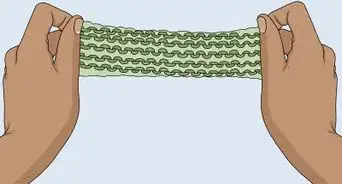
- You'll be able to see tubular knitting on the circular needle once you've completed 2 to 3 rows of stitches.
Things You'll Need
Using Circular Needles
- Circular knitting needles
- Stitch marker
- Yarn
Knitting with Double Pointed Needles
- 3 to 6 double pointed needles
- Yarn
- Stitch marker, optional
Making the Magic Loop
- Flexible circular knitting needle with a cable at least 32-inches (81-cm) long
- Yarn
References
- ↑ https://www.youtube.com/watch?time_continue=2&v=WlNn2ph4HDc
- ↑ http://www.redheart.com/learn/articles/how-knit-4-needles
- ↑ http://www.redheart.com/learn/articles/how-knit-4-needles
- ↑ http://www.redheart.com/learn/articles/how-knit-4-needles
- ↑ http://www.redheart.com/learn/articles/how-knit-4-needles
- ↑ http://www.redheart.com/learn/articles/how-knit-4-needles
- ↑ https://www.craftsy.com/blog/2014/10/demystifying-the-magic-loop/
- ↑ https://www.craftsy.com/blog/2014/10/demystifying-the-magic-loop/
- ↑ https://www.craftsy.com/blog/2014/10/demystifying-the-magic-loop/
About This Article

To knit in the round using circular needles, start by casting your stitches onto your needle and sliding them onto the cable so they’re near the tip of the left needle. Next, put a stitch marker on your right needle to help you keep track of your rows. Then, insert the right needle tip into the stitch on the left needle. Wrap the working yarn around the needle and move the complete stitch onto the right needle. Finally, keep knitting until you’ve reached the desired length. To learn how to knit with double pointed needles, keep reading!