This article was co-authored by Rishabh Mehan and by wikiHow staff writer, Hunter Rising. Rishabhn Mehan is a Cricket Systems Operator in the United Kingdom. He has been coaching cricket in London since 2016, when he received his Level 2 Certificate in Coaching Young People and Adults Cricket (QCF).
There are 10 references cited in this article, which can be found at the bottom of the page.
wikiHow marks an article as reader-approved once it receives enough positive feedback. In this case, 87% of readers who voted found the article helpful, earning it our reader-approved status.
This article has been viewed 261,911 times.
Before you can use a cricket bat in a game, you have to compress the willow wood on the striking surface, a process called knocking. It can take up to 20,000 hits with a mallet to properly compress the wood, but it’s a necessary process to ensure your bat can take a hit and is ready for the game![1]
Steps
Oiling the Bat
-
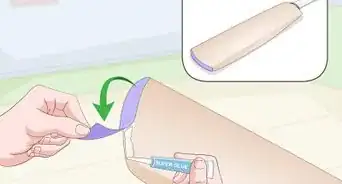
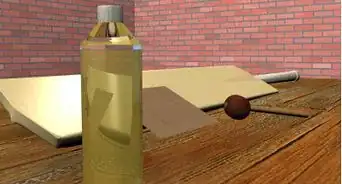
1Pour 1 tsp (4.9 mL) of raw linseed oil on the flat side of the bat. Put the oil directly onto the bat. Avoid getting oil near any decals or the handle of the bat. Linseed oil helps moisturize and soften the fibers of the willow wood and makes the bat easier to compress.[2]
- Don’t use cooked linseed oil since that will remove moisture from the wood.
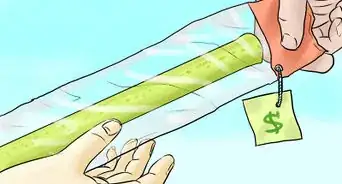
- Raw linseed oil can be purchased online or at hardware stores.
-
2Rub the oil onto the wood with your fingers or a soft rag. Coat the entire flat area since it could come into contact with a cricket ball. Make sure the oil is evenly spread out and it is not pooling on any area of your bat.[3]
- Rags covered in linseed oil can catalyze, meaning it can generate heat as it is drying and possibly combust. Leave rags spread out outdoors so they can dry before storing them in an airtight, fireproof container. Dispose of the rags when there is hazardous waste collection.[4]
Advertisement -
3Spread the oil onto the edges of your bat. The edges of the bat will also need to be knocked in and rounded, so it’s important to work the oil over each edge. Bring the oil 1⁄4 inch (6.4 mm) down the side of the bat with your finger and rub it into the edges.[5]
-
4Let the oil set for 24 hours. Keep your bat face-up so the oil seeps down into the wood. Let the oil soak in for a full day until it is dry.
-
5Oil the bat 2 more times. This will ensure the wood is filled with moisture and your bat will absorb a hit from a mallet rather than crack. Each time, let the oil dry for 24 hours before applying another coat.


Rounding the Edges and Toe
-
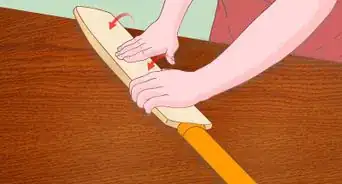
1Strike the long edge at a 45-degree angle with a bat mallet so it dents. Use a hardwood bat mallet with a rounded striking surface. Hold the bat in one hand and hit 1 edge of the bat with your dominant hand with enough power to leave an impression.[6]
- Do not hit the edges at a 90-degree angle. This shrinks the hitting surface of the bat and could cause damage.
- Instead a mallet, you can also use an old cricket ball to strike the edges.
-
2Work down the edge of your bat so it has a smooth, rounded appearance. Continue striking down the edge of the bat with the same amount of power. Make sure the edge is even so no areas are higher or lower.
- Avoid hitting the bottom of the bat.
-
3Repeat the process on the other long edge of your bat. Make sure the angle of each edge of the bat is the same. Hold the bat so the short end of the striking surface, or the toe, is eye level. Check both edges of the bat to make sure they are even and rounded.
-
4Strike the toe of your bat. Use a table clamp to secure the bat to a table so it does not move while you strike the toe. Flatten the corners at the toe of the bat and round the edge. Slowly build up power to further compress the edge.[7]


Compressing the Striking Area
-
1Clamp your bat down so the flat edge faces up. Place a cloth underneath the bat so the bottom does not get damaged. Use a table clamp to secure the bat so you can strike it easily with a mallet.[8]
-
2Hit the middle of the flat area so it dents. Slowly test how much power you need to use so you don’t damage your bat. Swing the mallet with enough power to leave an indentation in the middle of the hitting area.
- If it’s difficult to see an indentation on the bat, loosen the clamp and hold it up to a light to see if you’ve made a dent.
-
3Strike the flat face of the bat until the surface is even. Repeatedly hit the entire flat area of the bat since a ball may be hit anywhere on the surface. Use the same amount of power you used to make your initial indentation across the face of the bat.[9]
-
4Repeat the process with harder hits until you’ve struck it 20,000 times. The entire process should take about 6 hours. As you increase power, continue making the surface of the bat even so it is flat.[10]
- Split your time knocking the wood into 10 or 15 10-minute sessions so you don’t get burnt out.
- Test the wood with your fingernail occasionally. At first, your fingernail should leave an impression in the wood’s surface, but after you’ve knocked it in, it will be harder to press.
-
5Practice hitting soft pitches with the bat. Ask a friend to toss gentle pitches to you with an old cricket ball so you can hit them back with the bat. This helps you detect if any sections of the bat hit unevenly. If they do hit unevenly, go back and strike the areas with a mallet again.[11]
- Using a new ball could damage the bat if it is hit improperly.
- Alternatively, put the ball in a sock and tie it to a rope. Put the rope over a tree branch to make a swing. Hit the ball as it swings back and forth.


Expert Q&A
Did you know you can get premium answers for this article?
Unlock premium answers by supporting wikiHow
-
QuestionCan I get my bat ready within a two day knocking process?
 Rishabh MehanRishabhn Mehan is a Cricket Systems Operator in the United Kingdom. He has been coaching cricket in London since 2016, when he received his Level 2 Certificate in Coaching Young People and Adults Cricket (QCF).
Cricket CoachThe knocking process will take 3 to 4 days, so you would not be able to use it within 2 days.
Support wikiHow by unlocking this expert answer.
-
QuestionWould it be OK to mallet the bat after oiling it once?Rishabh MehanRishabhn Mehan is a Cricket Systems Operator in the United Kingdom. He has been coaching cricket in London since 2016, when he received his Level 2 Certificate in Coaching Young People and Adults Cricket (QCF).
Cricket CoachYes this is fine, however, I would recommend oiling the bat at least twice.Support wikiHow by unlocking this expert answer.
-
QuestionIf I knocked my bat without bat oil, then knocked it with bat oil, should I oil it the second time also?Rishabh MehanRishabhn Mehan is a Cricket Systems Operator in the United Kingdom. He has been coaching cricket in London since 2016, when he received his Level 2 Certificate in Coaching Young People and Adults Cricket (QCF).
Cricket CoachOne coat of oil will work just fine, so you do not need to oil the bat a second time.Support wikiHow by unlocking this expert answer.
Warnings
- Rags soaked in linseed oil catalyze if they’re wadded up, meaning it generates heat and could combust. Hang them to dry before storing them in an airtight, non-combustible container.[12]⧼thumbs_response⧽
Things You’ll Need
- Raw linseed oil
- Table clamp
- Bat mallet with a round striking surface
- Old cricket ball


References
- ↑ https://youtu.be/v4AmZYq7hSk?t=2m1s
- ↑ https://youtu.be/aEbEENWnICo?t=4m56s
- ↑ https://youtu.be/aEbEENWnICo?t=5m25s
- ↑ https://www.mass.gov/service-details/disposing-of-oily-rags
- ↑ https://youtu.be/aEbEENWnICo?t=5m38s
- ↑ https://youtu.be/v4AmZYq7hSk?t=1m53s
- ↑ https://youtu.be/MF4-nfbR5hA?t=1m37s
- ↑ https://youtu.be/MF4-nfbR5hA?t=1m49s
- ↑ https://youtu.be/v4AmZYq7hSk?t=1m43s
About This Article