This article was co-authored by Joseph Bautista and by wikiHow staff writer, Sophia Latorre. Joseph Bautista is a Self Defense Specialist and a Martial Arts Instructor specializing in Filipino martial arts. With over 18 years of instructing and martial arts training experience, Joseph runs Legacy Filipino Martial Arts, a Filipino martial arts school based in San Francisco, California. He also teaches self-defense with Self Defense For the People, a self-defense program with clients such as Salesforce, Airbnb, Gap, UPS, and UCSF. When not teaching self defense he is teaching CPR and 1st Aid Skills to 911 Dispatchers and Local Police Officers in the SF Bay Area with 1st Five Minutes.
There are 15 references cited in this article, which can be found at the bottom of the page.
This article has been viewed 122,854 times.
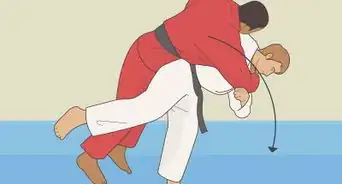
Brazilian jiu-jitsu is a challenging but rewarding martial art. While jiu-jitsu is an offshoot of Judo, it focuses more on ground techniques. To learn Brazilian jiu-jitsu, you should take classes with a trained instructor. During classes, you’ll learn techniques and spar with a variety of partners. With dedication and commitment, you can advance all the way to a black belt!
Steps
Selecting Your Training Center and Materials
-
1Determine whether you will take classes or learn on your own. The best way to learn Brazilian jiu-jitsu is to take classes at a reputable training school so that an experienced instructor can show you proper form and technique. If you aren’t able to take classes, you could learn the basic movements from handbooks or video tutorials. If you’re going to practice at home, you should work with an experienced partner and use soft mats to prevent injury.[1]
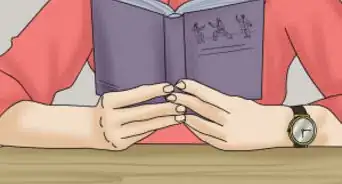
- There are many jiu-jitsu training handbooks available in stores and online. There are also tons of videos online, like on YouTube, that will teach you how to do Brazilian jiu-jitsu.
- Select handbooks and videos created by experienced jiu-jitsu instructors that list their credentials and the name of their school, which you can research further online.
-
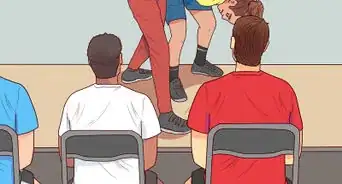
2Choose a jiu-jitsu training school near you. Do an Internet search to find training schools in your area. Many will allow you to watch a class and ask questions before signing up for classes. Visit several, if possible, to get a feel for the instructors, students, and school.[2] Choose a school whose students and instructors seem friendly and welcoming. The school should also be clean and well cared for.[3]
- A good instructor will have plenty of experience and training in jiu-jitsu as well as a passion for the sport. While neither a black belt nor a competition record are absolute necessities, they do show that the instructor knows what it takes to succeed in jiu-jitsu.[4]
- You could ask the students, “What do you like most about taking classes here?” or “What style of teaching does the instructor use?” to find out if you think your own learning style and reasons for learning jiu-jitsu are in line with those of the classes.[5]
Advertisement -
3Sign up for classes. Once you’ve chosen an instructor, you can sign up for classes. Consider the time slot, frequency, and cost of classes before making your decision. You need to be committed to these classes, so ensure you choose some that work with your schedule, lifestyle, and preferences.[6]
- For example, don’t choose the 5 a.m. session if you hate getting up early. Alternatively, don’t sign up for Friday night classes if you like to go out with your friends after work on Fridays.
-
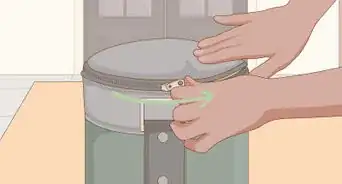
4Purchase a jiu-jitsu gi. If you’re dedicated to learning jiu-jitsu, you’ll need a gi, which is the outfit worn during classes and competitions. You can get fitted for a gi at some training schools as well as martial arts shops. It should fit well and be comfortable—the sleeves and pants shouldn’t be too long and the gi should be loose enough that it doesn’t restrict your range of motion.[7]
-
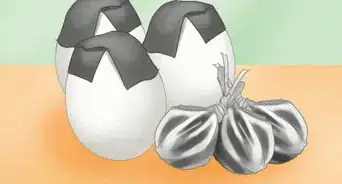
5Begin with a white belt. You’ll start with a white belt and be able to progress through different colored belts until reaching the highest level, the black belt. There are many ways to tie the belt, but the easiest is to loop the belt twice around your waist, then take the left side and slip it underneath the layers and out through the top. Ensure both ends of the belt are about the same length, then tie the ends in a simple shoelace knot and pull tight.[8]
-
6Get protective gear, if desired. Ask your instructor if you’ll need protective gear, and if so, what kind. Some beginners choose to use knee braces, ear guards, a mouth guard, and a groin protector (for males) to minimize the risk of injury. You can also protect your fingers and toes with athletic tape, as many schools don’t allow shoes on the mats.[9]


Taking Your First Class
-
1Practice good personal hygiene. Wear clean clothes, like athletic shorts or pants and a T-shirt, if you don’t yet have a jiu-jitsu gi. Be sure to freshen your breath, put on deodorant, and avoid any perfumes or strong lotions. Keep your fingernails and toenails trimmed. Remove any piercings, don’t wear other jewelry, and if you have long hair, keep it tied back in a bun or braid.[10]
- Avoid wearing items that are baggy or have loose pockets or straps, as fingers and toes could get caught in them.[11]
-
2Show respect to everyone. Be on time for class and greet everyone politely. You should leave your ego at the door and be prepared to try something new. It will take some trial and error before you get things down, so try not to get frustrated. Acknowledge that your classmates know more about jiu-jitsu than you do, and try to learn from them.
-
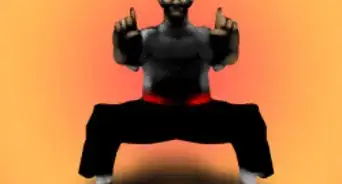
3Stretch and warm up. Your class will likely begin with stretches and warm ups to prepare everyone to practice techniques and spar. Follow the instructions carefully and take this part seriously. If you don’t stretch and warm up properly, you have a higher chance of getting hurt.[12]
- A common stretch is the butterfly stretch. Sit on the floor and bring the heels of your feet together so that your knees are pointing out to the sides. Straighten your back and bring your heels as close to your body as you can.[13]
- Another good stretch is the cobra pose. Lay on the floor on your stomach with your palms placed on the ground just below your shoulders on either side of your body. Extend your arms so that your torso raises off the floor, but keep your hips pressed to the ground. Engage your abs to protect your lower back and bend backwards.[14]
-
4Try new techniques. You’ll be shown new techniques, like forward roll. To do a forward roll, start with a neutral stance—stand with your feet shoulder-width apart, your shoulders back, and your spine straight. Take a full step forward with your dominant foot then reach for your opposite leg with your dominant hand. Roll from your dominant shoulder to the opposite hip. Then, return to a neutral stance.[15]
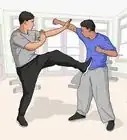
- To do a low parry, block a kick with the same arm your opponent is kicking with (i.e. block a right-footed kick with your right arm). Extend your arm at a 45-degree angle in front of you with your elbow locked to prevent the kick from making contact with your body.[16]
- To do a high parry, twist clockwise on the ball of your left foot to block a left punch with your left arm. Twist counterclockwise on the ball of your right foot to block a right punch with your right arm. Bend your arm at the elbow and hold it out in front of you so that your bicep is parallel to the floor.[17]
-
5Spar with a partner. After learning some new techniques, you’ll probably get to try them out with a sparring partner. Start each round down on your knees, facing your partner. Once you’re both ready, shake hands and begin. Usually, you’ll change partners after each round.[18]
-
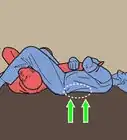
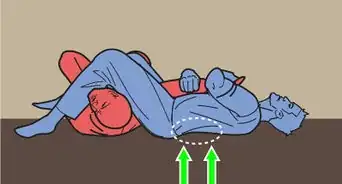
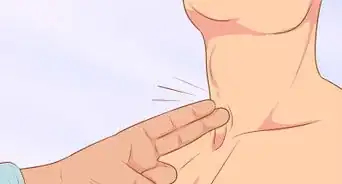
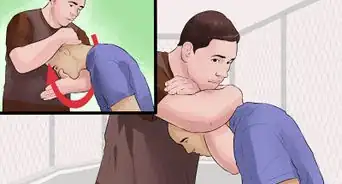
6Signal submission by tapping. When you’re sparring with your partner and get into a position you can’t maneuver your way out of, you can signal your submission. To surrender, tap your opponent three times. You’ll both return to the starting position on your knees, then try again.[19]


Practicing Basic Techniques
-
1Try a side breakfall. A side breakfall allows you land comfortably when thrown by an opponent. Stand up and place your right foot in front of your left, resting the outside of your right foot on the floor. Allow yourself to fall to the right and throw your right arm straight out on the floor to break your fall. Bring your left knee up to protect your body from possible kicks and bring your hands up to guard your face.[20]
-
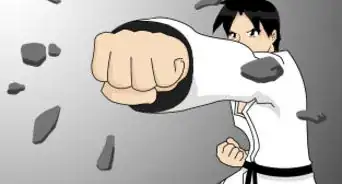
2Do a front snap punch. Another basic technique is the front snap punch. Put your left foot forward and keep your guard up, meaning your fists should be protecting your face. Do a small jab with your left fist, followed immediately by a strong strike with your right fist. Twist on the ball of your back foot with your hips to gain extra speed and power.[21]
-
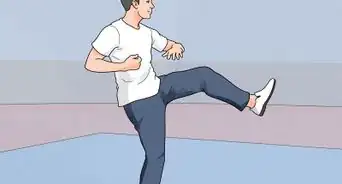
3Practice a front snap kick. Begin by standing with your left foot forward and your arms up to guard your face. Bend your right knee and bring it up to hip level. Snap your foot out forward to strike your opponent, then return to the starting position.[22]
-
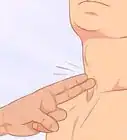
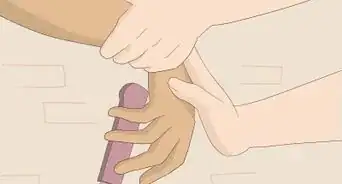
4Learn the escape wrist grab. When your opponent grabs one of your wrists, bring the hand of the wrist they are holding up in front of your face so that you are looking at your palm. Rotate your wrist clockwise until your thumb is pointing at your face. Thrust your hand down quickly to the side of your body to break their grip.[23]


References
- ↑ https://breakingmuscle.com/fitness/the-beginners-guide-to-brazilian-jiu-jitsu
- ↑ Joseph Bautista. Self Defense Specialist, Martial Arts Instructor, & 1st Aid/CPR Instructor. Expert Interview. 30 April 2020.
- ↑ https://breakingmuscle.com/learn/tips-for-choosing-a-brazilian-jiu-jitsu-academy
- ↑ https://breakingmuscle.com/learn/tips-for-choosing-a-brazilian-jiu-jitsu-academy
- ↑ https://breakingmuscle.com/learn/tips-for-choosing-a-brazilian-jiu-jitsu-academy
- ↑ https://breakingmuscle.com/fitness/the-beginners-guide-to-brazilian-jiu-jitsu
- ↑ http://www.jiujitsubrotherhood.com/8-steps-to-finding-the-perfect-bjj-gi/
- ↑ http://jiujitsumag.com/tying-your-jiu-jitsu-belt/
- ↑ http://www.grapplearts.com/starting-bjj-what-to-expect-on-your-first-class/
- ↑ http://www.grapplearts.com/starting-bjj-what-to-expect-on-your-first-class/
- ↑ https://bjjtribes.com/why-arent-you-allowed-to-train-bjj-with-pockets-or-jewelry/
- ↑ http://www.grapplearts.com/starting-bjj-what-to-expect-on-your-first-class/
- ↑ http://www.bjjee.com/articles/8-best-bjj-flexibility-exercises/
- ↑ http://www.bjjee.com/articles/8-best-bjj-flexibility-exercises/
- ↑ http://www.ultimatejujitsu.com/learn-jujitsu-techniques/traditional-jujitsu-techniques/white-belt/forward-roll/
- ↑ http://www.ultimatejujitsu.com/learn-jujitsu-techniques/traditional-jujitsu-techniques/white-belt/low-parry/
- ↑ http://www.ultimatejujitsu.com/learn-jujitsu-techniques/traditional-jujitsu-techniques/white-belt/high-parry/
- ↑ http://www.grapplearts.com/starting-bjj-what-to-expect-on-your-first-class/
- ↑ http://www.grapplearts.com/starting-bjj-what-to-expect-on-your-first-class/
- ↑ http://www.ultimatejujitsu.com/learn-jujitsu-techniques/traditional-jujitsu-techniques/white-belt/side-breakfall/
- ↑ http://www.ultimatejujitsu.com/learn-jujitsu-techniques/traditional-jujitsu-techniques/white-belt/front-snap-punch/
- ↑ http://www.ultimatejujitsu.com/learn-jujitsu-techniques/traditional-jujitsu-techniques/white-belt/front-snap-kick/
- ↑ http://www.ultimatejujitsu.com/learn-jujitsu-techniques/traditional-jujitsu-techniques/white-belt/escape-wrist-grab/
About This Article