This article was co-authored by wikiHow Staff. Our trained team of editors and researchers validate articles for accuracy and comprehensiveness. wikiHow's Content Management Team carefully monitors the work from our editorial staff to ensure that each article is backed by trusted research and meets our high quality standards.
There are 7 references cited in this article, which can be found at the bottom of the page.
This article has been viewed 335,214 times.
Learn more...
If your house is cold, your water won’t heat up, or your stove isn’t working, chances are the pilot light has gone out. A pilot light is a small gas burner that is continuously burning to light a larger burner. Whether it’s your furnace, water heater, oven, or stove, relighting your pilot light is actually really easy. You need to locate and access the pilot light, turn the gas valve to the pilot light position, and use a long lighter to relight the pilot light. Now you’re cooking with gas!
Steps
Reigniting a Gas Furnace
-
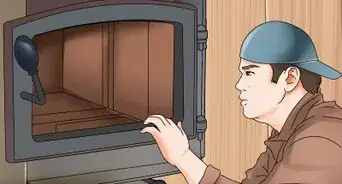
1Find the instructions label on your furnace. Nearly every furnace will have a sticker on it that has instructions on how to light the pilot light of the furnace. The instructions label will also tell you where the gas valve and reset button are located so you can relight the pilot light.[1]
- Use a flashlight to locate the label if the furnace area is dark.
-
2Turn off the gas valve. The first thing you need to do before you try to light the pilot light on your furnace is shut off the gas so there isn’t any chance of causing a fire or an explosion. Most furnaces have a small valve near the bottom of the furnace that have 3 positions labeled “On”, “Off”, and “Pilot.” Turn the valve so that it’s in the “Off” position.[2]
- Wait 5 minutes before you do anything else so any gas left in the pipes has a chance to clear out.
Advertisement -
3Switch the gas valve to pilot light. After waiting 5 minutes, turn the gas valve to the position labeled “Pilot” or “Pilot Light.” You shouldn’t smell any gas coming from the valve. If you do, you may have a gas leak.[3]
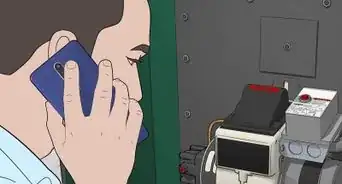
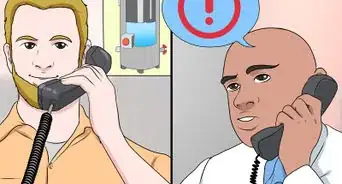
Warning: If you think you may have a gas leak, leave the area immediately and call a furnace repairman.
-
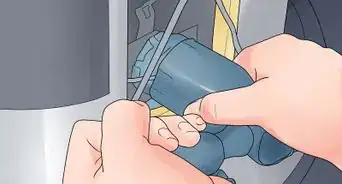
4Press and hold the reset button. Near the gas valve, you should see a small button or switch labeled “Reset.” Before you try to light the pilot light, locate the reset button and hold it down.[4]
- If you can’t locate the reset button, check the owner’s manual of the furnace to see if there is a diagram that shows the location of the reset button.
- If you don’t have the owner’s manual for your furnace, try looking up your specific furnace online.
-
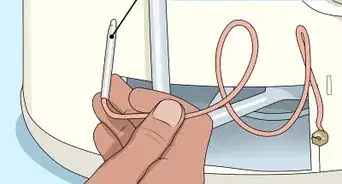
5Light the pilot light valve with a long lighter. Continue to hold the reset button as you ignite the lighter. Bring the flame to the pilot light valve and hold it steady until you see the pilot light reignite, then release the reset button.[5]
- You can use a long match or roll a piece of paper into a long tube to use to light the pilot light.
- It’s possible that you may need to relight the pilot light a few times until it stays on.
-
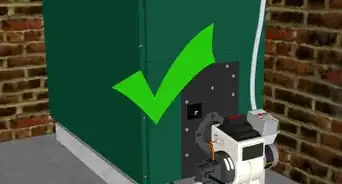
6Turn the furnace back on by switching the valve back to the “On” position. Once you’ve reignited the pilot light, turn the gas valve back into the “on” position and you should hear your furnace turn back on. The furnace should start to generate heat to the house soon afterward.
- If the pilot light continues to go out, you may have a broken or faulty thermocouple. Call a professional to take a look at your furnace.[6]


Lighting a Gas Water Heater
-
1Open the access panel covering the pilot light. Many gas water heaters will have a small access panel that you’ll need to remove in order to access the pilot light and gas valve. Depending on your water heater, you may be able to just snap the panel off, or you’ll need to use a small screwdriver to remove the panel.[7]
Tip: If you have to remove screws to open the access panel, keep them in a small plastic back so you don’t lose them!
-
2Switch the gas valve off. When you open the access panel, locate the gas regulator valve and turn the switch until it’s in the “Off” position. The valve is usually located on the box that has the temperature control valve.[8]
- Wait 10 minutes before you move on to allow any residual gas from the tank to clear from the air.
-
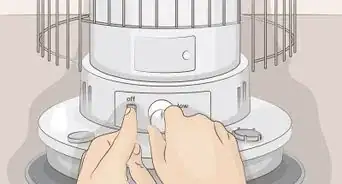
3Set the temperature control valve to the lowest setting. Near the gas regulator valve, you’ll see a temperature control valve that allows you to set the temperature of the water heater. Turn the dial or switch to the lowest possible temperature setting.[9]
- For some water heaters, the lowest temperature setting is labeled “Pilot.” Turn the dial to that position.
-
4Turn the gas valve to the “Pilot” position. After you’ve lowered the temperature control valve, switch the gas regulator control valve to the “Pilot” position so you can reignite the pilot light. Some older water heaters may require you to hold the switch in the pilot position to relight the pilot light.[10]
-
5Use a long lighter to light the pilot light. With the gas valve in the pilot position, or with you holding the valve in the pilot position, use a long-stemmed lighter to light the tip of the pilot light’s valve. Keep the regulator valve in the pilot position for 1-2 minutes to allow the thermocouple to sense that the pilot light is on and the water heater to restart.[11]
- You can use a long match or a piece of paper rolled up into a tube to light the pilot light.
- Some modern gas water heaters will have a red button or switch near the regulator valve that is labeled something like “Pilot ignition” or “Ignite.” If your heater has an igniter, don’t use a lighter, just press the button to light the pilot light.
-
6Reset the temperature setting and turn the gas back on. Once the pilot light is back on and is burning smoothly, switch the gas regulator valve back to the “On” position. Then put the temperature valve back to the original setting.[12]
- Never set a water heater past 120 °F (49 °C).
-
7Close the access panel. With the pilot light on and your water heater back in working order, replace the access panel by either screwing it back on or snapping it back into place. You should be able to use hot water now that the heater is working.[13]


Relighting a Gas Stove and Oven
-
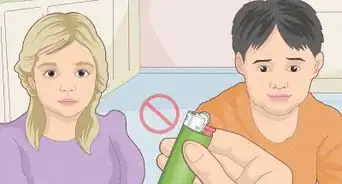
1Make sure everything is off. Turn all of the knobs to the off position and make sure the oven isn’t on. It’s very important that no gas is being released when you relight the pilot light or you could cause a fire or an explosion.[14]
- Make sure you don’t smell any gas in the kitchen. If you do, do not try to light the pilot light. Call a technician to repair your stove.
- Listen for a hissing sound that could indicate that gas is leaking from the stove.
-
2Remove the burners from the stove top. Take off any grates and covers from the burners so they don’t fall off when you raise the stovetop. Set them aside until you’re finished.[15]
Tip: Clean the burners before you replace them.
-
3Lift the stovetop lid to expose the pilot light valves. There will be a lever or switch on the underside of the stovetop that you need to engage in order to raise the lid of the stovetop. Look for a small pipe that connects the burners on the left and a small pipe that connects the burners on the right. There is a pilot port in the center of each of the pipes.[16]
- If you can’t locate the pilot light ports, consult the owner’s manual to find them. Look up your stove online to find the pilot light ports if you don’t have the owner’s manual.
-
4Open the oven door and look for the pilot light hole at the bottom. When you open the oven door you should see a small hole at the bottom of the oven. This is where you will need to light the pilot light.[17]
- Depending on the model of your oven, the pilot light hole may be in the front corner, back corner, or in the center near the door. Check your owner’s manual or look up your oven online to find the pilot light if you can’t locate it.
-
5Use a long-stemmed lighter to light the pilot lights. Ignite the long-stemmed lighter and hold the flame to the pilot light valves in the center of the pipes on the stove top. Light both pilot light valves. Then light the pilot light in the small hole at the bottom of the oven. Hold the flame until the pilot light ignites and stay lit.[18]
- You can also use a long match to light the pilot light.
- The pilot should ignite almost immediately. If it doesn’t, you may have a blocked gas line. Call a technician to repair your stove.
-
6Close the stovetop lid and the oven door. Once the pilot lights have been reignited, close the stovetop lid, making sure it locks into place and closes securely. Then close the oven door. You should be able to use your stove or oven now.[19]
- Test the burners on the stovetop and turn on the oven to make sure they’re working.
- If the pilot light keeps going out, there may be something wrong with the gas lines. You may need to call a technician to fix a faulty gas line.


Community Q&A
-
QuestionDo I need to turn the pilot light off during the summer?
 Community AnswerYou should if you're not using it all summer, and you should also close the valve on the supply line. It will save you on fuel cost and will make your device safer. If a paper or cloth should come into contact with the pilot flame by accident, it can cause a major fire.
 -
QuestionWhat do I do if the pilot is on, but whenever I turn the knob to the on position, the light is out?Community AnswerIt takes a while to warm up the thermocouple that opens the main gas line, so hold the button while the pilot is on until the flame stays lit when you move the knob to on.
-
QuestionHow can I tell if the pilot light is not working?
 Community AnswerIf it's an electric ignition, listen for a clicking sound. If you are not sure, try spotting a spark when you press it. If it has neither, then you have a broken ignition.
Warnings
- If you smell gas or hear a hissing sound, do not attempt to light a pilot light. Leave the area and call a technician to repair your appliance.⧼thumbs_response⧽

-Step-6.webp)
References
- ↑ http://www.preferredhomerepair.com/GasFurmacePilotLightAndTroubleshooting.html
- ↑ https://www.bobvila.com/articles/how-to-light-a-pilot-light/
- ↑ https://www.bobvila.com/articles/how-to-light-a-pilot-light/
- ↑ https://www.bobvila.com/articles/how-to-light-a-pilot-light/
- ↑ https://www.hometips.com/repair-fix/furnace-problems.html
- ↑ https://www.hometips.com/repair-fix/furnace-problems.html
- ↑ https://www.water-heater-repair-guide.com/waterheaterpilotlight.html
- ↑ https://homeguides.sfgate.com/light-pilot-gas-hot-water-heater-26723.html
- ↑ https://www.water-heater-repair-guide.com/waterheaterpilotlight.html
- ↑ https://homeguides.sfgate.com/light-pilot-gas-hot-water-heater-26723.html
- ↑ https://www.bobvila.com/articles/how-to-light-a-pilot-light/
- ↑ https://homeguides.sfgate.com/light-pilot-gas-hot-water-heater-26723.html
- ↑ https://www.bobvila.com/articles/how-to-light-a-pilot-light/
- ↑ https://www.thekitchn.com/how-to-light-a-stovetop-and-oven-pilot-light-253182
- ↑ https://www.thekitchn.com/how-to-light-a-stovetop-and-oven-pilot-light-253182
- ↑ https://www.bobvila.com/articles/how-to-light-a-pilot-light/
- ↑ https://www.bobvila.com/articles/how-to-light-a-pilot-light/
- ↑ https://www.bobvila.com/articles/how-to-light-a-pilot-light/
- ↑ https://www.cnet.com/how-to/how-to-fix-a-gas-stove-that-wont-light/
About This Article

To light a pilot light, first turn the gas control valve to off and wait 5 to 10 minutes until all the gas fumes are gone. Once you’ve made sure there’s no gas coming out, hold a lit barbecue lighter or long match next to the pilot light tube inside your furnace while turning the gas control knob to pilot. Then, press the reset switch button or lever and light the tube. After the tube lights, keep holding the switch for 1 minute. Repeat this process 1 to 2 more times if the pilot doesn’t stay lit. Otherwise, call a heating technician for assistance. For more help, including how to light a pilot light in a stove or oven, scroll down!


-Step-6.webp)


