This article was co-authored by wikiHow Staff. Our trained team of editors and researchers validate articles for accuracy and comprehensiveness. wikiHow's Content Management Team carefully monitors the work from our editorial staff to ensure that each article is backed by trusted research and meets our high quality standards.
The wikiHow Video Team also followed the article's instructions and verified that they work.
This article has been viewed 104,141 times.
Learn more...
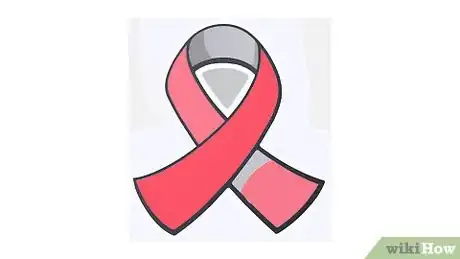
Awareness ribbons are a simple way to show support for something and are often worn on days dedicated to specific causes. Wearing an awareness ribbon can help serve as a conversation piece as well. You have the opportunity to educate about what the symbol stands for, as well as demonstrate empathy for and solidarity with a particular cause.
Steps
Choosing Your Cause and Ribbon Materials
-
1Find a cause you care about. The most important step is finding and understanding your cause and knowing what ribbon matches it.[1] Of course, if you are reading this article you probably already know what you are wearing a ribbon for. It is always good to understand the cause you represent deeply, as you may be asked about it.
- Often, ribbons are worn in honor of someone you know. For instance, a relative that passed from a type of cancer.
- Ribbons are also worn to demonstrate solidarity with a particular group, for instance Black Lives Matter or the LGBT community.
- Check your sources carefully. Some organizations, such as Susan G. Komen for the Cure and Autism Speaks, are strongly disliked by the people they claim to be helping. Be careful about what type of group you are supporting.
-
2Choose your ribbon design. Single-color ribbons are simple enough, but ribbons with multiple colors or different designs can be more complicated. Often, a particular cause may have a specific "official" design, but you don't necessarily need to be bound by that.
- You can customize a ribbon by writing the name of a person who is meaningful to you on the ribbon's tail, or trimming in their favorite color.
- The "Eye" of the ribbon is also an area that people like to customize with designs or symbols.
- If you want to follow a particular design exactly, you'll want to seek out the website representing the cause and find their exact specifications.
Advertisement -
3Choose premade ribbon or fabric for most smaller jobs. For smaller ribbons, especially those that will be worn, you'll want to use ribbon or fabric as your material. These materials are generally soft, wearable, and tolerate stress and weather reasonably well.
-
4Choose paper or card stock for most larger jobs. If you are making a larger ribbon to be displayed on a door or in a window, you may want to consider paper or card stock. Since the ribbon won't be worn and won't be moving much, paper and card stock are both cheaper and easier to make large ribbons out of.
- Paper or card stock reasons are also easy to add additional colors to - just use a marker or paint.
Constructing Your Cloth or Fabric Ribbon
-
Video Player is loading.
This is a modal window.
The media could not be loaded, either because the server or network failed or because the format is not supported.1Size your ribbon. You'll need to decide how large you want your ribbon to be. Most simple awareness ribbons that people wear are 1/4" thick.[2] Depending on your method and material, this make take some trial and error.- When using ribbon or fabric and folding it into your shape, you'll want to cut a band between 2.5x and 3x the total length of the completed ribbon.
-
Video Player is loading.
This is a modal window.
The media could not be loaded, either because the server or network failed or because the format is not supported.2Cut your ribbon.[3] In most cases you will be using scissors, but you can also use various types of precise craft knives. You may want to make sure you cut your desired lines by using a straightedge or ruler and tracing along your cut.- Try to make sure that the angles of your cut match each other on each end of the ribbon.
-
Video Player is loading.
This is a modal window.
The media could not be loaded, either because the server or network failed or because the format is not supported.3Fold your ribbon. You'll need to fold your ribbon. Fold one half over the other half and leave an "eye" in the middle to form the classic ribbon shape. When complete it will look like a "Figure 8" with one end open. -
Video Player is loading.
This is a modal window.
The media could not be loaded, either because the server or network failed or because the format is not supported.4Decorate your ribbon. You can personalize your ribbon or follow more complicated designs by adding other types of fabric, tassels, sequins, and a number of other decorations.[6] You can also use markers or paint, especially on paper and card stock ribbons.
Constructing Your Paper Ribbon
-
Video Player is loading.
This is a modal window.
The media could not be loaded, either because the server or network failed or because the format is not supported.1Size your ribbon. You'll need to decide how large you want your ribbon to be. Most simple awareness ribbons that people wear are 1/4" thick.[7] Usually you will want ribbons that are placed on doors or windows to be larger though. Depending on your method and material, sizing make take some trial and error.- When making a paper or card stock ribbon size it by simply tracing the ribbon shape onto your material. You will cut this out later.
-
Video Player is loading.
This is a modal window.
The media could not be loaded, either because the server or network failed or because the format is not supported.2Cut your ribbon.[8] In most cases you will be using scissors, but you can also use various types of precise craft knives. You may want to make sure you cut your desired lines by using a straightedge or ruler and tracing along your cut.- When cutting the pre-traced ribbon shape out of your material, be especially careful along edges with corners.
- When complete, it should look like a "Figure 8" with one end open.
-
Video Player is loading.
This is a modal window.
The media could not be loaded, either because the server or network failed or because the format is not supported.3Decorate your ribbon. You can personalize your ribbon or follow more complicated designs by adding other types of fabric, tassels, sequins, and a number of other decorations.[9] You can also use markers or paint, especially on paper and card stock ribbons.- You can write a name on the tail of a ribbon, decorate it with a trim of a favorite color, or even add a symbol or design to the eye of the ribbon.
Mounting and Displaying Your Ribbon
-
Video Player is loading.
This is a modal window.
The media could not be loaded, either because the server or network failed or because the format is not supported.1Use a pin to mount ribbon or cloth ribbons on shirts and clothes. Good types of pins to use include safety pins, clothespins and the pins used to for flowers and boutonnieres. Run the pin through the center of the ribbon and the item of clothing it will be attached to as you would if you were pinning a boutonniere.- Be careful not to prick yourself or anyone else with the pin!
-
Video Player is loading.
This is a modal window.
The media could not be loaded, either because the server or network failed or because the format is not supported.2Use glue or tape to mount paper or card stock ribbons. Double sided tape is very useful for this, but you can also fold single layered tape into a loop around itself to have it serve as double sided tape.- Don't use glue to mount a pin to a non-disposable background.
-
3Display your ribbon. Now that you have made your ribbon you can display it with pride. Draw attention to the cause you are representing and get ready to tell everyone else about it!
Things You'll Need
- Paper
- Marker(s)
- Scissors
- Ribbon
- Pins
References
- ↑ http://www.disabled-world.com/disability/awareness/ribbons.php
- ↑ https://www.youtube.com/watch?v=SROWOxy7mvE
- ↑ https://www.youtube.com/watch?v=SROWOxy7mvE
- ↑ https://www.youtube.com/watch?v=SROWOxy7mvE
- ↑ https://www.youtube.com/watch?v=ZsG_IGxl0vM
- ↑ https://www.youtube.com/watch?v=ZsG_IGxl0vM
- ↑ https://www.youtube.com/watch?v=SROWOxy7mvE
- ↑ https://www.youtube.com/watch?v=SROWOxy7mvE
- ↑ https://www.youtube.com/watch?v=ZsG_IGxl0vM


