X
wikiHow is a “wiki,” similar to Wikipedia, which means that many of our articles are co-written by multiple authors. To create this article, 12 people, some anonymous, worked to edit and improve it over time.
This article has been viewed 77,732 times.
Learn more...
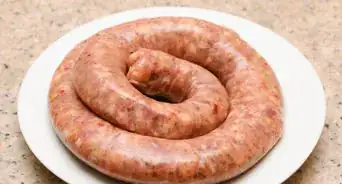
Capicola, also referred to as "capocollo" or "coppa," is a type of Italian cold cut made from dry-cured pork. It can be used as a deli meat on sandwiches or tossed into pasta and antipasto dishes. Depending on where you live, you might have difficulty finding professionally made capicola. With enough time, patience, and attention to detail, however, you can make your own capicola at home.
Ingredients
Makes 5 lbs (2270 g) meat
- 5 lb (2270 g) pork shoulder or pork butt
Curing Mixture
- 5 Tbsp (110 g) salt
- 5 Tbsp (65 g) cane sugar
- 1-1/2 Tbsp (10 g) pepper, black
- 1 tsp (6 g) cure #2
- 2 tsp (5 g) garlic powder
- 10 juniper berries
- 1/2 tsp (0.8 g) mace
Flavoring Blend
- 8 Tbsp (125 ml) powdered glucose
- 4 Tbsp (60 ml) corn syrup solids
- 1 Tbsp (15 ml) separate spice mix (crushed black pepper; half cayenne pepper and half paprika; half black pepper and half ground fennel seeds; or half paprika and half black pepper)
Steps
Method 1
Method 1 of 4:
Part One: Preparing the Pork
-
1Trim the pork. Use a heavy serrated knife to trim away the outer fat, revealing the muscle bundle beneath. Remove any excess fat from the surface, and shave away meat from the muscle bundle to round it off.
- Note that if you use a pork shoulder cut of meat, the muscle bundle you are trying to obtain is the portion that would like just to the side of the shoulder blade.
- If using pork butt, opt for Berkshire rather than Heritage since the latter has more fat and less muscle fiber content. If you cannot find Berkshire, however, commodity pork will also work.
- You can save the trimmings to make sausage, if desired, or you could discard them.
-
2Chill the meat. Wrap the pork in wax paper and place it in a cool sanitary area, like a meat locker or refrigerator. Allow it to reach an internal temperature of 36 degrees Fahrenheit (2 degrees Celsius).
- Note that you should check the temperature of the meat using a meat thermometer. Avoid guessing; for health reasons, you should make sure that the meat completely cools to this temperature.
Advertisement -
3Grind the dry ingredients into a blend. Place the salt, sugar, pepper, cure #2, garlic powder, juniper berries, and mace in a spice mill. Grind them down until thoroughly pulverized into a powder.
- Note that cure #2 is the same thing as Prague powder #2. It contains 6.25 percent sodium nitrite, 1 percent sodium nitrate, and 92.75 percent salt. In general, cure #2 breaks down at a slower pace, which makes it safer to use for meats that have a prolonged curing time, like capicola.[1]
- Overall, this powdered cure blend you create must contain a minimum of 4.5 percent salt based on the weight of the meat before you cure it. This is the only way that the Trichinella sp. bacteria will be destroyed.
-
4Thoroughly rub the pork with the cure blend. Divide your spice-cure mixture in half. Thoroughly rub one half of this mixture over all sides of the pork.
- Save the rest of the spice-cure mixture in an airtight container until ready to use.


Advertisement
Method 2
Method 2 of 4:
Part Two: Curing the Pork
-
1Chill the pork for 9 days. Place the meat in a single layer inside a non-reactive container. Place this container in a sanitized cooler or refrigerator set to a temperature of 36 to 38 degrees Fahrenheit (2 to 3 degrees Celsius). Let it remain there for 9 days.
- If curing more than one capicola, lay the cuts of meat in a single layer. Do not stack them.
- Use a plastic or glass container. Do not use a container made from reactive material, like metal.
- Cover the meat with plastic wrap as it chills to prevent air from getting in and to prevent it from drying out.
-
2Rub the pork with the remaining cure blend. Remove the plastic wrap after the original 9-day period passes. Rub all the sides of the meat with the remaining spice-cure mixture, then turn the meat in the cure lying at the bottom of the container to re-coat.
-
3Chill for another 9 days. Place the meat back in the container and stick the container back into your refrigerator or cooler, still set to a temperature between 36 and 38 degrees Fahrenheit (2 to 3 degrees Celsius).
- Keep the pork covered with plastic wrap during this time.
-
4Rinse off the remaining cure mixture. After the meat has chilled for a full 18 days, remove it from the cooler and rinse off any spice-cure mixture still on it using cool running water.
- Pat the meat dry with clean paper towels before proceeding.
-
5Air-dry the meat. Place the cut of pork on a sanitized rack in a cool, dry place. Allow the capicola to dry there for 3 hours.


Advertisement
Method 3
Method 3 of 4:
Part Three: Forming the Capicola
-
1Prepare the casings.[2] Go to a specialty butcher shop and purchase large pork casings. Turn the casings inside-out and soak them in a solution made from water and citrus for 2 hours.
- The water-citrus solution can be made by squeezing the juice of two oranges and two lemons into 1 L (1 qt) of cold water. Let the juiced peels sit in the water, as well.
- Soaking the casings in this manner removes any odor and also strips away any cholesterol in the casings.
- Let the casings air dry for another 1 hour after you soak them.
-
2Mix the flavoring blend. The flavoring blend can be prepared to your liking, but it should contain eight parts powdered glucose, four parts corn syrup solids, and one part spice mix. Mix these ingredients together in a small bowl until evenly distributed.
- For spice mix options, try:
- Crushed black pepper
- Half cayenne pepper and half fancy paprika
- Half black pepper, finely ground, and half ground fennel seeds
- Half ground black pepper and half fancy paprika
- For spice mix options, try:
-
3Flavor the meat. Rub your flavoring blend over all sides of the pork. Let sit for 10 minutes at room temperature, allowing the flavors to seep into the meat.
-
4Stuff the meat into casings. Working carefully, stretch the prepared casings over the meat, covering the meat with these casings completely.
- Note that if you did not use prepared pork casings, you could use beef bungs or collagen casing.
- If you notice any air pockets after you stuff the casings, use a clean pin to prick these pockets and deflate them.
-
5Dry for additional time. Place the pork in a dry location with an ambient temperature of 70 to 80 degrees Fahrenheit (21 to 26 degrees Celsius). Let it remain there for 12 hours if using beef bung or pork casings, or 6 hours if using collagen casings.
- If you plan on smoking the meat, you can skip over these additional air drying steps and jump directly to the smoking section. Capicola does not need to be smoked, however, and can be used after thoroughly air drying it post-casing.
-
6Dry at a lower temperature for 17 more days. Transfer the capicola to an area with an air temperature of 60 degrees Fahrenheit (15 degrees Celsius). Hold it there for 17 more days.
- Note that the relative humidity of this last area should be between 70 and 80 percent.


Advertisement
Method 4
Method 4 of 4:
Part Four: Smoking the Capicola
-
1Preheat a smokehouse to 90 degrees Fahrenheit (32 degrees Celsius). A traditional smokehouse works best, but if you do not have access to one, you could use a grill. Charcoal grills work better for smoking meat than gas grills do.
- In particular, consider using a kettle-style grill or a ceramic Japanese-style grill that looks like an outdoor oven. Other great options include a water smoker or large pit smoker with a chimney and separate fire box.[3]
-
2Smoke the meat for 10 hours.[4] Place the capicola inside the smoker and completely open the dampers or vents. Monitor the temperature, keeping it at 90 degrees Fahrenheit (32 degrees Celsius) for the full 10 hours.
- Leaving the dampers open at the beginning can help dry out the casings. You can, however, close the dampers until they are only a quarter of the way open once the casings feel dry. Doing so will apply a light amount of smoke to the meat.
-
3Smoke the meat for an additional 15 to 20 hours. After the 10 hours pass, close the dampers so that they are only one quarter of the way open, if you have not done so already. Smoke the capicola for another 15 to 20 hours at 90 degrees Fahrenheit (32 degrees Celsius).
-
4Remove the pork and dip it into boiling water. Ready a large pot of boiling water immediately before the capicola is ready to come out of the smoker. As soon as you remove the meat, dip it into the hot water for a few moments.
- This process causes the casings to shrink and cling to the meat.
-
5Dry for 20 days before using. Transfer the capicola to a dry room with a relative humidity between 65 and 75 percent and a temperature between 70 and 75 degrees Fahrenheit (21 and 24 degrees Celsius). Keep it there for at least 20 days.
- Once the capicola has finished drying, the process is complete. As long as proper procedures were followed, this deli meat should be ready to shave into slices and enjoy.


Advertisement
Things You'll Need
- Serrated knife
- Cooler or refrigerator
- Meat thermometer
- Room thermometer
- Spice mill
- Airtight container (for spice-cure blend)
- Non-reactive container (for capicola)
- Plastic wrap
- Drying rack
- Casings: pork, beef bung, or collagen
- Water-citrus solution
- Medium to large bowl (for soaking casings)
- Small bowl (for flavoring blend)
- Smoker: smokehouse, kettle grill, Japanese-style grill, water smoker, or large pit smoker
- Large pot of boiling water


References
About This Article
Advertisement