This article was co-authored by Michael Van den Abbeel. Michael Van den Abbeel is a Professional Hair Stylist and the Owner of Mosaic Hair Studio and Blowout Bar in Orlando, Florida. He has been cutting, styling, and coloring hair for over 17 years. Michael loves showing his clients how to wash and wear their hair easily and effortlessly. Mosaic Hair Studio and Blowout Bar is recognized as a Diamond Top Tier level Wella salon.
There are 7 references cited in this article, which can be found at the bottom of the page.
This article has been viewed 265,360 times.
If you want curls but don’t have a curling iron, don’t head out to the store just yet. It may sound counter-intuitive, but a straight iron can give you curls almost as easily as a curling iron can. With a few simple tricks, you can have bouncy ringlets or beachy waves in no time.
Steps
Wrapping Your Hair Around the Iron
-
1Select a skinny flat iron. You need one no wider than one or two inches. A paddle iron will be too wide.
-
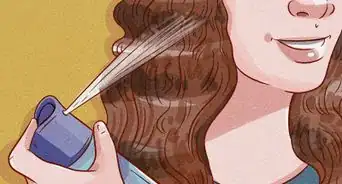
2Prepare your hair for exposure to heat. Lightly spray your hair from about 6 inches (150 mm) away with a heat protectant. Comb it through thoroughly.
- When you use a heat protectant, the hair should be lightly misted but not damp. A gentle spray will be enough.
Advertisement -
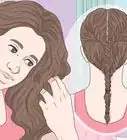
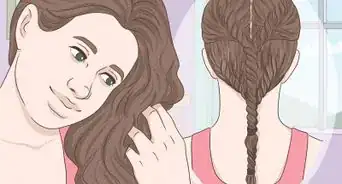
3Separate your hair into sections. Start with one side of your head. Gather up the top layers of your hair, leaving just the bottom layer, and pin them back with a butterfly clip. Comb out a one- or two-inch section (the smaller the section, the tighter your curls will be and the more curls you will produce).[1]
-
4Clamp the section of hair you separated into the iron. Start about an inch or two from the roots.[2] At this point, you will basically just rotate the iron, and move it down the length of your hair. The direction you rotate it and the speed you move it will depend on the kind of curl you want.[3]
- For tight curls, hold the iron vertically, and move down your hair slowly (not so slow that you burn your hair, of course). Depending on the length of hair, spend about 20 to 30 seconds slowly moving down the strand.
- For loose curls, hold the iron horizontally, and move down your hair more quickly.
- For curls that turn away from your face, twist the iron up, toward the top of your head.
- For curls that turn toward your face, twist the iron down, toward the ground.
-
5Unclamp the iron when you get to the end of your hair. Use your finger to twirl your hair in the same direction as the curl. This will help set it in that shape.[4]
-
6Continue on to the rest of your hair. Work from the bottom to the top, and then do the other side of your head the same way. Mist it with hairspray to set it.

Creating Waves by Angling the Iron
-
1Select a skinny flat iron. You need one no wider than one or two inches. A paddle iron will be too wide.
-
2Prepare your hair for exposure to heat. Spray your hair with a heat protectant about 6 inches (150 mm) away from your head. Comb it through thoroughly.
-
3Separate your hair into sections. Start with one side of your head. Gather up the top layers of your hair, leaving just the bottom layer, and pin them back with a butterfly clip. Comb out a one- or two-inch section.[5]
-
4Clamp the section of your hair you separated into the iron. Start about an inch or two from the roots. Rotate your wrist toward your head, angling the iron down.[6] Slide it an inch or two down at this angle, and rotate your wrist in the other direction, so the iron is angled up. Slide it an inch or two down at this angle, and rotate your wrist again. Repeat until you reach the end of your hair.[7]
-
5Keep going. Continue through the rest of your hair, until it is all nice and wavy. Mist it with hairspray to help it keep its shape.


Using Aluminum Foil
-
1Prepare your hair for exposure to heat. Lightly mist your hair with a heat protectant from about 6 inches (150 mm) away. Comb it through thoroughly.
-
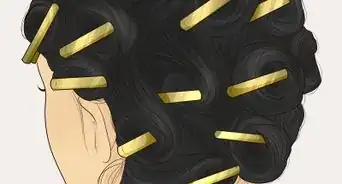
2Make a loop with a section of your hair. Wrap a one or two inch section of hair around your finger. Carefully slide it off your finger, being careful to maintain the loop.[8]
-
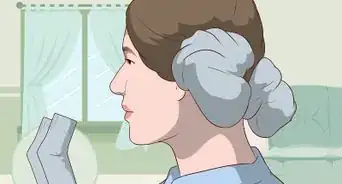
3Wrap a piece of aluminum foil around the loop of your hair. It should be tight enough to stay there on its own when you let go. Repeat until all your hair is wrapped in foil.[9]
-
4Clamp the iron over one of the foil-wrapped loops of hair. Hold it for two or three seconds and release.[10] Give the foil a few moments to cool down, then unwrap it.
-
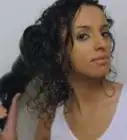
5See how your hair looks. If it has the amount of curl you’re looking for, simply repeat the exact same process with the rest of the foil on your head. If it’s not quite as curly as you’d hoped, loop and wrap it again, and try a couple seconds longer.[11]
- Proceed with caution. Aluminum foil cools relatively quickly, but it’s still easy to burn your hands or your scalp during this process.
- Err on the side of ironing for too little time at first, to avoid burning your hair.
Community Q&A
-
QuestionHow do I curl my hair with a curler?
 Community AnswerTake the iron and run it down your hair like a straightener. Once you get to the bottom, take your hair and wrap it around, going up rather than down. Hairspray it once you get it wrapped, and let go of the hair.
-Step-12-Version-4.webp)

References
- ↑ https://www.youtube.com/watch?v=A_KxtTVMOxQ
- ↑ https://www.youtube.com/watch?v=WaBTXr9It18
- ↑ http://www.bustle.com/articles/48335-how-to-curl-your-hair-with-a-flat-iron-so-you-dont-have-to-buy-all
- ↑ http://www.huffingtonpost.com/maria-senise/how-to-curl-your-hair-with-a-flat-iron_b_6679622.html
- ↑ https://www.youtube.com/watch?v=A_KxtTVMOxQ
- ↑ http://www.huffingtonpost.com/maria-senise/how-to-curl-your-hair-with-a-flat-iron_b_6679622.html
- ↑ https://www.youtube.com/watch?v=WaBTXr9It18
- ↑ https://www.youtube.com/watch?v=O4222-IYwAw
- ↑ http://fabfitbeauty.com/curl-hair-foil-flat-iron
About This Article

To make curls with a flat iron, start by pinning up the top layer of your hair and combing out a 1- or 2-inch section of the bottom layer. Next, clamp the flat iron on that section about 1-2 inches from your roots. Then, hold the iron horizontally and move it down your hair quickly if you want loose curls. Alternatively, for tight curls, hold the iron vertically and move it down your hair slowly. Finish curling the bottom sections of your hair, then unpin the top layer of your hair and repeat the curling process. For more tips from our Beauty co-author, like how to twist the iron to turn your curls in a specific direction, keep reading!