This article was co-authored by wikiHow Staff. Our trained team of editors and researchers validate articles for accuracy and comprehensiveness. wikiHow's Content Management Team carefully monitors the work from our editorial staff to ensure that each article is backed by trusted research and meets our high quality standards.
There are 11 references cited in this article, which can be found at the bottom of the page.
This article has been viewed 28,608 times.
Learn more...
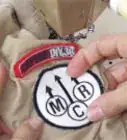
Epaulettes are decorative pads worn over the shoulders. They are often seen on top of military jackets and marching band uniforms. Whether it is for a costume, cosplay, uniform, or a fashion statement, epaulettes can add that final touch to your outfit. Store bought epaulettes may not always match your outfit, but luckily, it is easy to make custom ones.
Steps
Cutting the Pieces
-
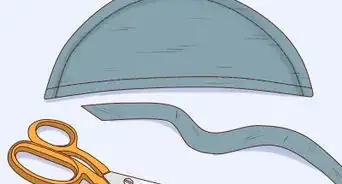
1Decide on the shape of your epaulette. Epaulettes cover the tops of your shoulders, but they come in many different shapes and sizes. Some look like semicircles, while others look like rectangles. Some look like skinny rectangles, with a rounded end that covers your shoulder caps.
- The edge that faces your neck will always be straight.
-
2Create a template on a sheet of paper based on your design. The epaulette needs to be wide enough to cover the top of your shoulder, from front to back. The length is up to you. It can span from the base of your neck all the way to your shoulder cap, or it can be just long enough to cover your shoulder cap.[1]
- After you cut the template out, fold it in half lengthwise, then cut off any excess paper that hangs over the edges. This will help make it symmetrical.
Advertisement -
3Use your template to trace and cut 2 shapes from thin cardboard. These will go inside your epaulette and make it nice and stiff. Trace around the template first, then cut the cardboard out with scissors or a craft blade.[2]
- If you don't have thin cardboard, you can use a thin sheet of template plastic instead. You can find this in the quilting section of a fabric store.
- Do not use your fabric scissors for this, or you will ruin them.
-
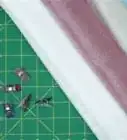
4Trace the epaulettes onto your desired fabric. Choose some nice fabric for the tops of your epaulettes, then flip it over so that you can see the back. Use your paper template or cardboard insert to trace the shape onto the fabric.[3]
- You need to do this twice to create 2 identical shapes.
- Choose a nice fabric for this, such as velvet, twill, or pleather.
- Avoid thick or overly decorated fabrics, such as wool felt, upholster, or home décor brocade.
-
5Cut the epaulettes out, adding a 1⁄2 in (1.3 cm) seam. If you need to, use a ruler to help you trace a 1⁄2 in (1.3 cm) seam allowance around the epaulettes first. Next, cut the epaulettes out with fabric scissors.
-
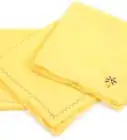
6Repeat the process for the bottom fabric pieces. Use the template or cardboard to trace the shapes onto the fabric that you want to use for the bottom of the epaulettes. Cut the shapes out, adding a 1⁄2 in (1.3 cm) seam allowance.[4]
- Since these pieces will be on the underside of the epaulettes, you can use a cheaper fabric for this, such as cotton.
- If you are using a different type of fabric for this side, make sure that the color matches the upper fabric.
-
7Cut some tassel trim to fit the outside edge of your epaulette. Measure around your cardboard epaulette, except for the straight edge that faces your neck. Cut 2 pieces of tassel trim according to this measurement.
- The color of the trim is up to you. If this is for a uniform, however, the trim should match the trim on your uniform.
- You can find tassel trims in both the regular trim section and the upholstery trim section of a fabric store.


Assembling the Pieces
-
1Pin the tassel trim to the front of 1 upper epaulette piece. Turn 1 of your upper epaulette pieces so that the front (right side) is facing you. Wrap the trim around the edge so that the tassels are pointing into the epaulette. The edge of the trim should be touching the edge of the epaulette. Secure both pieces with sewing pins.[5]
- Make sure that the trim is centered. If you need to, mark the center of both pieces with a pen.
- Do not extend the tassel trim onto the flat edge of the epaulette. Cut it if you have to.
- Some trims have a thicker edge. If this edge is greater than 1⁄2 inch (1.3 cm), you’ll have to adjust the trim so that you don’t sew through the edge.
-
2Sew the trim on using a 1⁄2 in (1.3 cm) seam allowance. Sew around the epaulette using a straight stitch and a 1⁄2 in (1.3 cm) seam allowance. Backstitch when you start and finish sewing.[6]
- Remove the pins as you sew so that you don’t bend them or break your needle.
- Use clear thread, or a color that matches your fabric.
-
3Pin the bottom piece to the front, covering the tassels. Flip the piece over so that you can see the right side and the tassels. Take 1 of your bottom pieces, and place it face-down on top so that the wrong side of the fabric is facing up. Make sure that the edges align, then secure them with sewing pins.
- Make sure that the tassels are sandwiched between the 2 layers of fabric.
-
4Sew around the epaulette, but don't sew across the straight edge. As with the upper fabric, use a straight stitch and a 1⁄2 in (1.3 cm) seam allowance. Remove the pins as you sew and remember to backstitch.[7]
- Do not sew across the straight edge that faces your neck. You need this gap for turning the epaulette right-side-out.
-
5Trim the seam allowances, then turn the epaulette right-side-out. Cut the seams off so that you get 1⁄8 to 1⁄4 in (0.32 to 0.64 cm) seam allowances. Sew around the raw edges with a zigzag stitch for extra durability. Next, turn the epaulette right-side-out through the gap along the straight edge.[8]
-
6Slide the cardboard into the epaulette, then sew the end shut. Take 1 of your cardboard shapes and slide it into the epaulette. Fold the raw edges of the straight edge into the epaulette, then sew it shut by hand using a ladder stitch.[9]
- Alternatively, fold the raw edge under the epaulette, then sew across it with a straight stitch.
-
7Repeat the process for the second epaulette. Pin and sew the tassel trim to the right side of the upper piece. Pin the bottom piece right-side-down on top of the epaulette, then sew it down as well. Turn the epaulette right-side-out, then fold the raw edges in and sew them down.


Decorating the Epaulette
-
1Choose a flat, braided trim to go around the top edge of your epaulette. Epaulettes have a fancy trim along the top edge. It often looks like a woven or braided ribbon, about 1⁄4 to 1⁄2 inch (0.64 to 1.27 cm) wide. They come in all sorts of colors, but you should choose one that matches the tassel trim.
- Do not use a round rope. Choose a flat, braided trim. Another option is to use a sequin trim.
- You can find these in the regular and upholstery trim sections of a fabric store.
-
2Measure the top, inside edge of your epaulette, then add 1 inch (2.5 cm). Make sure that you are only measuring the edge that has the tassel trim attached; do not measure along the straight edge. Add 1 inch (2.5 cm) to your measurement so that you can fold it under the epaulette in the end.
-
3Cut your trim according to your measurements. Some braided trims will start to unravel as soon as you cut them. You can stop this from happening by sewing across the cut ends, sealing them with a drop of glue, or wrapping clear tape around them.
- If you wrap clear tape, make sure that the braided trim stays flat. Don't wrap the tape so tightly that it curls up into a rope.
-
4Pin the trim to the top of the epaulette, making sure it's centered. The cording needs to go on top of the upper fabric. It can sit right next to the tassels and touch them, or you can leave a small gap between the cording and the tassels.
- You will have some extra trim hanging off of the ends of your epaulette. Make sure that you have an equal amount of trim on each side.
- Find the center of the braided trim before you start pinning it. This will ensure that you have an equal amount of excess trim hanging off of the end of the epaulette.
-
5Fold the ends of the trim down by 1⁄2 inch (1.3 cm). Flip the epaulette over so that you can see the back. Fold the ends of the trim down until they are snug against the edge of the epaulette, about 1⁄2 inch (1.3 cm), then secure them with pins.[10]
- This will create a neater finish in the end.
-
6Sew the trim down with a straight stitch. Use clear thread, or match the top thread color to the trim, and the bottom (bobbin) color to the bottom fabric. Sew right down the middle of the trim, taking the pins out as you sew. Be sure to backstitch so that the stitching doesn't come undone.
- Alternatively, use a clear fabric glue to attach the trim.
-
7Repeat the process with the other epaulette. Wrap and pin the trim around the top edge of the epaulette. Fold the ends over onto the back, then sew the trim down. Remove the pins as you sew and don't forget to backstitch.


Things You'll Need
- Paper
- Pen
- Thin cardboard
- Fancy fabric
- Plain fabric
- Tassel trim
- Braided trim
- Thread
- Needle
- Sewing machine
- Sewing pins
- Scissors
References
- ↑ https://www.youtube.com/watch?v=41f9pdlAN2o&feature=youtu.be&t=2m2s
- ↑ https://www.youtube.com/watch?v=41f9pdlAN2o&feature=youtu.be&t=2m25s
- ↑ https://www.youtube.com/watch?v=41f9pdlAN2o&feature=youtu.be&t=2m34s
- ↑ https://www.youtube.com/watch?v=41f9pdlAN2o&feature=youtu.be&t=3m3s
- ↑ https://www.youtube.com/watch?v=41f9pdlAN2o&feature=youtu.be&t=3m21s
- ↑ https://www.youtube.com/watch?v=41f9pdlAN2o&feature=youtu.be&t=4m19s
- ↑ https://www.youtube.com/watch?v=41f9pdlAN2o&feature=youtu.be&t=5m8s
- ↑ https://www.youtube.com/watch?v=41f9pdlAN2o&feature=youtu.be&t=5m30s
- ↑ https://www.youtube.com/watch?v=41f9pdlAN2o&feature=youtu.be&t=6m7s
About This Article