This article was co-authored by wikiHow staff writer, Janice Tieperman. Janice is a professional and creative writer who has worked at wikiHow since 2019. With both a B.A. and M.A. in English from East Stroudsburg University, she has a passion for writing a wide variety of content for anyone and everyone. In her free time, you can find her working on a new crochet pattern, listening to true crime podcasts, or tackling a new creative writing project.
There are 12 references cited in this article, which can be found at the bottom of the page.
This article has been viewed 88,405 times.
Learn more...
Leg warmers aren’t just a staple accessory for an 80s costume party—they’re also a fun, stylish way to stay cozy once the weather gets a bit chillier. While you can pick up a pair of leg warmers online or at your local department store, you can have a lot of fun crafting your own pair at home. If you’re in a rush, you can turn an old pair of socks, a sweater, or some leggings into a quick and easy accessory. If you have a little more time to spare, try knitting your own leg warmers with some leftover yarn and a round loom!
Steps
Using Socks, Leggings, or Sweater Sleeves
-
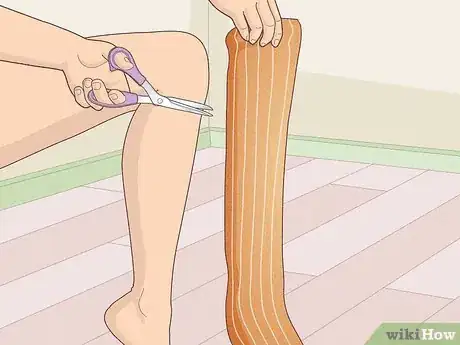
1Cut the fabric so it fits over your lower legs. Grab a tape measure and decide just how high/far you’d like your leg warmers to go, then jot down the corresponding measurement. Then, drape the tape measure over your socks, keeping the end of the tape in line with the top of the fabric. Once you’ve settled on an exact measurement, cut along this point with fabric scissors.[1]
-
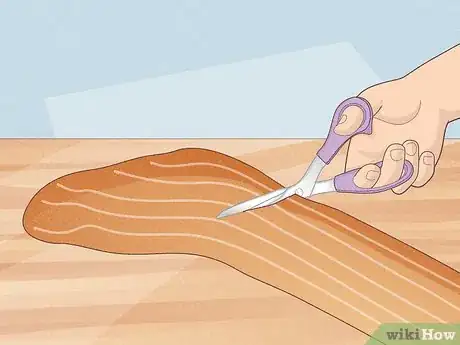
2Snip away the heel and toe sections if you're using socks. You don’t need to do any exact measurements for this—just eyeball the heel portion of the sock and cut it out with the fabric scissors. Do the same with the toe section—about 1 in (2.5 cm) is a good amount to cut off.[4]
- You’ll only need the “foot” section of your socks now, aside from the main leg section. Any other fabric scraps can be tossed out or used for another project.
Advertisement -
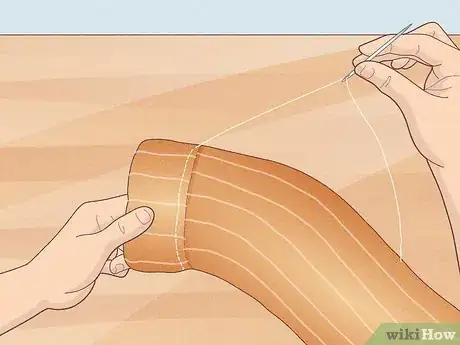
3Turn the leftover fabric into a cuff. Tuck and fold the “foot” or extra section of fabric in half to create a “cuff” shape, which will go along the bottom of your leg warmer. Slide the cuff over the bottom, cut edge of your makeshift leg warmer. Using a needle and thread or sewing machine, sew the cuff in place. Once you’ve finished sewing on the cuff, you can make your second leg warmer![5]
- You can also use a “serger” machine for a more seamless stitching job.
- If you’re working with a sweater sleeve, you can simply fold and hem the cut edge of the sweater to make it smooth.[6]
- If you’re using leggings, slide a circular elastic band directly beneath the top cut edge of your leggings. Fold the fabric over the elastic and stitch it into place, so your leg warmer stays up around your knee or thigh.[7]
-
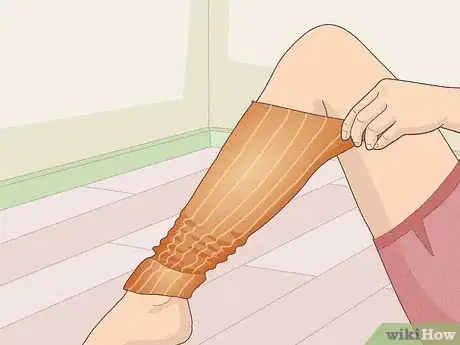
4Slip into your leg warmers and enjoy. Slide the leg warmers over your calves and adjust the fabric until they're comfy. Scrunch up the fabric for a slouchy look or stretch it out to cover more of your leg[8]
Knitting Leg Warmers
-
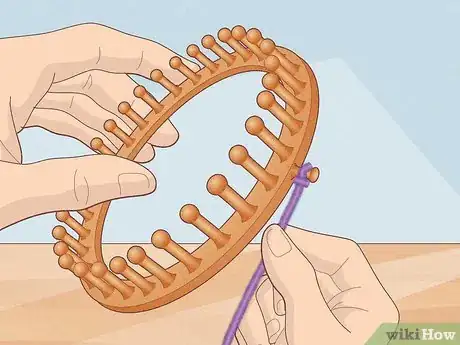
1Create a slip knot and place it on the loom’s anchor peg. Form a slip knot with the end a yarn skein. Look along the side of your loom to find a peg sticking out, otherwise known as the anchor peg. Loop the slip knot over the anchor peg, tightening the knot so it stays attached to the loom.[9]
- The anchor peg will help you form the base rows of your leg warmers, and will really help you get started.
- Once you’ve stitched a few rows on your loom, you can remove this knot from the anchor peg.
- A 31-peg loom works well for leg warmers.[10] Any kind of yarn will work for this project, but chunky yarn will make your leg warmers extra cozy.[11]
-
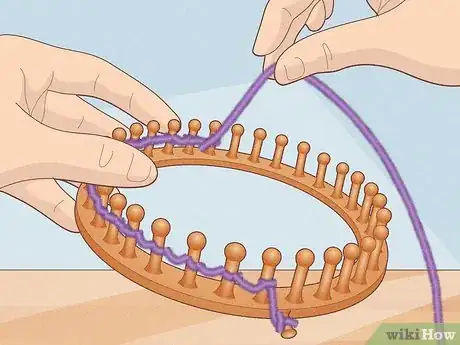
2Circle the yarn around all the pegs until you reach the anchor peg again. Unwind some yarn from your skein, so you can work with your loom more easily. Loop the yarn clockwise around the vertical peg that’s directly behind the anchor peg. Continue looping the yarn clockwise around each individual peg, ending with the original peg.[12]
- This will provide the base to your leg warmer.
- This part of the process can be a little confusing, especially if you’ve never worked with a round loom before. It’s okay if you need to stop and restart again!
-
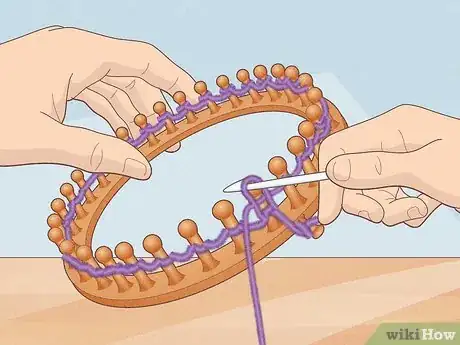
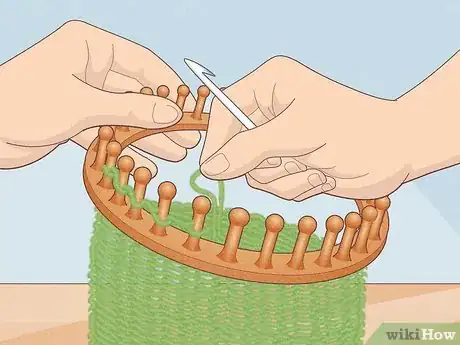
3Knit your base row of stitches with yarn and loom hook. Working 1 stitch at a time, extend your yarn along the front of each peg. Stick your loom hook beneath the bottom yarn loop, dragging it up and over the top section of yarn along the front of the peg. Repeat this process with the other loops of yarn on your loom, which creates your first “row” of stitches.[13]
- When you work with a round loom, you’re using knitted stitches to create your leg warmers.
-
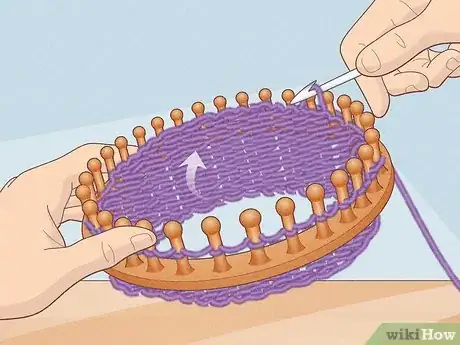
4Form a cuff along the bottom of your leg warmer after you’ve stitched 10 rows. Continue working your way around the loom, moving the loop up and over the new yarn to create new stitches. Once you’ve gone around the loom 10 times, lift up the very bottom row of stitches, which will be sticking out through the bottom of the loom. Drape these loops over the loom, using your loom hook to “knit” a new row. This will create a cuff along the bottom of your leg warmer.[14]
- This process can be a bit confusing at first. Focus on lining up the bottom row of loops with the corresponding pegs on the loom. It’s okay if you don’t get it right on the first try!
- You only need to make a cuff for 1 end of your leg warmers.
-
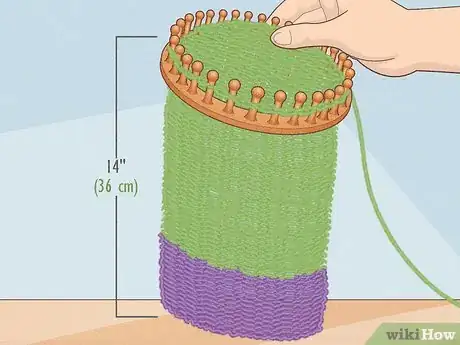
5Continue “knitting” until your leg warmers are 14 in (36 cm) long. Repeat this knitting process, using your yarn skein and looming hook to build and “grow” your leg warmer. Grab a tape measure, so you can see how long your leg warmers are currently. Generally, 14 in (36 cm) is a good length for your leg warmer. However, you can make it longer or shorter as you see fit.[15]
- It may help to measure your own legs, so you have an idea of how long you’d like your leg warmer to be.
-
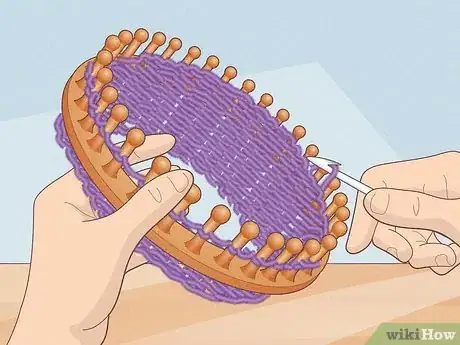
6Finish the leg warmers by “casting off” the stitches. Lift up 1 loop from your loom with your hook and shift it to the next peg over. Drag the bottom loop up and over the new peg, which will successfully cast off the stitch. Repeat the process of transferring and “stitching” the remaining loops. When there’s 1 loop left, cut off the yarn and slide the loose yarn end through the stitch.[16]
- In knitting, getting rid of your last row of loops is known as casting off.[17]
-
7Create a second leg warmer following the same pattern. Now that you’re a seasoned looming veteran, follow the same process you did to make your first leg warmer. After looming 10 rows, transfer the stitched yarn back onto the loom to create a “cuff.” Keep “knitting” around the loom until your second leg warmer is 14 in (36 cm) long, or the same length as the first leg warmer. Once you’ve cast off the stitches, you’ll be ready to wear your leg warmers![18]
Things You’ll Need
Using Socks, Leggings, or Sweater Sleeves
- 1 pair of long socks, leggings, or a sweater
- Fabric scissors
- Tape measure
- Needle and thread or sewing machine
- Elastic band (optional)
Knitting Your Own Leg Warmers
- 3 skeins of yarn
- 31-peg loom
- Loom hook
- Tape measure
References
- ↑ https://m.youtube.com/watch?v=Fjvlo8wi4ks&t=0m52s
- ↑ https://www.sparklesofsunshine.com/make-leg-warmers-from-sweater-sleeves/
- ↑ https://stylewithingrace.com/diy-leggings-into-leg-warmers/
- ↑ https://www.seamssewlo.com/2017/10/11/how-to-make-leg-warmers-from-socks/
- ↑ https://www.seamssewlo.com/2017/10/11/how-to-make-leg-warmers-from-socks/
- ↑ https://www.sparklesofsunshine.com/make-leg-warmers-from-sweater-sleeves/
- ↑ http://radcraftingcollective.com/tutorial-leggings-into-legwarmers/
- ↑ https://ofhousesandtrees.com/diy-leg-warmers/
- ↑ https://m.youtube.com/watch?v=AsqHBODQXM4&t=0m52s
- ↑ https://m.youtube.com/watch?v=cXlOXnd9LM0&t=0m14s
- ↑ https://www.joann.com/on/demandware.static/Sites-JoAnn-Site/Sites-joann-project-catalog/-/images/hi-res/project/pdf/P499969_leg_warmers.pdf
- ↑ https://m.youtube.com/watch?v=AsqHBODQXM4&t=1m15s
- ↑ https://m.youtube.com/watch?v=AsqHBODQXM4&t=2m10s
- ↑ https://www.joann.com/on/demandware.static/Sites-JoAnn-Site/Sites-joann-project-catalog/-/images/hi-res/project/pdf/P499969_leg_warmers.pdf
- ↑ https://www.joann.com/on/demandware.static/Sites-JoAnn-Site/Sites-joann-project-catalog/-/images/hi-res/project/pdf/P499969_leg_warmers.pdf
- ↑ https://www.joann.com/on/demandware.static/Sites-JoAnn-Site/Sites-joann-project-catalog/-/images/hi-res/project/pdf/P499969_leg_warmers.pdf
- ↑ https://sheepandstitch.com/library/how-to-cast-off-knitting/
- ↑ https://www.joann.com/on/demandware.static/Sites-JoAnn-Site/Sites-joann-project-catalog/-/images/hi-res/project/pdf/P499969_leg_warmers.pdf
