This article was co-authored by Jessica Banh and by wikiHow staff writer, Megaera Lorenz, PhD. Jessica Banh is a Pastry Chef and the Owner of Fancy Flavors in San Jose, California. With over 12 years of technical experience, Jessica has expertise in a wide variety of pastry techniques and has a focus on macarons. Her work has been featured in The SF Chronicle, The Mercury News, and Good Morning America. She received her training from The Professional Culinary Institute.
This article has been viewed 206,447 times.
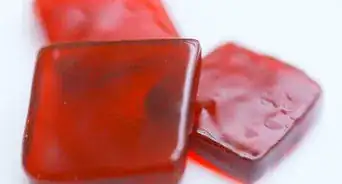
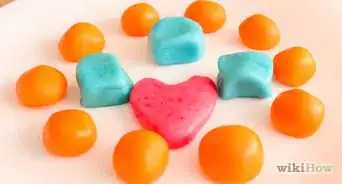
On its own, fondant generally has a matte appearance. There are several techniques you can use to make fondant decorations and fondant-covered cakes shiny, though. The degree of gloss varies depending on the technique, so the best one to use may depend on the project itself.
Steps
Steaming
-
1Load the steamer with water.[1] Fill the basin of a handheld steamer with distilled water. Turn on the steamer and allow the water to heat up.[2]
- You can use a clothing steamer for this technique as long as no detergents or other chemicals were ever poured into the basin.
- Every steamer works differently, so it's best to consult the manufacturer's instructions prior to use. Typically, however, you should use a plain hose attachment and low heat for the best results.
-
2Pass the steam over the fondant. Hold the steamer approximately 4 inches (10 cm) away from the fondant. Press the steam trigger to release the steam onto the piece.[3]
- Turn the fondant piece or move the steamer around as needed to evenly apply steam to all sides.
- Only allow the steam to hit the fondant for 3 to 5 seconds per spot. Using too much steam can cause the fondant to melt and may also cause water droplets to form on the surface.
- In addition to giving the fondant a soft glossy finish, steam can also remove traced of corn starch and powdered sugar previously left behind on the surface of the fondant.
Advertisement -
3Re-steam as needed. Within an hour, you'll likely notice the gloss fading as the water dries. Apply additional steam in the same manner to return the gloss.
- Steamed gloss will fade every time you apply it, so it's generally best to use this method only if you plan on presenting the fondant immediately.
- Note that any sugar or starch residue obscured by the steam will not return, however.


Corn Syrup Glaze
-
1Avoid using fats on the fondant. Fats can cause this glaze to separate. As a result, the surface will look "bubbled" and uneven instead of smooth and shiny.[4]
- Do not knead the fondant in shortening, oil, or other fats prior to applying this glaze. Do not use this method in conjunction with the shortening glaze technique, either.
- Additionally, you should avoid using silicone or vinyl sheets for rolling your fondant when you intend to use this glaze. Oils and fats can collect on these sheets from previous works, and the residue can be enough to cause separation of this glaze.
-
2Combine corn syrup and alcohol. Pour one part light corn syrup and one part clear drinking alcohol into a shallow cup. Stir well to combine.
- The alcohol should be 150 proof or higher. Vodka works well, but clear grain alcohols are also effective.
- The exact amount will vary depending on the amount of fondant you need to glaze, but using 1 tsp (5 ml) of each component will usually work well for small decorations.
-
3Brush the mixture over the fondant. Use a small, soft paintbrush to evenly apply the glaze of the surface of the fondant.
- The glaze should create an instant and permanent high gloss over the fondant.
- It's best to apply the glaze in thin layers. Thicker coats will create a shinier appearance, but they will also take longer to dry.
-
4Let it dry. Let the glaze dry completely before you handle the fondant further. This can take anywhere from 1 to 12 hours, depending on how thick the glaze is.
- Avoid brushing over the glazed area or touching it with your fingers once the glaze starts setting. You can easily leave marks in the glaze during this stage, and those marks will be permanent.
- You can apply additional coats once the glaze is completely dry, but re-application should not be necessary to maintain the initial sheen.


Alcohol
-
1Fill a spray bottle with vodka.[5] Fill a small, clean spray bottle with approximately 2 inches (5 cm) of vodka.
- If you don't have vodka, clear grain alcohols may also work. Avoid using tinted alcohols, though, since the color will bleed onto the fondant.
- Use a clean spray bottle that has never held hair products or other chemicals to avoid accidental contamination. Salon-quality spray bottles are better than cheap bottles since cheap bottles may spray unevenly. Note than an airbrush could also work.
-
2Mist the fondant. Hold the nozzle about 4 inches (10 cm) away from the surface of the fondant. Lightly and evenly spray the alcohol over the fondant.
- Only spray a light mist of alcohol onto the fondant. Using too much can cause puddles to form and may dry out the fondant to a damaging degree.
-
3Let it dry. Wait several hours for the alcohol to completely dry. After it dries, the fondant should have a soft glossy finish.
- The gloss should be semi-permanent. It may fade after several days, but you should avoid re-applying the alcohol since too much can quickly dry out the fondant.

Shortening
-
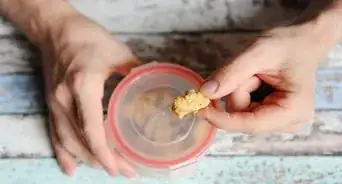
1Apply shortening to the fondant. Use your fingers to carefully rub a thin, smooth, and even layer of vegetable shortening over the surface of the fondant.[6]
- If you want to keep your fingers clean, you could try using vegetable cooking spray instead of solid shortening.[7] Hold the nozzle approximately 4 inches (10 cm) away from the fondant and lightly mist it over the surface at even intervals.
-
2Buff the fondant. After applying the fondant, use a dry paper towel to lightly buff the shortening into the fondant, working in small, circular strokes.
- Any irregularities, fingerprints, or stroke marks should fade as you buff the fondant. Press lightly, however, to avoid leaving any indentations.
- After you buff the piece, you should be left with a smooth, satin gloss.
-
3Re-apply as needed. The gloss should remain intact for a day or so, but you may notice some fading once the fondant begins to absorb the oil. You can apply another coating at this point in the same manner used for the first.
- Shortening does not dry completely, however, so some gloss will likely remain even after absorption occurs.
- Since fondant remains wet and sticky, it's easy to accidentally leave fingerprints and other marks while moving the cake. You can remove these marks before presenting the piece by lightly buffing them out with a dry paper towel.

Gum Arabic
-
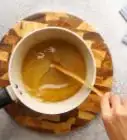
1Combine gum arabic and water. Add one part gum arabic and two parts distilled water to a small bowl. Stir vigorously to combine.
- The exact amount will vary depending on the amount of fondant you need to cover, but you should always maintain these proportions. For most small pieces, 1 Tbsp (15 ml) gum arabic and 2 Tbsp (30 ml) water should suffice.
-
2Let it sit. Allow the mixture to sit at room temperature for 15 minutes. Afterward, vigorously stir it again to combine the components.
- Resting and re-stirring the mixture in this manner should help the two ingredients combine more evenly, making the glaze more effective after application.
-
3Brush the mixture onto the fondant. Using a small, soft paintbrush, immediately paint an even layer of glaze over the fondant.
- Work carefully to avoid getting stroke marks, fingerprints, or other marks in the glaze.
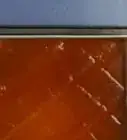
- Immediately after applying the glaze, the fondant should have a very high gloss. This will not be the way the final finish looks, however.
-
4Let it dry. Wait for the glaze to dry a full 24 hours before handling the fondant further. Once dry, the fondant should be slightly hard and semi-glossy.
- This glaze should be permanent, so re-application is not necessary.


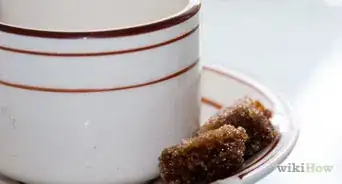
Egg Whites
-
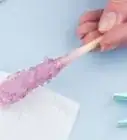
1Apply pasteurized egg white to the fondant. Pour 2 to 4 Tbsp (30 to 60 ml) of pasteurized egg whites into a small, clean dish. Using a small, soft paintbrush, lightly and evenly brush these egg whites onto the surface of the fondant.
- For safety reasons, you should use pre-separated, pasteurized egg whites from a carton.
- When working with small pieces, you can dip the fondant directly into the egg whites instead of brushing the egg whites over the piece. Tap off any excess before leaving the piece to dry.
- When you need to brush the fondant onto the piece, use a small brush and leave behind as few stroke marks as possible. Tap off any excess egg whites that pool in the crevices of the piece immediately after application.
-
2Let it dry. Let the egg whites dry for several hours. Once dry, the fondant should have a natural, medium-level shine.
- The egg whites must dry completely before you handle the piece. If you touch it while the whites are still drying, you may leave behind fingerprints that you won't be able to remove later.
- Note that the egg whites should dry to a semi-hard, permanent finish. Re-application should not be necessary.
-
3Add further coats as needed. If the fondant is not as shiny as you would prefer, you can apply additional coats following the same procedure.
- Allow each coat to finish drying before applying the next coat. Doing so minimizes the risk of imprinting the egg whites with fingerprints or brush marks.


Community Q&A
Did you know you can get answers researched by wikiHow Staff?
Unlock staff-researched answers by supporting wikiHow
-
QuestionCan I do the same thing with modeling chocolate?
 wikiHow Staff EditorThis answer was written by one of our trained team of researchers who validated it for accuracy and comprehensiveness.
Staff AnswerwikiHow Staff EditorStaff AnswerYou may be able to use the alcohol and corn syrup technique with modeling chocolate. You can also create shiny modeling chocolate by tempering it with a small amount of paraffin or canning wax, or bring out the shine by gently heating the chocolate with a hair dryer on low speed and medium heat. The heat will bring the oils in the chocolate to the surface to create a shine. Just take care not to melt it by leaving the heat in one place for too long!
Support wikiHow by unlocking this staff-researched answer.
-
QuestionEveryone claims they have used the vodka/corn syrup for a shine and it dries. Well mine did and then the next day it was sticky again. And going over with vodka again did nothing. Can I fix this?wikiHow Staff EditorThis answer was written by one of our trained team of researchers who validated it for accuracy and comprehensiveness.
Staff AnswerwikiHow Staff EditorStaff AnswerHumidity and temperature can affect how well these finishes work. Make sure to store your cake in a cool, dry area so that the glaze can dry completely.Support wikiHow by unlocking this staff-researched answer.
-
QuestionCan glossing techniques be used on dried fondant?
 Community AnswerExcept for steam and spraying vodka, all of the methods should only be used on dried fondant.
Things You'll Need
Steaming
- Handheld electric steamer
Corn Syrup Glaze
- Light corn syrup
- Clear drinking alcohol, 150 proof or higher
- Small bowl
- Small, soft paintbrush
Alcohol
- Spray bottle
- Vodka
Shortening
- Vegetable shortening or cooking spray
- Dry paper towels
Gum Arabic
- Gum arabic
- Distilled water
- Spoon
- Small bowl
- Small, soft paintbrush
Egg Whites
- Carton of pasteurized egg whites
- Small dish
- Small, soft paintbrush

References
- ↑ http://www.craftsy.com/blog/2013/08/how-to-make-fondant-shiny/
- ↑ Jessica Banh. Pastry Chef. Expert Interview. 6 April 2022.
- ↑ Jessica Banh. Pastry Chef. Expert Interview. 6 April 2022.
- ↑ http://www.howtocakethat.com/how-to-make-fondant-shiny.html
- ↑ http://domesticfits.com/2011/07/01/fondant-basics/
- ↑ Jessica Banh. Pastry Chef. Expert Interview. 6 April 2022.
- ↑ http://thesugarlane.com/2008/07/17/making-your-fondant-look-shiny/
About This Article

There are many ways to make fondant shiny, like using egg whites or a corn syrup glaze. To use egg whites, pour 2-4 tablespoons of pasteurized egg white into a small dish. Alternatively, mix equal parts light corn syrup and clear drinking alcohol, like vodka, in a cup or bowl. Whichever glaze you use, apply it lightly and evenly with a soft paintbrush. Leave the glaze to dry for 1-2 hours or until the fondant has a natural, medium-level shine. If you want the fondant to be shinier and you have time, apply additional coats. For more tips, including how to glaze your fondant with gum Arabic, read on!