wikiHow is a “wiki,” similar to Wikipedia, which means that many of our articles are co-written by multiple authors. To create this article, 69 people, some anonymous, worked to edit and improve it over time.
This article has been viewed 689,006 times.
Learn more...
Old fashioned hard candy is a treat known to many generations and it's still popular among many. Also known as boiled sweets or crunched sweets, old fashioned candy is suitable for being sucked rather than chewed. Hard candy has the benefit of being long-lasting while still retaining its taste, making it an ideal energy-boosting treat for those hiking, camping, spending time outdoors, etc. Moreover, a few hard candy treats can replace the desire to munch too many soft candies––a little will go a long way to tame a sweet tooth!
Best of all, it's surprisingly easy to make hard candy provided that you have the right ingredients and tools. Once you're familiar with the candy-making process, it will likely inspire you to make more batches. In this article, you'll learn how to make basic hard candy, fruit drops, lollipops and old-fashioned barley sugar. On top of these four options, you can also try caramels, an especially tasty hard candy.
Ingredients
Basic Recipe:
- 2 cups sugar
- 2/3 cup light corn syrup
- 3/4 cup hot water
- Food coloring
Fruit Drops:
- 450g/1 lb sugar
- 100g/4 oz powdered glucose
- 5ml/1 teaspoon cream of tartar
- A few drops of fruit extract (essence) or flavoring oil – try pear, strawberry, peach, apricot, orange, lemon, blackcurrant, mango, etc.
- Icing sugar (confectioners sugar), for dusting
Lollipops:
- 450g/1 lb sugar
- 15ml/1 tablespoon powdered glucose
- 3 or 4 flavorings and food colorings (orange oil, lemon oil, raspberry flavoring, peppermint oil, etc.)
- 150ml (1/4 pint) of water
Old Fashioned Barley Sugar:
- 250g, 9oz, 1 1/4 cups hulled barley
- 5 liters (1.3 US gal), 8 1/2 pints, 5 1/2 quarts water
- 1 kg, 2 1/4 lb, 4 cups sugar
Steps
Since candy making is precise, it's important as a beginner candy maker to understand a few basics before trying one of the following recipes.
-
1Before you make candy of any kind, read through the entire instructions for the individual recipe. You need to be thoroughly aware of what the recipe requires before starting because candy needs precise temperature control and precise actions at the times that the recipe states. Most importantly, remember that candy not attended to is candy that burns!
-
2Check the temperature before making candy. Candy should not be made when the weather is high in humidity or rainy or it has a hard time setting. Check the room temperature––it should be around 60ºF-68ºF (15.5ºC-20ºC), with low humidity.
- If you have no choice about cooking in sub-optimal temperature conditions, you may be able to compensate by cooking the candy 1 to 2 degrees higher than recommended by the recipe.
- Altitude will affect the outcome; if you live at high altitude, you may need to make adjustments in accordance with the usual recommendations for high altitude cooking.
Advertisement -
3If you don't already have one, purchase a candy thermometer of good quality. You need to be happy about working with great precision when making candy––it's a science as well as an art.
- For more details on selecting a candy thermometer, see How to choose a candy thermometer.
- Never touch the base of a saucepan with a candy thermometer. The pan must always be long enough that the thermometer does not reach the bottom when hung on the pan lip.
-
4Avoid changing the ingredient amounts in a recipe. They are precise because they work. Even doubling ingredients in a candy recipe can result in a failure.
-
5For the heat source, choose the burner that is wider than the cooking pan you're using. This ensures more even heating.
-
6Know how to test the hardness of candy. This can be done manually or using a thermometer. The thermometer is easiest, but it's handy to know how to test the temperature manually, which you can learn to do before using a recipe by reading How to test candy hardness stages.


Basic Recipe
-
1Gather the ingredients and items needed before starting. Have everything in place.
-
2In a large saucepan, combine the sugar, corn syrup and water. Stir over medium heat until the sugar has dissolved, about 5 minutes. Without stirring, let the mixture come to a boil which should be about another 5 minutes,
-
3Raise the temperature to high as it boils.
- Right before the liquid reaches exactly 300ºF/150ºC, add the food coloring and flavoring to the mixture. Doing so will allow the boiling action to stir the coloring and flavoring into the mixture.
-
4Watch the thermometer until the temperature is at exactly 300ºF/150ºC. (If you do not have a candy thermometer you can fill a glass with really cold water then take a drop of the candy liquid and if it solidifies in the shape of a ball and floats to the surface, then its ready for next step.) Remove the mixture immediately at 300ºF/150ºC, or it will burn!
- After you remove the sugar from heat, the temperature will continue rising but that is not a problem provided that you took it off the heat at 300ºF/150ºC.
-
5When it is still very hot, add a dab of flavoring oil and several drops of your choice of food coloring or Kool Aid. Mix quickly.
- Mix food coloring to make fun shades. Try adding the color after stirring in flavor and stir lightly for a swirled effect.
- Mix flavors or Kool Aid or pour over dried fruit for an added texture.
-
6Pour the molten sugar onto a greased cookie sheet. Allow it to cool. Spread the mixture around the sheet before it cools too much.
- It is not advised to put the mixture inside the freezer as it makes it harden too fast.
- Try pouring into candy molds or mini muffin pans instead for a consistent shape.
-
7After the sheet cools (30 minutes to an hour), break up the candy into several pieces.
-
8Dust with powdered sugar. For a variation, do not dust the pieces––simply leave them as they are and they will look like stained glass.
- The powdered sugar keeps the candy pieces from sticking together and becoming a large, sharp lump. If you like the effect of the colors without the powdered sugar, make sure you store the pieces on pieces of wax paper and not touching one another.
-
9Store if needed. This candy is best stored in paper bags or metal tins for a fun snack or a quick sugar craving.


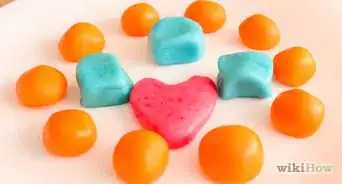
Fruit Drops
Fruit drops are a very traditional hard candy that can be flavored to suit your preferences.
-
1Gather the ingredients and items needed before starting. Have everything in place.
-
2Line the baking pan. Use parchment or baking paper, or grease lightly.
-
3Pour the sugar, glucose and 175ml/6 fl oz of water into the heavy based saucepan. Using a wooden spoon, stir until the sugar dissolves.
-
4Place on the heat source. Bring to the boil. Cover, then boil for another 3 minutes.
-
5Remove the cover. Boil until the temperature reaches 154ºC/310ºF, also known as the hard crack stage. (See How to test candy hardness stages for more information).
-
6Add the cream of tartar and the fruit extract (essence) of choice. Mix through quickly.
-
7Pour the candy syrup into the prepared pan.
-
8Leave until the candy is cool enough to handle. Using lightly oiled scissors, quickly cut small pieces off and use your hands to shape into small balls.
-
9Roll in icing (confectioners) sugar to complete.
-
10Serve or give away. These are lovely wrapped in clear cellophane or tucked into a small candy tin as gifts. If you are adding them to a tin, line with wax paper.
-
11Store in an airtight container. Ensure that moisture doesn't get to the drops or they'll lose their appeal and turn sticky.


Lollipops
One of the easiest old-fashioned candies to make, lollipops are a delicious addition to the old fashioned hard candy maker's repertoire. Lollipops are also known as suckers, lollies or sticky-pops.
-
1Gather the ingredients and items needed before starting. Have everything in place.
-
2Measure the flavoring. Depending on whether you're using 3 or 4 flavorings, measure thirds or quarters in a measuring jug.
-
3Pour the sugar and glucose into the saucepan. Add 150ml/1/4 pint of water. Gently heat and stir well to ensure that the sugar dissolves.
-
4Add the measured coloring to the syrup. Bring to the boil, then cover and boil for another 3 minutes.
-
5Remove the cover. Boil until the temperature reaches 130ºC/265ºF, the hard ball stage.
-
6Remove the syrup from the heat. Separate quickly into three or four batches. Pour in the chosen flavoring for each batch.
-
7Using a soup spoon or a dessert spoon, drop small, round shapes of syrup onto the parchment covered tray. Carefully add a lollipop stick to each round, covering with a little more syrup if needed.
-
8Allow to cool and harden. Carefully remove them from the parchment paper. Wrap in clear cellophane or stick into a lollipop holder and they're ready to be shared around or given away as a gift.


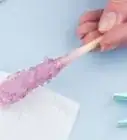
Barley Sugar
This is a very traditional sweet often relied upon for its glucose "restorative powers" when performing outdoor activities or during emergency situations.
-
1Assemble the ingredients and items needed before starting. Have everything in place. Prepare the baking pan by covering in parchment paper or oil a marble slab.
-
2Cook the hulled barley in the water gently for 5 hours. Keep the heat low and be aware that it's easy to burn barley, so keep a regular check on the water level.
-
3Strain the liquid. It will look like white jelly. Then return it to the pan.
-
4Warm the sugar. Then add it to the pan and stir until it is dissolved, over a gentle heat.
-
5Boil the mixture until the temperature reaches 156ºC/310ºF, the hard crack stage.
-
6Pour the candy syrup over the lined tray or oiled slab.
-
7Once the barley sugar has cooled enough to touch, immediately cut it into long strips using lightly oiled scissors. Twist as you cut, to form the traditional twisted barley shape.
-
8Leave the strips to harden. Once hardened, they can be wrapped individually in cellophane or place on wax paper inside an airtight tin.


Community Q&A
-
QuestionHow can I make candies in a certain shape?
 Community AnswerYou can buy silicone candy molds to create the shape you desire. Molds are available online or in specialty stores.
 -
QuestionWhere is the best place to get hulled barley?
 Community AnswerMost grocery stores sell barley in a box. Check near the rice.
 -
QuestionMy toffee is soft like butter. Unfortunately, I already put the chocolate and nuts on top. Can I do anything to save it?Community AnswerFreezing or refrigerating it for a short while might help. You may just have to redo the recipe.
Warnings
- Watch your teeth! It is always better to suck hard candies than to chew or crunch them.⧼thumbs_response⧽
- Heated sugar is almost as hot as a deep fryer. If you get it on you, it will stick and burn for several seconds. Cooking old fashioned candy is not suitable for children under 12 and when teaching children over 12, remain in a role of constant supervision.⧼thumbs_response⧽
- Hard candies should be eaten in moderation and not as a regular part of the diet.⧼thumbs_response⧽
Things You'll Need
Basic Recipe:
- Heavy based saucepan
- Cookie sheet (baking tray)
- Thermometer
Fruit Drops:
- A baking pan or tin 17.5 centimeter (6.9 in), 7" square
- Parchment (baking) paper
- Heavy based saucepan
- Wooden spoon
- Kitchen scissors or shears (lightly oiled)
- Clear cellophane or wax-paper lined gift tin if giving away as a gift
Lollipops:
- Lollipop sticks
- Large baking sheet (or oil a marble chopping board)
- Parchment (baking) paper
- Heavy based saucepan
- Wooden spoon
- Measuring jug
- Dessert or soup spoon
- Cellophane paper for wrapping
Barley Sugar:
- Large heavy based saucepan
- Strainer or colander
- Wooden spoon
- Baking pan/tray and parchment (baking) paper or marble slab and oil
- Kitchen scissors or shears, oiled lightly
- Cellophane paper for wrapping


References
- Hilary Walden, The Complete Home Confectioner, (1986), ISBN 0-86824-266-7 – research source
- Andrea Swenson, Gifts from the Kitchen for Dummies, (2002), ISBN 0-7645-5452-2 – research source
- Larousse Gastronomique, Old-fashioned barley sugar, (2009), p. 66, ISBN 978-0-600-62042-6 – research source