This article was co-authored by wikiHow Staff. Our trained team of editors and researchers validate articles for accuracy and comprehensiveness. wikiHow's Content Management Team carefully monitors the work from our editorial staff to ensure that each article is backed by trusted research and meets our high quality standards.
This article has been viewed 108,789 times.
Learn more...
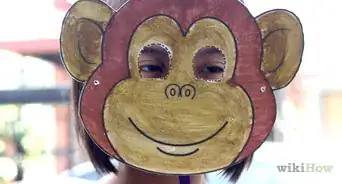
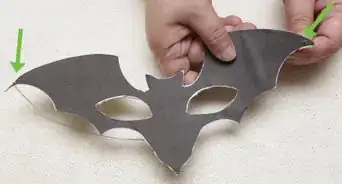
Want to make your own mask for Halloween? Tired of store bought ones, or want a cute kids' project? You can make a latex mask yourself at home using materials from any large crafting or art supply store. You begin by sculpting your design, then creating a mold of the sculpture, which is then cast in latex. This is an advanced crafting project that is a lot of fun.
Steps
Gathering Your Supplies and Sculpting the Design
-
1Gather your materials. You will need several types of supplies to make your own mask, but you can always use these supplies to make additional masks. These are available online or at large crafting stores.
- You will need an oil based clay to sculpt the mask.[1]
- You will also need a form to sculpt your mask on top of such as a Styrofoam mannequin head.[2]
- You will need a material called industrial gypsum in order to make a mold of the sculpture.[3]
- You will need some burlap to make your mold 3-D.
- Select a good quality brand of liquid latex for your mask. You will need a casting latex specifically formulated for mask making, called RD-407.[4]
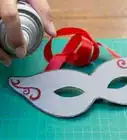
- You can also purchase paints or decorations such as fake fur, sequins, or feathers to put on the mask. This will depend on what final look you are hoping to achieve.
-
2Warm the clay. Your clay will become more pliable for sculpting if you warm it a bit first. Place a few blocks of plasticine clay in the oven at a low temperature (150°-200° F) for 15 to 20 minutes.
- The clay should be very pliable and warm, but not hot to the touch.
- Do not allow the clay to liquify.
Advertisement -
3Set up the mannequin or other form. To sculpt the mask, you will need the form to stay immobile. You can secure the styrofoam mannequin head to a solid wooden base such as a 12' x 12' piece of plywood.
- Attach the head with duct tape until it is secure.
-
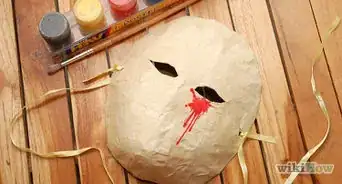
4Cover the head with clay and start sculpting. You should use a thick enough layer of clay that you don't have to worry about it thinning as you sculpt.
- You can use your hands, sculpting tools, or tools from around the house (like a butter knife or putty knife) to sculpt details including skin textures and exaggerated features.
- Smooth the surface of the clay with lighter fluid and a small flat paint brush. When you are satisfied with your creation, move on to the next step.
- It may take you several hours or even days to create the look you are going for.


Making a Mold
-
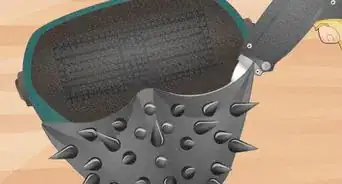
1Make a two piece mold. In order to transfer the clay sculpture to a latex mask, you need a two-piece mold made out of industrial gypsum, which is porous so that the latex can soak into it as you make the mask in the next step.
- Your mold will be a reversed 3-D copy of the sculpture you made in the previous step.
-
2Create a separation for a two piece mold. First, cut 1 inch (2.5 cm) square pieces of burlap. Set burlap aside and build a clay wall around sculpture starting at bottom below right ear, and working over the head to the left ear.
- This wall will create a separation for a two piece mold.
- Mix the plaster in a plastic bucket, and spread an even coat of plaster over clay sculpture, making sure to get plaster into all the recesses of the sculpture.
-
3
-
4Paint the exposed plaster flange. Use a bright colored acrylic paint, which will help you separate the pieces later.
- After the paint dries, create the second half of the mold in the same way as the first.
- When the second half of the mold is set, slowly pry the two halves apart. Use a butter knife, working very carefully along the visible seam made by the acrylic paint so you do not crack your mold. Once the two halves are separated, remove the clay and the Styrofoam head.


Applying the Latex and Finishing the Mask
-
1Pour latex into the mold. Using a good amount of latex, pour it into the mold making sure to rotate the mold in your hands to get the liquid latex into all the recesses and work out air bubbles.
- A small brush may help you work the latex into deeper parts of your mold.
-
2Turn the mold right side up to allow the excess latex to drain from the mold. Catch this latex in a clean bucket and put it back in the container to save it for the additional coats.
- Rotate the mold 90 degrees every 5 minutes, so that the latex is evenly distributed to the back, front, and sides of the mold.
- This will help prevent the latex from pooling up, and becoming too thick in one spot.
- A hair dryer on the lowest heat setting aimed inside of the mold will speed up the drying process. With a hair dryer, it should only take an hour or so for the layer to dry.
- Repeat this process until you have built up at least six layers.
- If you live in a dry climate, allow a day for the latex to air-cure. In a more humid climate, allow 48 hours.
-
3Peel the latex away. After the latex is cured, and before removal, dust the inside of the mask with talcum powder. Then, carefully peel the neck away from the mold and add talcum powder between the latex and the plaster mold.
- The talcum will fall into place as you peel the mold from the plaster keeping it from sticking to itself. After you have removed your mask, trim away excess latex to clean up the edges. Be sure to use a knife to cut away holes for the mask wearer's eyes.
-
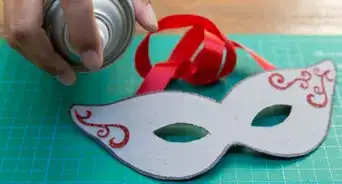
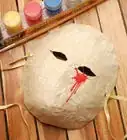
4Paint and add details. Mix small amounts of acrylic paint with latex in small containers (cap these when not in use). The colors will appear much lighter when wet (for example, when dry a light pink will become a blood red).
- Experiment with these latex-acrylic paints until you get the look that you want.
- After the mask is painted, attach hair cut from an old wig, feathers, sequins, or other elements. You can glue these in place with tinted latex. Be creative, and have fun!


Community Q&A
-
QuestionWhat is needed to construct a functioning mask?
 PillowpigCommunity AnswerFor the simplest kind of mask, you will simply need a thick piece of paper, scissors, and a string to hold it on your head.
 -
QuestionHow does it stick to my face?
 Community AnswerUse a string to tie it around your face.
Warnings
- The chemicals used in this project should not be used by children except under close adult supervision. Be sure that you use them in a well-ventilated area.⧼thumbs_response⧽
Things You'll Need
- Oil-based clay
- Styrofoam head
- Industrial gypsum
- Liquid latex
- Scissors
- Plaster
- Acrylic paint
- Fake hair
- Mixing buckets
- Assorted brushes
- Plastic drop cloth
- Newspaper
- Paper towels
References
About This Article

To make a Halloween mask, start by putting warm, pliable clay over a Styrofoam mannequin head and sculpting it to get the look you want. Then, you’ll need to make a mold of your sculpture from industrial gypsum, and let it dry before removing it from the clay and the Styrofoam head. Next, pour latex into the mold, rotate it to evenly distribute the latex, then pour off the excess before letting it dry. After that, repeat the process until you’ve built up at least 6 layers of latex. Finally, let the latex dry for 1-2 days before peeling it from the mold. For step-by-step instructions on how to make the mold for your Halloween mask, keep reading!


-Step-1-Version-3.webp)