This article was co-authored by wikiHow staff writer, Amber Crain. Amber Crain has been a member of wikiHow’s writing staff for the last six years. She graduated from the University of Houston where she majored in Classical Studies and minored in Painting. Before coming to wikiHow, she worked in a variety of industries including marketing, education, and music journalism. She's been a radio DJ for 10+ years and currently DJs a biweekly music program on the award-winning internet radio station DKFM. Her work at wikiHow supports her lifelong passion for learning and her belief that knowledge belongs to anyone who desires to seek it.
This article has been viewed 13,026 times.
Learn more...
Juicing is a great way to get a huge dose of nutrients by simply drinking a delicious beverage. Most people think you need to have a juicer and other expensive kitchen tools to create juice blends at home, but that equipment really isn’t necessary—you can get the same results with a regular blender! Choose fruits and veggies with complementary flavors, chop them up, and blend them on HIGH. Then, pour the mixture into a fine mesh strainer to remove the pulp and enjoy your homemade juice blend.
Ingredients
Carrot Beet Ginger Juice
- 1 medium beet (rinsed, lightly peeled and quartered)
- 1 medium apple (peeled, cored and quartered)
- 1 small piece of fresh ginger (skin removed)
- 3 whole carrots (rinsed and peeled)
- Unfiltered apple juice (optional)
Makes 1 serving
Pineapple Apple Kale Lemon Juice
- 1/2 ripe of a pineapple, cut into chunks
- 1/2 of a green apple, seeds and stem removed
- 3 cups (710 grams) of kale, stems removed
- 1 small cucumber, quartered
- Juice from half a large lemon
Makes 1 serving
Green Yogi Juice
- 1 cucumber, peeled and roughly chopped
- 1 cup (236 grams) of baby spinach, rinsed and de-stemmed
- 1 apple, cored, peeled and roughly chopped
- 1 ripe pear, cored, peeled and roughly chopped
- 1 carrot, peeled and chopped
- Juice of 1 lemon
- 1/2 tsp of minced ginger (optional)
Makes 2 servings
Steps
Choosing Fruits and Veggies
-
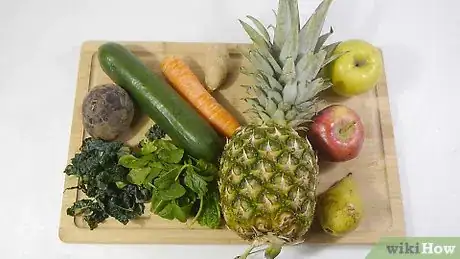
1Use fruits and veggies with complementary flavors. When you’re creating juice blends, select produce items that taste good together. This will make your juice tastier and more cohesive, and might even trick some people into thinking you're a professional![1]
- Strawberries, pineapples, and kiwis have very complementary flavors when mixed together.
- Carrots, beets, and apples are also tasty when blended together.
- Light, refreshing green produce like cucumbers, melon, pears, green apples, and leafy greens blend nicely if you want to make a green juice.
Tip: You can incorporate supplementary ingredients like kale and ginger into pretty much any blend you want, depending on your personal preference.
-
2Choose flavors that balance each other out for the best results. It’s important to aim for a nice balance between sweet and savory flavors when creating juice blends. If it's too sweet, your juice might be difficult to drink quickly, while too-savory juices can be a bit off-putting.[2]
- Adding kale to your juice is wonderfully healthy, but it can create a bitter taste that is off-putting to most people. To counteract this bitterness and make the flavor more palatable, add sweet fruits like pineapple and juicy apples to the mix.
- If you want to make a root vegetable base with carrots and beets, you can add sweet fruits like apples to balance the flavor and sweeten the mixture. This trick also works great for smoothies that are a little too tangy or sour.
- If you want to balance out a smoothie that's already pretty sweet, try squeezing the juice from half a lemon into the mixture.
- For a spicy kick that can jazz up a bland smoothie, try adding ginger.
Advertisement -
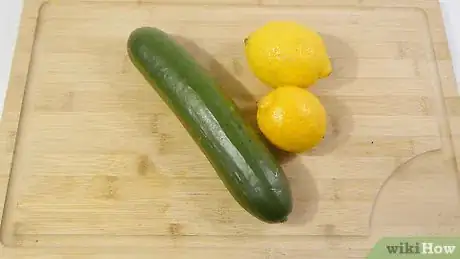
3Incorporate water-heavy fruits and veggies to ensure a uniform mixture. You can get juice out of almost anything, but keep in mind that you want the final juice product to be fairly smooth and drinkable. Adding water-heavy produce like citrus fruits, tomatoes, and cucumbers will generate plenty of liquid during the juicing process and help to bring the different flavors together.[3]
- If none of your produce is particularly water-heavy, just add a splash of water or unfiltered apple juice to the blender instead.
- Adding water-heavy items is particularly helpful if you're using a regular blender rather than a high-speed blender.
-
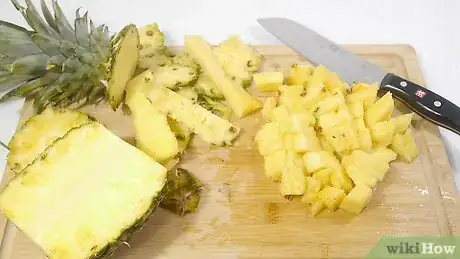
4Remove peels, cores, seeds, and skins to avoid damaging your blender. Peels, cores, and seeds have nutritional value, but they can be hard on blender blades. If your fruit and vegetables are organic, you can leave most of the cores and peels intact, or you can remove them—just keep in mind that removing them will prolong the life of your blender! However, no matter what you choose, you should definitely remove big pits, like the ones you find in peaches, plums, and avocados. Pineapples should always be peeled and cored before juicing them.[4]
- If you’re using non-organic produce, it’s a good idea to go ahead and remove skins and peels as you normally would. That way, harmful traces of pesticides won’t make their way into your juice.[5]
- Juice recipes will typically tell you to remove cores, seeds, and rinds, but it’s ultimately your call. If you're using a regular blender or food processor, it's a good idea to remove them.
-
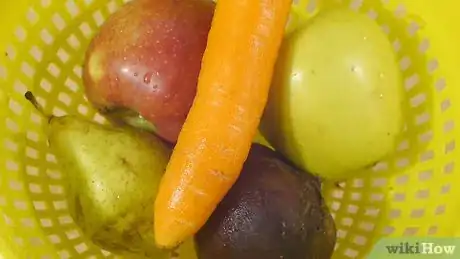
5Rinse off the produce thoroughly with cool water. Run each fruit and vegetable under the faucet to remove any dirt and debris on the surface. Root veggies like beets and carrots may need a little extra scrubbing since they grow underground and usually still have dirt clinging to them. If you don’t remove peels and skins before juicing, you may need to rinse off items that you normally wouldn't rinse.[6]
- For example, you typically don't need to rinse off an orange, since the peel protects the fruit inside and the peel comes off. In this case, if you aren’t removing the rind, it definitely needs a quick rinse!
- You can use a vegetable or produce brush to be extra thorough.
Blending and Straining the Produce
-
1Chop the fruits and veggies into large chunks. Aim for chunks that are about 1–2 in (2.5–5.1 cm) large. This will make it easier to blend everything together and may reduce the stress on your blender blades. However, don't worry about making the chunks too precise.[7]
- Try to make the chunks fairly uniform in size if you can.
-
2Add the chunks to the blender with the juiciest produce at the bottom. The order you add items to your blender does matter! Add the water-heavy veggies and fruits, like citrus fruits, pears, tomatoes, cucumbers, and tomatoes, to the blender first. You can pile the sturdier items, like beets and carrots, on top of the juicy produce.
- This way, the juiciest produce is closest to the blender blades and will yield their juices straightaway, making it much easier to incorporate the other ingredients.
- A high-speed blender works best for juicing, but a regular blender can get the job done, as well. You can also use a food processor and get good results.
-
3Blend the produce on HIGH until the mixture looks mostly smooth. Put the lid on your blender and start processing the produce using the highest setting. You will likely need to stop the blender occasionally and give the ingredients a stir to keep everything moving. Keep blending until the produce looks well-incorporated and mostly smooth.[8]
- If stirring isn't helping, add a splash of water, unfiltered apple juice, or 1-2 pieces of water-heavy produce to the mix to help things along.
- If you left cores, peels, and seeds intact, they may still be floating around at this point, which is totally fine.
-
4Place a mesh strainer over a bowl and strain the mixture through it. Let the mixture sit for about 5-10 minutes to allow the juices to drop into the bowl. You can also speed things along by gently pressing the pulpy mixture with a spatula to extract the juice with force.[9]
- If you like extra pulpy juice, you can press down pretty hard with the spatula so that small pieces of pulp make their way into the bowl with the juice.
- For extra smooth juice, drape a cheesecloth over the strainer before pouring the mixture into it.
-
5Enjoy your fresh juice immediately for the best flavor. Homemade juice tastes best on the day it’s made, so transfer it from the bowl into glasses with a funnel and enjoy! If you like chilled juice or if you have leftovers, simply place the juice in an airtight container and keep it in the fridge. Be sure to drink leftovers within 2-3 days.[10]
- You can toss out the pulp left behind in the strainer or compost it.
- Mason jars make great containers if you need to store leftovers.
Trying Different Juice Recipes
-
1Make a nutrient-rich juice with carrots, apple, beet, and ginger. This blend is sweet and earthy with just a hint of spiciness from the ginger. To make it, you’ll need 1 medium beet, 1 medium apple, 1 tbsp of fresh ginger, 3 whole carrots, and a splash of unfiltered apple juice. Peel and chop the produce, add everything to your blender, and process the mixture until it looks smooth. Push it through a fine mesh strainer, discard the pulp, and enjoy the juice![11]
- This makes 1 serving of juice. If you want to make more than 1 serving, double or triple the ingredients as needed.
- Store leftovers in an airtight container for 1-2 days.
-
2Blend pineapple, lemon, apple, cucumber, and kale for a balanced flavor. Kale can taste pretty bitter in juices, but this blend perfectly balances it out with the addition of sweet, fresh citrus fruits. Peel, core, and chop up 1/2 of a ripe pineapple, 1/2 of a green apple, 3 cups (710 grams) kale, and 1 small cucumber. Put everything into your blender, squeeze in the juice from half a lemon, and blend the ingredients until they look incorporated. Strain out the pulp and enjoy the fresh juice immediately.[12]
- This makes a single serving of juice.
- Pour leftovers into an airtight container and consume them within 1-2 days.
-
3Whip up a Green Yogi juice with lots of healthy greens. The Green Yogi blend (sometimes called Green Goddess) is tangy and sweet juice with a just a hint of spicy ginger. Chop up 1 cucumber, 1 cup (236 grams) of baby spinach, 1 apple, 1 pear, 1 carrot, and 1/2 tsp of minced ginger. Add everything to the blender and juice the lemon on top before processing the mixture until it looks smooth. Push the mixture through a strainer and transfer the juice to 2 glasses.[13]
- You can omit the ginger if you don’t like the flavor.
- This recipe yields about 2 servings.
Things You’ll Need
- Blender
- Strainer
- Knife
- Large bowl
- Measuring cups and spoons
- Storage containers
- Glasses
References
- ↑ https://thechalkboardmag.com/how-to-juice-without-a-juicer
- ↑ https://thechalkboardmag.com/how-to-juice-without-a-juicer
- ↑ https://www.myrecipes.com/how-to/how-to-make-fresh-juice-without-a-juicer
- ↑ https://food52.com/blog/9933-how-to-juice-without-a-juicer
- ↑ https://www.myrecipes.com/how-to/how-to-make-fresh-juice-without-a-juicer
- ↑ https://food52.com/blog/9933-how-to-juice-without-a-juicer
- ↑ https://food52.com/blog/9933-how-to-juice-without-a-juicer
- ↑ https://food52.com/blog/9933-how-to-juice-without-a-juicer
- ↑ https://food52.com/blog/9933-how-to-juice-without-a-juicer
