This article was co-authored by Claire Donovan-Blackwood. Claire Donovan-Blackwood is an Arts & Crafts Specialist and CEO of Heart Handmade UK, a site dedicated to helping people live a happy, creative life. With over 13 years of experience, Claire uses art as a form of therapy and focuses on mindfulness in the making of art. She makes crafting easy and accessible for those she works with. Claire received her B.A. in Photography & Visual Imagery from The University of Huddersfield.
This article has been viewed 280,892 times.
You can't have vintage, hip decor without a few mason jars thrown in the mix. Gaining popularity at restaurants, bars, and in homes, mason jar lights are great DIY projects that look good in any room. And, thanks to the abundance of quality jars, easy and cheap to make yourself.
Steps
Rounding Up Supplies
-
1Choose your mason jars depending on how big you want the light to be. You can find vintage mason jars at antique stores or find canning jars online or in kitchen supply stores. In some locations, they sell canning jars by the dozen at supermarkets. Canning jars come in varying sizes, including 8 oz., 1 pint and 1 quart. The bigger the jar, the bigger your bulb can be and the brighter the light.
- For the average bulb (60 watts), a normal 12-ounce jar should be perfect.
-
2Find a pendant or hanging light kit from your local hardware store. These kits are commonly sold in order to light paper or other lanterns. Ikea, in particular, sells a kit designed for simple DIY projects like this, but other retailers should have kits as well. They can be hung from a hook, strung along ceilings or walls and plugged into an electrical outlet.Advertisement
-
3Buy funky, fun bulbs that fit in your jar and match the light kit's specification. Look at the wattage requirements for the light kit. Each socket should specify what watts are required. Then, as long as the bulb fits, you can use any design or light type to fit into your kit.[1]
-
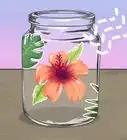
4Clean and dry your mason jars with soap and water. Clean them out the best you can, then dry them by hand to prevent water spots from forming. Make sure you get any dust and dirt off the inside of the jar.
-
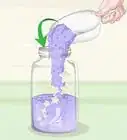
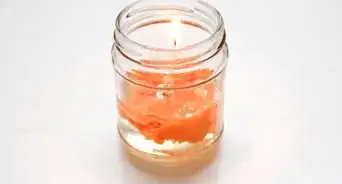
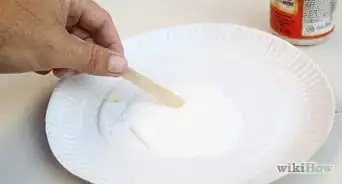
5Optionally, color your jars before adding bulbs for tinted lights. You can color clear canning jars with food coloring and Elmer's glue. Pour 1 cup of glue into a disposable bowl. Stir in the food coloring that you want to use until it is mixed well. Apply it to the inside of the mason jar with a foam brush. Allow it to dry overnight.[2]
- You can also use decoupage glue; just be certain that whatever glue you use is easy to apply and dries clear.
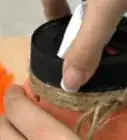
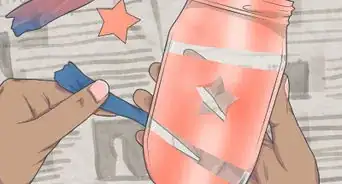
- You can also spray paint your lid and light fixtures to match if you want a more elegant light. Try a copper, silver, or gold spray paint.


Building the Light
-
1Unscrew the connector from the end of the light kit. This is the big, circular piece the holds the light in place. Take it off, leaving just the cylindrical light fixture at the end of your light kit for now.[3]
-
2Trace the end of the hanging light kit on the top of the jar. Take the end of your hanging light (where the bulb is screwed in) and trace it out on the lid of the mason jar. You'll need to punch through this top to get the light in.
- Make sure you're using both parts of the lid -- the round, flat piece and the circular "cuff" that screws on.
-
3Use a hammer and small nail to punch a hole in the lid somewhere on your line. This is the simplest set of tools to use, but you can also use a power drill if you have one on hand. Punch a small hole into the lid using the nail or your drill, then remove the nail.
- Punch along the inside of your tracing line. You'd rather make it a bit too small at first than too large.
-
4Continue punching holes around the circle until you've "cut" out the hole for the light. Use your hammer and nail to keep working around your traced circle until it falls out.
- If you have a pair of tin cutters or strong scissors, you can use these to speed up the process.[4]
-
5Thread the light fixture into the hole in your lid, then screw the connector back on. Make sure that the wire runs out of the jar and the light fixture points into it. If you need, use the back of your hammer to bend back any sharp or rough edges in the jar. The connector, however, should keep the whole light fixture in place on the lid.
- If the hole is a little small, push and twist to try and get it through and keep a nice tight seal between the light and lid.
-
6Optionally, use modeling clay or super glue to close the seam between the light fixture and the lid. While few people will notice a rough cut on the top of a light, you can tighten this connection easily with a hard, quick-drying adhesive. While it will not affect the light much, it can prevent the fixture from wiggling around if your cut isn't snug.
-
7Screw your light bulb into the light fixture, then screw the top into the jar. Turn it on to make sure it works, and voila!
-
8Place hooks in the ceiling where you want your pendant lamp to hang. If your pendant light cord is covered in thick plastic, you may be able to knot it and hang the light from a hook from the knot for more support.
- Aim to install your hooks in a ceiling beam. They can fall if they are simply screwed into plaster.
- You can also make 2 or 3 similar pendant lights and knot the chords together. Hang them from 1 sturdy ceiling hook to create a larger light fixture.
-
9Call an electrician to install pendant lights within your ceiling or walls. If you want your mason jar lights to hang directly from the ceiling, you should not try to install them on your own, unless you have extensive experience with electrical wiring. Alternatively, you can string the cord along your wall or ceiling, outside of the wall plaster, and plug it into an electrical outlet.[5]

Expert Q&A
-
QuestionHow do you decorate mason jars with fairy lights?
 Claire Donovan-BlackwoodClaire Donovan-Blackwood is an Arts & Crafts Specialist and CEO of Heart Handmade UK, a site dedicated to helping people live a happy, creative life. With over 13 years of experience, Claire uses art as a form of therapy and focuses on mindfulness in the making of art. She makes crafting easy and accessible for those she works with. Claire received her B.A. in Photography & Visual Imagery from The University of Huddersfield.
Arts & Crafts SpecialistSimply place some battery-powered fairy lights inside of a mason jar! You can even change the color of the light by painting the jar with some translucent paint. You can also try coating the jar with a layer of Mod Podge dyed with food coloring. -
QuestionHow do I let the heat from the bulb disperse?
 Community AnswerYou can punch extra little holes in the lid, around the light fixture, so that the heat will exit.
 -
QuestionAre these weather/outdoor proof?Community AnswerIf you take them outside with you just for the night, then, yes, they'll be fine. But don't leave them outside indefinitely.
Warnings
- Never attempt to do electrical wiring unless you are a trained electrician. In some countries and states it is illegal to attempt interior electrical work without a license.⧼thumbs_response⧽
Things You'll Need
- Mason jars
- Pendant light fixtures
- Light bulbs
- Hammer/Nails
- Marker
- Pliers
- Ceiling hook
- Stud/beam detector


References
- ↑ https://www.youtube.com/watch?v=XLwqns5pgjE
- ↑ http://mountainmodernlife.com/25-creative-ways-to-light-up-mason-jars/
- ↑ https://homeiswhatyoumakeit.com/2012/07/26/diy-mason-jar-pendant-ligh/
- ↑ https://www.youtube.com/watch?v=XLwqns5pgjE
- ↑ http://mountainmodernlife.com/25-creative-ways-to-light-up-mason-jars/
- Videos provided by Dani Austin
About This Article

To make mason jar lights, start by taking a pendant light kit and unscrewing the connector from the end of it, which is the circular piece that holds the light in place. Then, trace the circular end of the light kit on a mason jar lid. Once you've drawn the circle, use a hammer and nail to punch holes around your traced line until the circle falls out. Next, thread the light fixture through the hole and screw on the connector. Finally, screw the bulb into the fixture and screw the top back onto the mason jar. To learn how to color your lights and how to cover up a rough cut on the mason jar lid, read on!