This article was co-authored by Amy Guerrero. Amy Guerrero is an Arts and Crafts Specialist and the Owner of Sunshine Craft Co., a crafting studio based in Phoenix, Arizona. Amy specializes in macrame, DIY crafting, and teaching fiber arts. She offers monthly in-person and online workshops along with having developed a range of DIY craft kits for at-home projects. Amy holds a BS in Industrial Design from Philadelphia University. She worked as a graphic designer before starting her own business. Sunshine Craft Co. is a creative hub that offers a wide range of workshops, tools, and resources for any craft project to inspire creativity and community engagement.
There are 10 references cited in this article, which can be found at the bottom of the page.
This article has been viewed 58,527 times.
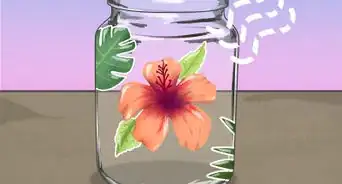
Decorating a Mason jar is a fun craft project that lets you design the look and determine the use of your jar.[1] Do-it-yourselfers can use a variety of materials and find many creative ways to decorate a Mason jar. Whether you choose to paint, embellish, wrap, decoupage, or mosaic your Mason jar, you are sure to end up with a useful and unique DIY project!
Steps
Painting a Mason Jar
-
1Choose the best size and shape Mason jar for your project. Bear in mind what you intend to use your jar for once it is decorated. Mason jars come in a variety of sizes, shapes, and even colors, so it is important for you to choose the right type for your specific project.
- If you plan to use your jar as a flower vase, for example, you will likely want to select a larger sized jar. If you are going to use your jar for toiletry or make up storage, you might want to select a small and short Mason jar.
- If your Mason jar is old or appears to be dirty, make sure that you clean it with dish soap and warm water. Air dry completely or thoroughly dry with a paper towel or rag before applying any paint.
- Mason jars are sold at most craft stores, grocery stores, and some home improvement stores, so it should be easy for you to find the size and shape you want to use for your project.
-
2Decide if you want to paint the inside or outside of the Mason jar. Paint the outside for more control over how the paint is applied, and to easily allow you to create designs. Painting the inside, on the other hand, can been useful because it won't be touched as much, so the paint won't wear off as fast.
- If you are using the jar to store any food, skincare, or living items, steer clear of painting the inside. Paint can contain toxic chemicals that could compromise the items being stored.
Advertisement -
3Select your paint. Choose a spray paint for quick and easy application, or choose a brush-on paint to create more detailed designs.[2] [3] Whatever paint you decide to use, make sure that it is suitable for glass surfaces so that it will stick and not easily rub off.
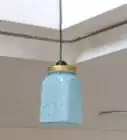
- Pick a metallic spray paint to decorate your Mason jar and create a striking and sophisticated flower vase or storage container.
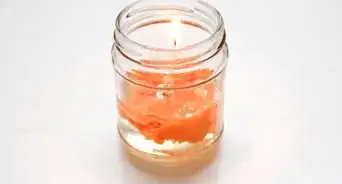
- Select a glitter spray or brush-on paint and add a tea light to create a festive holiday candle you could leave out all year long.[4]
- Use chalkboard paint to turn your Mason jar into kitchen storage or a fun activity for kids.[5]
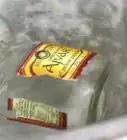
- For an antiqued mercury glass look, choose a mirror spray paint and prepare some white vinegar in an empty spray bottle.
-
4Cover your work surface to protect the surfaces under the jar and around you. Use newspaper or tarp to cover a wide area if you are using spray paint. If you are using brush-on paint, you can use a smaller protectant for your surfaces, such as cardboard or paper towels, since you can be more precise with the application. Regardless of what type of paint you use, always work in a well-ventilated area to prevent harm from the fumes.
- If you are using spray paint, try to set up your work space outside or in a garage, as residual spray will likely extend out farther than you intend.[6]
-
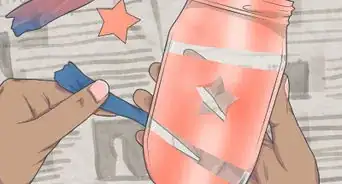
5Remove the lid and cover any areas you don’t want painted. Flip the Mason jar over to paint upside down if you are painting the outside of your jar. This will prevent any residual paint from falling into the opening. If you are painting the inside of your Mason jar, cover the top outside area of the jar with masking tape to prevent stray paint from marking it.
- If you are creating a design on your Mason jar, use painter’s tape to mask off the areas that you do not want painted.
-
6Spray or brush-on 1 coat of paint evenly over the jar. Move the Mason jar around or move around the jar as you spray or brush-on the paint to ensure that you cover the entire surface.
- If you are using brush-on paint, try applying a light coat first to avoid dripping or oversaturating. Once the paint is dry, apply additional coats as needed to cover completely.
- If you are using spray paint, make sure that you follow the directions on the bottle and shake well before painting. Position the spray bottle several inches away from your jar to ensure that the paint is applied evenly.
-
7Leave the Mason jar to dry. Check the instructions on the label of your paint container for expected drying times.The drying time will vary depending on the type of paint you used and how many coats you applied.[7] Make sure that the jar is completely dry before adding any storage or décor items.


Creating a Mosaic Design
-
1Select your mosaic material. Consider what you plan to use your Mason jar for, and what sort of look and decorative feel you are going for. You can mosaic a Mason jar with many different small decorative materials, including seashells, glass, seaglass, mirrors, or broken tiles. These items can be purchased in small or pre-broken, mosaic-ready form at most craft stores, or you can make them yourself.
- If you want to create a soothing, beachy candle holder, for example, seashells or seaglass would both be great options for your mosaic material. If you are going for a more funky, bohemian vibe with your Mason jar, broken tiles might be a better bet.
- To create your own mosaic materials, drop or throw the glass, mirror, or tiles on the ground, break them on a hard surface with a hammer, or use glass cutters for more precisely shaped pieces.[8] Make sure that you wear safety glasses and protective gloves, cover your entire work space, and vacuum the area very well when you are done.
-
2Decide on your mosaic design. Spread out your mosaic pieces on a flat surface and try out different arrangements to help you decide on the placement of the mosaic pieces.[9] You may want to trace your Mason jar with a pencil on a piece of paper so that you can determine exactly how many mosaic pieces you will need for each side of the jar. To replicate your exact design, remove the mosaic pieces from your arrangement one by one, placing each in the corresponding spot on the actual jar.
-
3Glue your mosaic pieces to the Mason jar. Apply a small to medium drop or mosaic adhesive on the back of a mosaic piece. Carefully press the adhesive side to the place you want it on the Mason jar. Hold the mosaic piece in place for a few seconds, then move on to glue the next piece. Repeat this process until you have mosaic-ed the entire Mason jar, or until you have completed your desired pattern.
- Make sure that your Mason jar is clean and dry before you begin to glue on your mosaic pieces.
-
4Wait 5 to 6 hours for the adhesive to cure. Let the adhesive cure for 5 to 6 hours, or check the label on the adhesive container to determine the exact curing time. While a mosaic adhesive will usually take about 5 minutes to set enough that your pieces should feel securely attached to the Mason jar, it generally takes several hours for the adhesive to completely cure. You may be tempted to continue earlier, but it is important that you wait until the adhesive has cured before you start grouting.[10]
- Grouting before your adhesive has cured can cause your mosaic pieces to shift or fall off, forcing you to re-adhere these pieces and wait another 5 to 6 hours for the re-applied adhesive to cure.
-
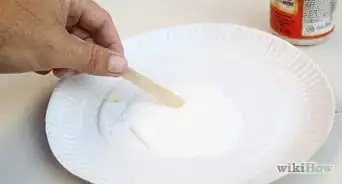
5Smear grout onto your mosaic. Using your hands or a small craft knife, cover all the mosaic-ed areas on your Mason jar with grout. Don’t worry about covering up your mosaic pieces – you will be washing these off later. Make sure that you use enough grout to get into all the crevices.[11] Let the grout sit for 20 to 30 minutes, or the length of time specified on the label.
- Most craft stores sell mosaic grout that is pre-mixed and ready to use. If you do not purchase a pre-mixed grout, mix your mosaic grout by following the instructions on the label.
- If you are applying grout with your hands, you may want to wear gloves, as mosaic grout can be difficult to remove from skin.
- If you want to add an extra pop of color to your mosaicked Mason jar, consider adding color to your grout before applying it to your Mason jar.
-
6Wipe away excess grout. Using a lightly dampened sponge or paper towel, wipe the grout off the mosaic pieces using medium pressure. Once you are done, let your mosaicked Mason jar dry for 24 hours.
- If your mosaic pieces still look a bit hazy from the grout when you are done, wait 30 minutes and repeat this process again to make sure they are clean and clear.[12]
-
7Apply a thin layer of mosaic sealer. Use a paint brush to paint over the entire bottle with a thin layer of mosaic sealer. This will protect the grout and mosaic pieces from dust and moisture and give your project a nice sheen.
- Let the mosaic sealer dry according to the instructions on the label, and then you are ready to use your uniquely decorated Mason jar!


Wrapping a Mason Jar with Fabric, Ribbon, or String
-
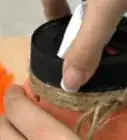
1Adhere burlap to your Mason jar for a rustic vibe. Measure around the circumference of the thickest part your Mason jar and from top to bottom. Using fabric scissors, cut the fabric in a strip about 1 inch (2.5 cm) longer than the circumference of your Mason jar to ensure the fabric wraps all the way around, and about 1 inch (2.5 cm) to 3 inches (7.6 cm) less than the height of the body of your jar. Use a hot glue gun to apply glue to the strip of burlap and adhere it to the Mason jar by wrapping it around and holding it in place until the fabric is secure.[13]
- If you want to cover more of your Mason jar, cut the fabric wider to suit your taste. If you want more of the jar to show, cut the strip of fabric thinner.
- You can also use twine or string to adhere the burlap to your Mason jar. To do this, cut a piece of twine or string about twice as long as the circumference of the jar. Wrap the burlap around the Mason jar, followed by the twine or string on top of the fabric in the middle. Secure with a knot or bow.[14]
-
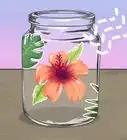
2Add a doily or lace for a cottage-ready storage jar or flower vase. Using the doily or lace of your choice, begin by laying the fabric flat on a protected surface. Using a glue gun, apply a thin layer of glue evenly across all of the edges and most of the fabric.[15] Carefully, pick up the fabric and place it where you want it on your Mason jar. Hold it in place for at least 30 seconds to ensure that it is securely in place. Let it dry according to the instructions for your glue.
- Make sure that you use a doily or lace that is suitably sized for your Mason jar. In general, the best size is one that covers the jar fully without having to be cut. Doilies and lace fabric are very delicate, so it is best to cut as little as possible to avoid unraveling.
- While it is recommended that you use a hot glue gun to securely adhere fabric to your Mason jar, you can also use a craft adhesive suitable for glass. Apply carefully with a small paint brush.
-
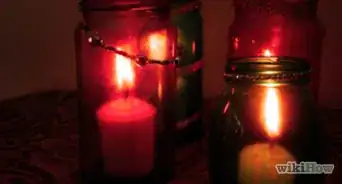
3Wrap with string, ribbon, or twine for a quick and easy Mason jar decoration. Measure the circumference of the part of the Mason jar you wish to adorn (this could be the neck of the Mason jar, the part right below where the cap screws on, or the body of the jar, the thickest part of the jar). Cut your string, ribbon, or twine approximately twice as long as the circumference you measured. Wrap around the jar and secure tightly with a decorative knot or bow.
- You may want to trim your string, ribbon, or twine after you have secured it around the Mason jar if too much excess hangs down.
- If you want a rustic farmhouse vibe but want a thicker option, consider cutting a 1 inch (2.5 cm) to 2 inches (5.1 cm) strip of burlap or lace to use instead of string, ribbon, or twine.


Decorating a Mason Jar with Decoupage
-
1Clean and dry your Mason jar. Use dish soap and water to clean thoroughly. Leave out to air dry, or pat dry completely with a towel. Mod Podge is a relatively strong adhesive that works well with glass, but only if the glass is completely dry.[16]
-
2Select your decoupage materials. Choose a common decoupage material, including magazine pages, wrapping paper, maps, graph paper, or personal photographs printed on paper, or get creative with a new idea.[17] Almost any paper product will work for a Mason jar decoupage project, so you have many options for your decoupage materials.[18]
- Whatever you choose, make sure that you have enough material to cover all of your Mason jar, or as much of your jar that you want to decoupage.
-
3Paint the Mason jar with an even coat of Mod Podge. Using a paint brush, dip the brush in the Mod Podge and immediately apply to the jar. If you want to cover the entire jar in decoupage, you will also want to paint the inside of the neck of the jar so that you can fold your material over the top and adhere it to the inside of the neck to cover the rim of the jar.[19]
-
4Apply your decoupage material to the Mason jar. Start applying your materials to the Mason jar immediately so that the Mod Podge does not begin to dry. When the material is secure around the body of the jar, press the paper around the neck, making sure that you adhere the material in all the crevices.
- If you are applying one large piece of paper, wrap the material all the way around the Mason jar, pressing tightly so that it adheres to the glass. If you are using multiple smaller pieces of paper, place each piece where you want it on the jar and press down firmly.
- Using scissors, cut a few slits around any excess material on the top and bottom so that it folds down easily. Fold any excess material over the top and bottom and press to secure.
-
5
-
6Trim away any excess paper. Once the Mod Podge is completely dry, use scissors trim away any excess paper that hangs over or does not lay flat. If you cannot cut close enough to trim as cleanly as you’d like, you can add another layer of Mod Podge to secure any stubborn bits in place. Let any touch-ups dry completely before use.


Expert Q&A
Did you know you can get expert answers for this article?
Unlock expert answers by supporting wikiHow
-
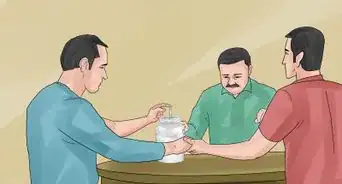
QuestionHow do I dress up a mason jar?
 Amy GuerreroAmy Guerrero is an Arts and Crafts Specialist and the Owner of Sunshine Craft Co., a crafting studio based in Phoenix, Arizona. Amy specializes in macrame, DIY crafting, and teaching fiber arts. She offers monthly in-person and online workshops along with having developed a range of DIY craft kits for at-home projects. Amy holds a BS in Industrial Design from Philadelphia University. She worked as a graphic designer before starting her own business. Sunshine Craft Co. is a creative hub that offers a wide range of workshops, tools, and resources for any craft project to inspire creativity and community engagement.
Arts & Crafts SpecialistGiving your mason jar a fresh coat of paint can make it pop with any decor.
Support wikiHow by unlocking this expert answer.
-
QuestionWhat can I use instead of a doily?
 T. ChinsenTop AnswererLook for lace fabrics in fabric stores. Check for the minimum cut as it varies from store to store, but 1/8 yard or a 4.5-inch strip will be relatively inexpensive. Ask about discontinued/remnants.
 -
QuestionWhich glue product will hold ribbon to painted jars?T. ChinsenTop AnswererCheck the glue section in the craft store. There is a wide variety to choose from. A general epoxy type like E6000 is a good choice as it can be applied thinly and dries fairly quickly. It is clear and can also be removed, though it takes a bit of effort. Not all glues dry clear or are waterproof, and many will yellow over time.
Things You’ll Need
Painting a Mason Jar
- Mason jar
- Cardboard or tarp
- Spray paint
- Masking tape (if you are making a design)
Creating a Mosaic Design
- Mason jar
- Mosaic material (such as seashells, rocks, seaglass, or broken tiles)
- Mosaic adhesive
- Mosaic grout
- Grout sealer
- Glass cutter or hammer (if you are creating the small mosaic materials from a larger item)
- Sponge
Wrapping a Mason Jar with Fabric, Ribbon, or String
- Mason jar
- Doily or lace fabric
- Paintbrush
- Burlap fabric
- Hot glue and hot glue gun
- Fabric scissors
Decorating a Mason Jar with Decoupage
- Mason jar
- Paper of choice
- Scissors
- Mod Podge
- Paintbrush


References
- ↑ https://www.countryliving.com/shopping/antiques/news/a39351/mason-jar-facts/
- ↑ Amy Guerrero. Arts & Crafts Specialist. Expert Interview. 9 October 2020.
- ↑ https://homebnc.com/best-diy-mason-jar-crafts-ideas/
- ↑ https://homebnc.com/best-diy-mason-jar-crafts-ideas/
- ↑ https://diyprojects.com/mason-jar-crafts/
- ↑ https://www.northstory.ca/spray-paint-glass-get-angry/
- ↑ https://www.northstory.ca/spray-paint-glass-get-angry/
- ↑ https://www.kenarry.com/mosaic-wine-bottle-mosaic-tiles-shells/
- ↑ Amy Guerrero. Arts & Crafts Specialist. Expert Interview. 9 October 2020.
- ↑ https://www.kenarry.com/mosaic-wine-bottle-mosaic-tiles-shells/
- ↑ https://www.kenarry.com/mosaic-wine-bottle-mosaic-tiles-shells/
- ↑ https://www.kenarry.com/mosaic-wine-bottle-mosaic-tiles-shells/
- ↑ https://www.fun365.orientaltrading.com/project/love-mason-jars-doily-flowers
- ↑ https://getinspiredeveryday.com/lifestyle/burlap-mason-jars/
- ↑ https://www.joann.com/how-to-make-a-hearts-desire-doily-ed-jar/4979519P24.html
- ↑ https://www.momtastic.com/diy/452951-how-to-decoupage-mason-jars/
- ↑ https://homebnc.com/best-diy-mason-jar-crafts-ideas/
- ↑ Amy Guerrero. Arts & Crafts Specialist. Expert Interview. 9 October 2020.
- ↑ https://www.momtastic.com/diy/452951-how-to-decoupage-mason-jars/
- ↑ Amy Guerrero. Arts & Crafts Specialist. Expert Interview. 9 October 2020.
- ↑ https://www.momtastic.com/diy/452951-how-to-decoupage-mason-jars/
About This Article

To decorate a Mason jar, try spray painting it with metallic paint and turning it into a vase. You could use chalkboard paint instead if you want to write on the jar. Alternatively, try turning your Mason jar into a mosaic by gluing broken tiles, pieces of mirror, or even seashells onto the outside of it. After you glue all the pieces on, simply spread some grout over them, let it sit for 30 minutes, and wipe away the excess. For an easier DIY project, try wrapping some fabric, ribbon, or burlap around the jar. You can secure it by tying a bow, or you can use hot glue for a neater finish. To learn how to decoupage a Mason jar, scroll down!