This article was co-authored by wikiHow Staff. Our trained team of editors and researchers validate articles for accuracy and comprehensiveness. wikiHow's Content Management Team carefully monitors the work from our editorial staff to ensure that each article is backed by trusted research and meets our high quality standards.
There are 9 references cited in this article, which can be found at the bottom of the page.
The wikiHow Video Team also followed the article's instructions and verified that they work.
This article has been viewed 30,000 times.
Learn more...
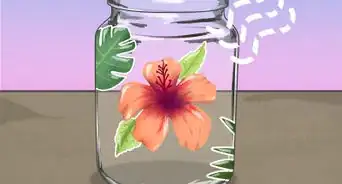
Mason jars are usually clear, but you can find them in a wide range of tints and colors. However, if you have some clear mason jars that you’d like to transform into decorative items, there are easy ways to paint the inside of them yourself. You can coat the inside of a mason jar with paint to provide an opaque color, or you can tint the inside of a mason jar with food coloring for a transparent color. The paint or food coloring will dry on its own, but you may also cure it by placing the jar in your oven if desired.
Steps
Coating a Mason Jar with Acrylic Paint
-
1Mix acrylic paint in a bowl to achieve the desired shade. Measure out 2 tablespoons (30 mL) of acrylic paint and pour it into a small bowl. You can use a 50/50 mixture of 2 different colors to achieve a specific shade or add a few drops of 1 color to another to adjust the shade slightly. Mix the paint colors together well using a spoon or fork.[1]
- For example, you could use 1 tablespoon (15 mL) each of blue and white to create a pastel or light blue shade. Or, add a few drops of green to 2 tablespoons (30 mL) of white paint for a light mint green paint.
- If you don’t want to adjust the shade of your paint before coloring the inside of the mason jar, pour it directly into the jar.
-
2Pour the paint into a clean, dry mason jar. Wash out the jar with dish soap and water, then rinse it out thoroughly. Let the jar air-dry upside down or use a paper towel to dry it out. When the jar is dry, pour the mixed paint into the jar.[2]
- If you’re painting the inside of multiple jars, measure out 2 tablespoons (30 mL) of paint per jar.
Advertisement -
3Twist and turn the mason jar to coat the inside of it. Swirl the paint around in the jar by slowly turning the jar on its side and rolling it around in your hand. Keep turning and tilting the jar until the inside of it is completely covered in paint.[3]
- This may take a few minutes since the paint will move slowly. However, do not use a paintbrush as this will result in an uneven appearance.
Tip: Try covering only the bottom half of the inside of the jar with paint and leaving the top half of the jar clear. Use 1 tablespoon (15 mL) of paint instead of 2 if you want to do this, and then let it dry right side up.[4]
-
4Place the mason jar upside down on a piece of cardboard to dry. After the inside of the jar is completely coated with the paint, place the jar on a piece of cardboard. The excess paint will continue to drip down, so pick up the jar and move it to a different spot on the cardboard about once every 15 minutes.[5]
- The jar will take several hours to dry, so plan to wait 24 hours before you use the jar for decorative purposes.
- If you don’t have cardboard, use a few layers of newspaper or paper towel to catch the paint that drips down.


Tinting a Mason Jar with Food Coloring
-
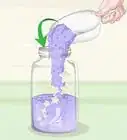
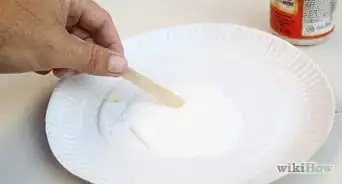
1Combine water and food coloring in a small bowl. Add 1 tablespoon (15 mL) of water into a small bowl. Then, add 20 or more drops of food coloring to the water and stir the food coloring into the water until they are well-combined.[6]
- You may use any color or combination of colors you like to tint the jar. Try using blue food coloring for a blue-tinted jar or red and yellow for an orange-tinted jar.
Tip: The more food coloring you add, the darker the tint will become. 20 drops will create a very light tint, 40 will produce a medium tint, and 60 drops will create a dark tint.
-
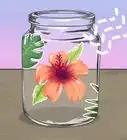
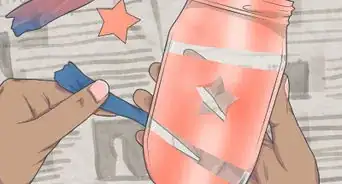
2Pour the mixture into the jar and add 1 tablespoon (15 mL) of white school glue. Use a fork or spoon to stir the food coloring a water mixture with the glue right inside of the jar. Stir until everything is well-combined.[7]
- You can also use clear PVA glue if you don’t have school glue.
-
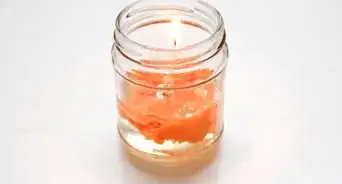
3Twist and turn the jar to coat the inside. Pick up the jar and start twisting and turning it in your hand to coat the inside of the jar. Turn the jar to the side and roll it around in your hands to get an even layer of the food coloring mixture all over the inside of the jar.[8]
- Do not turn the jar upside down until the inside is fully coated with food coloring. Then, pour the excess into the small bowl to use on another jar or discard it.
-
4Place the jar upside down on a paper towel to dry. Use 2 to 3 layers of paper towel to catch any excess glue that drips down while the jar is drying. Pick the jar up every 15 minutes for the first hour to prevent the glue from collecting and adhering to the paper towel. Then, turn the jar right side up and let the jar dry overnight.
- If you don’t have paper towels, you can also use a few sheets of newspaper or a piece of cardboard to catch the glue.
- Make sure to keep the jar away from pets and children while it dries.

Curing the Paint or Food Coloring
-
1Pre-heat your oven to 200 °F (93 °C). Turn your oven up to this temperature and allow about 10 to 15 minutes for it to reach it. Do this right after you finish painting or tinting the inside of your jars to cure the paint or food coloring while it's still wet.[9]
Tip: Placing the jar in the oven will make the paint appear slightly darker than it is right now. If you’re happy with the current color of the jar, you can skip baking it.
-
2Bake the jar upside down for 15 minutes. Place the jar upside down on a cookie sheet lined with wax paper. Then, carefully put the cookie sheet in the oven. Set a timer for 15 minutes to keep track of how long the mason jar is baking.[10]
- While the mason jar is baking, try making another jar or simply use the time clean up your supplies.
-
3Turn the jar over and bake for another 15 minutes. After the time is up, put on a pair of oven mitts and carefully remove the cookie sheet from the oven. Then, turn the jar over so that the open end is facing up and put it back into the oven. Bake it for another 15 minutes.[11]
- Do not touch the mason jar with your bare hands! It will be very hot and it will burn your skin.
-
4Remove the mason jar from the oven and let it cool. Use oven mitts to remove the cookie sheet from the oven and set it on a potholder or trivet. Then, let the mason jar sit on the cookie sheet until it’s completely cool. This will take about 20 to 30 minutes.[12]
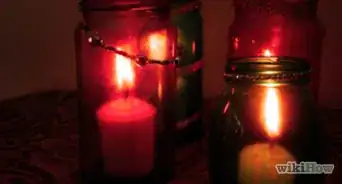
- After the mason jar is cool, use it for all your decorating needs!


Warnings
- Don’t store food in a mason jar after you paint or tint it.⧼thumbs_response⧽
Things You’ll Need
Coating a Mason Jar with Acrylic Paint
- Mason jar
- Acrylic paint
- Small bowl
- Spoon or fork
- Cardboard, paper towels, or newspaper
Tinting a Mason Jar with Food Coloring
- Mason jar
- Water
- Food coloring
- White school glue
- Small bowl
- Spoon or fork
- Paper towels, cardboard, or newspaper
Curing the Paint or Food Coloring
- Oven
- Cookie sheet
- Wax paper
- Oven mitts
- Trivet or potholder


References
- ↑ https://www.youtube.com/watch?v=2_gCXPB14v8&feature=youtu.be&t=35
- ↑ https://www.youtube.com/watch?v=2_gCXPB14v8&feature=youtu.be&t=81
- ↑ https://www.youtube.com/watch?v=2_gCXPB14v8&feature=youtu.be&t=81
- ↑ http://masonjarcraftslove.com/ball-mason-jars-painted/
- ↑ https://www.youtube.com/watch?v=2_gCXPB14v8&feature=youtu.be&t=120
- ↑ https://www.youtube.com/watch?v=KElzjix1n50&feature=youtu.be&t=30
- ↑ https://www.youtube.com/watch?v=KElzjix1n50&feature=youtu.be&t=45
- ↑ https://www.youtube.com/watch?v=KElzjix1n50&feature=youtu.be&t=60
- ↑ https://www.youtube.com/watch?v=KElzjix1n50&feature=youtu.be&t=80
About This Article