wikiHow is a “wiki,” similar to Wikipedia, which means that many of our articles are co-written by multiple authors. To create this article, volunteer authors worked to edit and improve it over time.
wikiHow marks an article as reader-approved once it receives enough positive feedback. In this case, 97% of readers who voted found the article helpful, earning it our reader-approved status.
This article has been viewed 137,451 times.
Learn more...
With a little patience and a lot of practice, you can create your own unique resin jewelry at home. Experiment with different designs and ideas to create pieces that express your personal style.
Steps
Preparing Your Embellishments and Supplies
-
1Prepare your workspace. You can utilize any desk or table, provided that it gives you enough space for your supplies. Cover the entire work area with wax paper.
- Resin drips and splashes will be very difficult to remove, so it's best to avoid the problem completely. However, if you do manage to get resin on a surface, a bit of isopropyl alcohol can usually remove it.
- You should also protect yourself by wearing rubber or plastic gloves and safety goggles.
- Always work in a well-ventilated area. Open windows and run fans to prevent the fumes from building up. If you have breathing difficulties, you may even want to wear a respirator designed to block or filter strong fumes.
-
2Find embellishments to add. Get creative. You can use flat two-dimensional objects and more elaborate three-dimensional objects. Almost anything can be put in resin, however, make sure that your intended arrangement will fit inside the resin mold or bezel.
- Popular ideas include broken or re-purposed jewelry, flowers, glitter, sprinkles, transparencies with words printed on them, scraps of fabric, scraps of ribbon, and decorative scrapbook paper. You can also buy special resin charms at craft stores or online.
- Some objects may not work as well as others, though. For instance, cured resin often obscures the facets of loose crystal gems, causing them to disappear inside the piece.[1]
Advertisement -
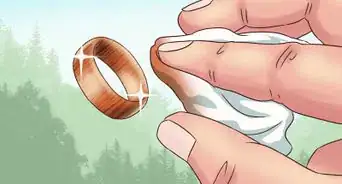
3Apply sealant to porous embellishments such as fabric and scrapbook paper. Coat the top, bottom, and sides of all porous embellishments with Mod Podge or a similar clear sealant. Let the sealant dry before using the embellishments.
- If you skip this step, these embellishments may discolor. They can also cause more air bubbles to appear in the resin.
-
4Trim everything down to size. When using transparencies and papers, make sure that the size of the piece precisely matches the dimensions of your mold or bezel.
-
5Determine whether to use molds or bezels. Bezels are easiest to work with since you don't need to remove the resin after it cures, but molds give you greater flexibility in design.
- Bezels are empty, open-ended charm settings. Once you pour the resin in and let it cure, the piece is finished and ready to attach to a chain.
- Molds will only allow you to shape the resin. You will need to take additional steps to turn the resin into a pendant or charm before using it, such as inserting hooks and clasps.
- Make sure that any molds you use are labeled specifically for use with resin.
-
6Coat molds with mold release. If you decide to use a mold, you need to spray the mold with mold release product. Let the mold release dry before continuing.
- Do not spray bezels with mold release. Mold release makes it easier for you to remove the finished resin pieces. Since the resin is supposed to stay inside the bezel, you'll want it to remain stuck in place as firmly as possible.
- Most silicone molds do not need mold release, however, it is required if you use plastic molds.
-
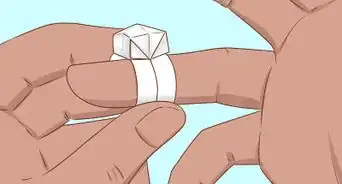
7Give the bezel a backing. If you decide to use a bezel, cut a piece of thick, sturdy packing tape and carefully stick it onto one side of the bezel.
- Make sure that the tape is secure and that there are no gaps between it and that side of the bezel.
- This is not necessary if you are using a mold or if the bezel is already closed on one side. Only follow this step if you are using a bezel with two open sides.


Preparing the Resin
-
1Choose the right type of resin. For best results, choose polyurethane casting resin, not polyester casting resin.[2]
- Polyester resin is more toxic and tends to retain an odor even after the pieces harden.
- To make the process easier, you should also make sure that the resin you buy is mixed in a one-to-one ratio with its catalyst.
-
2Place the resin and catalyst bottles in hot water. Fill a small bowl with hot tap water and rest the two bottles inside, keeping the contents of the bottles submerged beneath the level of the water.
- Do not use boiling water.
- Warming the resin and catalyst in this manner makes it easier to mix the two components smoothly. It also reduces the likelihood of dealing with air bubbles.
-
3Combine equal parts resin and catalyst. Combine the resin and catalyst in a small plastic or silicone measuring cup, adding equal parts of each. Stir continuously for two minutes using a wooden stick.
- Pay attention to the ratio specified in your resin's instructions. Some resins do not require 1:1 ratio, rather, they require a 1:2 or 2:1 ratio of resin to hardener.
- Follow the instructions that come with your resin for this step. Some resins may require more or less stirring time.
- Only mix as much resin as you expect to use. It will not stay in its liquid form for long, so if you make too much, it'll go to waste.
- Pour the resin in first, then follow it with an equal amount of the catalyst.
- Use a graduated measuring cup and measure out both components directly inside the cup.
- Old, clean cough syrup measuring cups work very well for this, but any graduated measuring cup should suffice. Make sure that you use a cup you don't mind sacrificing, though. It can be reused for other resin projects, but you should not reuse this measuring cup for food, drink, or medicine purposes.
- Stir slowly to prevent air bubbles from building up.
- Scrape the stick along the edges and bottom of the cup as you stir to ensure thorough, even mixing.
-
4Add color pigments if desired. If you want to create clear resin jewelry, no color pigment is needed. If you want to give each piece a tint of color, however, now is the time to add the pigment.
- Add liquid colors one drop at a time, stirring after each addition.
- Combine dry pigments such as mica powder with a little resin in a separate cup first, then combine the colored solution with the rest of the clear resin.
- Some dyes are clear, while others are opaque or even pearly.
- Most add-ins will not show up well if using pearly or opaque dyes.


Molding the Resin
-
1Pour a layer of resin in. Pour enough of the liquid resin mix into the mold or bezel to completely cover the bottom.[3]
- Work slowly to reduce the number of air bubbles.
-
2Remove any air bubbles. Hold a hair dryer, lighter, or heat gun roughly 4 inches (10 cm) above the resin for a minute or so. Any air bubbles trapped inside should rise to the surface and pop.
- Even though you'll be adding another layer of resin later, it's best to remove the air bubbles in this layer now instead of waiting until the end.
-
3Let the resin harden slightly before adding heavier embellishments. Wait 15 minutes or so, allowing the resin in your mold to harden slightly. Carefully place heavy three-dimensional objects on top of the bottom layer using tweezers.
- The bottom of the mold or bezel will be the front of your piece, so place the items in upside-down.
- By placing the heavy embellishments in between layers of resin, you help hold them in place. If you added them without using layers, the pieces would likely move around or sink before the resin sets.
-
4Cover with a final layer of resin. Pour additional resin over the heavy embellishments, covering them completely.
- This layer of resin should reach the top of the bezel or mold.
- You may need to adjust the position of your embellishments with a toothpick if they shift during this time.
-
5Add glitter, if desired. If you want a glittery background, sprinkle the glitter over the top of the mold or bezel after filling it with your final layer of resin.
- Glitter is small and light, so it should float on the surface of the resin as it dries. Since the top will later become the back of the piece, the glitter will create a background.
-
6Coat transparencies in resin before adding them. If you plan to add any transparencies, dip them in a little leftover resin before placing them in the mold.
- Use tweezers to dunk the transparency into the leftover resin in your measuring cup. Quickly dry the resin with your heat gun or hair dryer.
- Coating the transparencies will help reduce the risk of air bubbles forming between them and the resin in your mold.
- The bottom of your mold or bezel will end up being the front of your piece, so place the transparency in upside-down.
-
7Remove any air bubbles. As before, use your hair dryer or heat gun to gently bring any air bubbles to the surface, where they can pop.
-
8Add any paper backgrounds. If you plan to use a paper background, use tweezers to carefully place the paper over the top of the resin, aligning it as evenly as possible with the opening of the mold or bezel.
- Make sure that the paper is upside-down when you place it in so that the decorative side shows from the front of the piece.
-
9Let the resin cure. Set the filled mold or bezel aside and cover it with a clean box. Allow the resin to cure overnight.
- It is important to cover the resin as it cures to protect it from dust or other debris.
- Curing times can vary, so you'll need to follow the manufacturer's instructions. Only cure it long enough for the resin to be touchable. Do not wait until the resin is fully cured.
-
10Remove the resin charms from their molds. Once cured, you should be able to pop the resin pieces out of their molds using your fingers.
- If the pieces are still too soft to remove, try placing the mold in your freezer for 10 minutes. That should make it easier to pop the finished pieces out.
- At this point, the resin piece is ready to work with, but you'll need to take additional steps before you can wear it as jewelry.
-
11Remove the backing from bezels. If you used a bezel instead of a mold, you will need to peel off the tape from the back of the bezel once the resin cures.
- Do not remove the resin from the bezel.
- At this point, the resin charm is complete and ready to use as wearable jewelry.


Creating Bracelet and Necklace Charms
-
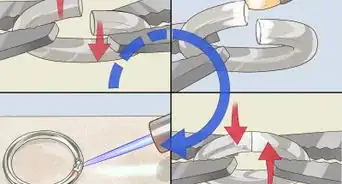
1Heat a metal eye pin. Grab the eye of an eye pin with pliers and carefully heat the metal over the flame of a candle or gas stove. Only heat the metal for about 5 seconds.
- Work carefully to prevent accidental burns.
- Use an eye pin that is just a little shorter than the width of the resin piece.
-
2Poke the metal into the resin charm. Grab the resin piece with one hand and carefully poke the straight side of the heated eye pin inside.
- Press the pin in until it extends roughly halfway through the resin piece.
- This will only work if the resin is only partially cured. If you allowed it to cure completely, it will be too hard and unyielding.
-
3Attach a jump ring to the loop. Once the metal eye pin is cool enough to touch with your bare fingers, slide a small jump ring into the eye.
- This completes the project and turns your resin piece into a wearable pendant or charm.


Creating Rings and Pins
-
1Glue the mount to the back of the resin. Apply quick hold contact adhesive to the top of the ring mount or pin backing. Press the mount or backing over the center back of your resin piece.
- Work quickly to prevent the adhesive from setting before it's attached to the resin.
- Keep the mount or backing as centered as possible.
-
2Let dry. Follow the adhesive manufacturer's instructions and let the adhesive set completely.
- This step completes the project and turns your resin piece into a wearable ring or brooch.


Community Q&A
-
QuestionCan I brush on casting resin to protect an item?
 Charl KoenCommunity AnswerYes, just ensure that the resin does not damage the item by testing on a small part or something similar. Resin can damage certain substances and paint.
 -
QuestionHello. After I remove my resin from the molds, it stays tacky. How do I remedy this?
 Elizabeth BolsterCommunity AnswerIf it is still tacky, it needs to sit longer. Keep it in the mold longer so it can have more time to harden.
 -
QuestionWhere can I get resin and molds?Elizabeth BolsterCommunity AnswerYou can find these products online. Some craft stores also carry these items.
Things You'll Need
- Wax paper
- Rubber gloves
- Safety goggles
- Various resin embellishments: broken jewelry, scrapbook paper, glitter, etc.
- Tweezers
- Sealant (such as Mod Podge)
- Scissors
- Resin molds OR bezels
- Mold release
- Packing tape
- Polyurethane casting resin
- Resin catalyst
- Graduated medicine cups
- Color pigments
- Hair dryer or heat gun
- Wooden popsicle stick
- Wooden toothpick
- Clean shoebox or plastic bin
- Eye pin
- Candle or gas stove
- Pliers
- Jump rings
- Chains
- Quick hold adhesive
- Ring backing
- Flat safety pins


References
About This Article
To make resin jewelry, start by combining equal amounts of polyurethane casting resin and a resin catalyst. Then, pour enough of the mixture into a jewelry mold to cover the bottom of the mold. Next, turn on a hair dryer and hold it 4 inches above the resin to remove any air bubbles. Let the resin harden for 15 minutes, then add your embellishments, such as flowers or feathers, and pour another layer of resin over the embellishment. Afterwards, use the hair dryer again to remove any bubbles, then cover the mold and let the resin cure overnight. To learn more, like how to remove your resin jewelry from the mold, scroll down!