This article was co-authored by Pippa Elliott, MRCVS. Dr. Elliott, BVMS, MRCVS is a veterinarian with over 30 years of experience in veterinary surgery and companion animal practice. She graduated from the University of Glasgow in 1987 with a degree in veterinary medicine and surgery. She has worked at the same animal clinic in her hometown for over 20 years.
There are 9 references cited in this article, which can be found at the bottom of the page.
wikiHow marks an article as reader-approved once it receives enough positive feedback. In this case, 86% of readers who voted found the article helpful, earning it our reader-approved status.
This article has been viewed 126,421 times.
Cat owners love to provide their pets with comfortable places to rest. However, store-bought cat furniture can be very expensive. Rather than running to the nearest pet store, try building your own cat furniture at home. A cute and comfortable cat bed can be constructed out of a suitcase, a sweater, or a cardboard box.
Steps
Building a Cat Bed out of Cardboard
-
1Find a box. Get a nice big cardboard box. You may be able to ask for one at your local supermarket. It must be in good condition, and must be big enough to hold your cat.[1]
-
2Remove the flaps from the box. Using a pair of scissors or a box-cutter, carefully remove the top “flaps” from the box. You may want to save these for future art projects. Leave the bottom “flaps” intact.[2]Advertisement
-
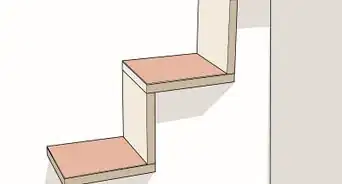
3Cut an opening in the front. You are going to create a U-shaped opening in the front of your box to act as a doorway for your cat. First, take a pencil and mark the location you plan to cut. Then, using your scissors or box-cutter, carefully cut this opening in your box.[3]
-
4Decorate the outside of the box. Using construction paper or fabric, and some craft glue, decorate the outside of your box. This will transform your cardboard box into an attractive cat bed.[4]
-
5Line the inside of the box. The final step is to create a soft area inside the box for your cat to rest upon. This may be a folded up towel, some quilt backing, stuffing, or a pillow the right size. Place your soft materials in the bottom of your box, and your cat bed is ready for use![5]


Creating a Cat Bed From a Suitcase
-
1Gather materials. You are going to need an old suitcase with hard sides (look at a thrift store), four wooden legs (which can be found at a hardware store), strong glue, some art supplies, and a small pillow (that can fit inside the suitcase).[6]
-
2Attach the legs. Turn your suitcase over so that the bottom is facing up. Then, apply some glue to bottom of each wooden leg, and affix each of them to the bottom of the suitcase (one near each corner.) Place some books or other heavy items on top of the legs, and allow the glue to dry (usually this takes about an hour).[7]
- Another option is to drill through the bottom of your suitcase and into the wooden legs.
- This is a good choice if your wooden legs came with screw holes, and if you are proficient with power tools.
-
3Place the pillow inside. Hopefully you have located a pillow that is roughly the same size as the inside of your suitcase. (You can look at thrift stores, home goods stores, or if you are feeling very adventurous, you can make your own.) Then simply place your pillow inside the suitcase.[8]
- Avoid pillows with tassels, sequins, or long strings that your cat may choke on.
-
4Make decorations. The inside lid of your suitcase-turned-cat-bed is a wonderful place for some cute decorations. You may want to cut pictures out of a magazine, or draw some images (e.g., little fish) on construction paper and cut them out.[9]
-
5Decorate the inside of the lid. Take the decorations you have created and arrange them on the inside of your lid. When you’ve figured out the best configuration, use some craft glue to stick your decorations down. Your cat bed is now ready to use![10]


Making a Cat Bed From an Old Sweater
-
1Gather materials. You are going to need a heavy-duty needle, yarn, stuffing, and an old sweater. Except for the sweater (which you can find at a thrift store), you can find all of these materials at a craft store. A good choice of material for the sweater is 100% wool, for warmth and comfort, but any material will do. If you have a sewing machine, you may want to use it, but it is not required.[11]
-
2Sew up the neckline of your sweater. Begin by flipping your sweater inside out. Then, sew along the neckline. (This closes the top of the sweater off so that you can stuff it later.) Finally, turn your sweater out the right way.[12]
-
3Sew a line from armpit to armpit. Visualize a line that moves from one armpit of your sweater to the other. You are going to sew both sides of your sweater together, across this line, using either your heavy-duty needle and yarn (or a sewing machine). Ultimately, you are creating a “tube” that runs all the way from one wrist-opening to the other. [13]
-
4Fill your "tube" with stuffing. After you have sewn the line from armpit to armpit, take your stuffing and insert it into one wrist of the sweater. Keep adding stuffing through the wrist-opening until you have a soft tube, that runs all the way from wrist to wrist. Now touch the wrists together to form a soft circle. This will form the "edge" of your cat bed.
-
5Sew the sleeves together. Once again, the “tube” of stuffing you have created is going to form the soft, plush edge of your cat bed. In order for this work, you need to sew the sleeves together, forming a loop. First, tuck one sleeve inside the other. Then, using your heavy-duty needle and yarn, sew around in a circle.[14]
-
6Attach the bottom. The “body” of your sweater will now form the bottom of your cat bed (where your cat will lay). Line up the “body” with the plush loop you have created, with the body fabric on the bottom. Any fabric that extends out farther than your plush loop is excess. Remove this excess fabric with scissors. Then, using your heavy-duty needle and yarn, attach the bottom to the loop.[15]


Warnings
- Watch out for any staples sticking out from your cardboard box or suitcase.⧼thumbs_response⧽
- Don't take it personally if the cat doesn't like it right away!⧼thumbs_response⧽
Things You'll Need
- Suitcase with hard sides
- Four wooden legs
- Heavy-duty glue (like Gorilla Glue)
- Small pillow
- Decorations (paper or fabric)
- A sweater
- Heavy-duty needle and yarn
- Stuffing
- A cardboard box
- Scissors


References
- ↑ http://www.thriftyfun.com/tf/Pets/Cats/Saving-Money-on-Cat-Beds.html
- ↑ https://www.youtube.com/watch?v=5NtqB0ulQG0
- ↑ https://www.youtube.com/watch?v=MNjjfOjGkQ4
- ↑ https://www.youtube.com/watch?v=5NtqB0ulQG0
- ↑ http://www.thriftyfun.com/tf/Pets/Cats/Saving-Money-on-Cat-Beds.html
- ↑ https://www.youtube.com/watch?v=CdYtz5l3Al0
- ↑ http://www.hgtv.com/design/make-and-celebrate/handmade/how-to-make-a-vintage-suitcase-pet-bed
- ↑ http://www.hgtv.com/design/make-and-celebrate/handmade/how-to-make-a-vintage-suitcase-pet-bed
- ↑ https://www.youtube.com/watch?v=CdYtz5l3Al0
- ↑ https://www.youtube.com/watch?v=CdYtz5l3Al0
- ↑ https://www.youtube.com/watch?v=6Wa2D6QaYEg
- ↑ http://www.handimania.com/diy/sweatshirt-pet-bed.html
- ↑ https://www.youtube.com/watch?v=6Wa2D6QaYEg
- ↑ http://www.icreativeideas.com/how-to-diy-pet-bed-from-old-sweater/
- ↑ http://www.icreativeideas.com/how-to-diy-pet-bed-from-old-sweater/
About This Article

If you want to make a bed for your cat, find a big, sturdy box and carefully cut off the top flaps. Cut a U-shaped opening in the front of the box, extending from the top to about 3/4 of the way down one side of the box. If you’d like, you can decorate the outside of the box with construction paper or fabric. Then, line the inside of the box with a folded towel, quilt backing, or a thin pillow. Place the bed in a quiet place so your cat will have a comfortable place to rest! Keep reading for tips from our Veterinary co-author on how to make a cat bed out of a suitcase!