This article was co-authored by wikiHow Staff. Our trained team of editors and researchers validate articles for accuracy and comprehensiveness. wikiHow's Content Management Team carefully monitors the work from our editorial staff to ensure that each article is backed by trusted research and meets our high quality standards.
The wikiHow Video Team also followed the article's instructions and verified that they work.
This article has been viewed 36,144 times.
Learn more...
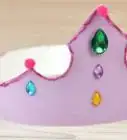
Crafting a crown is a fun way to pass an afternoon with a child, or to add a finishing touch to a royal costume. Making a king’s crown can easily be accomplished using common household items. Get started by measuring the head of the person who is wearing the crown. Then, use strips of cardstock and construction paper to create the crown. Give the crown a personal touch by decorating it using markers, glitter, rhinestones, or fabric.
Steps
Making the Base of the Crown
-
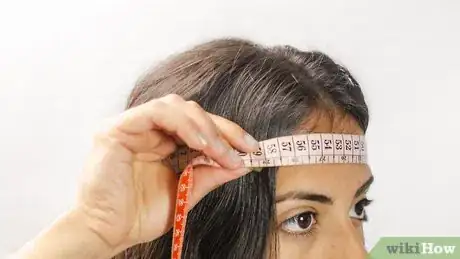
1Measure the circumference of your head using a tailor’s tape measure. Wrap the tape measure around the top of your head, so that the measurement goes horizontally across your forehead. Then, jot the measurement on a scratch piece of paper.[1]
- If you do not have a tailor’s tape measure, take a piece of string and wrap it around your head and then measure the length of the string.
- If you are helping someone else make the crown, measure the head of the person who will be wearing the crown.
-
2Cut a 3–4 in (7.6–10.2 cm) wide strip of poster board to fit around your head. Use a ruler and a pencil to draw a line across the poster board that matches the head measurements. Add at least 2 in (5.1 cm) of extra length to the strip so you will be able to overlap the ends and secure them. This will be the interior band of the crown. Make the strip 3–4 in (7.6–10.2 cm) wide to give the base ample support. Then, use a pair of scissors to cut out the measured strip.[2]
- If you do not have a poster board, use a thin piece of cardstock or glue 2 pieces of construction paper together. Use a washable glue stick or liquid glue.
Advertisement -
3Cut a 5–6 in (13–15 cm) wide strip of construction paper to fit around your head. Pick a color of construction paper that you want the outside of your crown to be, as this strip of construction paper will be the exterior of your crown. Then, measure and cut a strip that is 2 in (5.1 cm) longer than your head measurement, and about 5–6 in (13–15 cm) wide. The wider the strip is, the taller the points will be on your crown.[3]
- Since a standard piece of construction paper is only 12 in (30 cm) long, you may need to use 2 similarly colored sheets to accomplish this. Simply overlap the 2 sheets of construction paper and secure with clear tape or washable glue.
-
4Layer the interior and exterior strips so the bottom edges align and secure them together. Take your strip of poster board and rest it on top of the strip of construction paper. Make sure the bottom edges and both sides line up. Then, use washable glue or double-stick tape to secure the pieces together.[4]
-
5Use scissors to cut a zigzag across the exposed top of the construction paper. Only cut into the width of the exposed construction paper, as cutting the cardstock will lessen the sturdiness of the crown. Make the points of each triangle as wide or as narrow as you want. Alternate between wide and narrow points, or have every triangle equilateral.[5]
- To better visualize your particular design, use a ruler and a pencil to draw it along the construction paper before cutting it.
- Add little embellishments to the top of each triangular point. For instance, you can cut out little circles, crosses, or fleur-de-lis at the top of each point around the crown.
- Instead of the traditional triangular points, have fun creating a design unique to your crown. For example, create a wave around the crown to make the design more fluid like water.
Decorating Your Crown
-
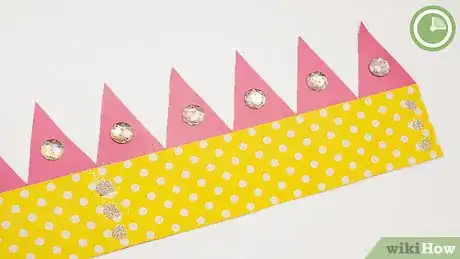
1Decorate the outside of the crown to reflect your personality or costume. Use stickers, markers, crayons, rhinestones, glitter, or small shapes cut from construction paper to decorate the outside of your crown. Try to lay out all of your decorations before gluing them down. This way you can play around with the design.[6]
- Glue heavier items like beads or rhinestones along the bottom half of the crown that is supported by the interior cardstock band. Otherwise, the weighty items will bend the construction paper points.
-
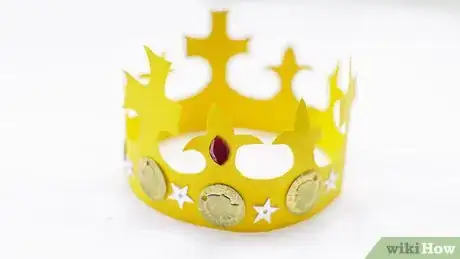
2Design a traditional yellow crown that has colored rhinestones for gems. Encircle the crown with a line of brightly colored rhinestones. Place them about 1 in (2.5 cm) above the bottom edge of the crown, and leave 1–2 in (2.5–5.1 cm) of space between them.[7]
- Use clear tape or washable glue to attach a circle of red felt into the center of the crown. This will make the crown look even more regal.
-
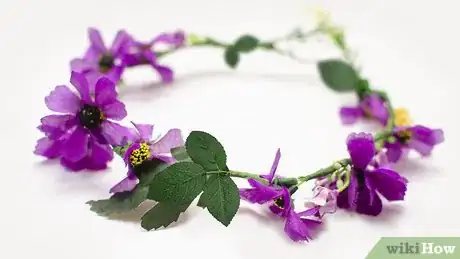
3Glue some fabric leaves onto a green colored crown to make it nature inspired. Use various green, orange, and red colored leaves. Arrange the fabric leaves around the base of the crown to make them the focal point. Then, use a brown marker to draw branches along the points of the crown. Alternatively, place the leaves just beneath the points of the crown. Then, use fake moss to frame the base of the crown.
- Purchase an assortment of inexpensive fabric leaves and fake moss at a local craft store, or online through major retailers.
- Instead of fabric leaves, cut some out of green, red, and orange construction paper.
-
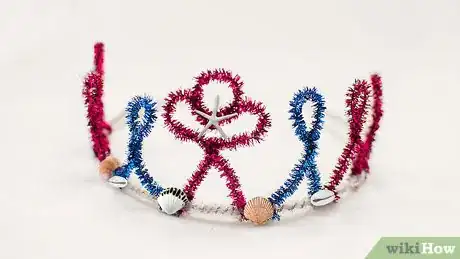
4Make an oceanic crown by decorating it with seashell cutouts. Draw and cut variously shaped seashells from white construction paper. Use them to line the base of a blue crown. Add additional cutouts of red coral or green seaweed to finish decorating the points of the crown.
- If you have access to real seashells, you can use those to decorate the crown instead. Just make sure to only glue the real seashells around the base of the crown to avoid bending the points.
-
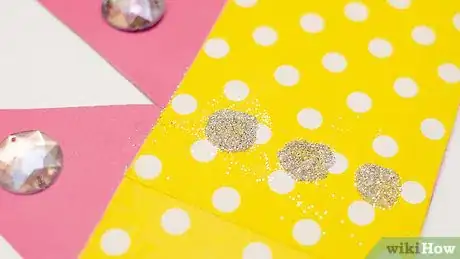
5Add some sparkle to your crown by outlining it with glitter glue. Place a piece of newspaper underneath the crown to keep your work surface clean. Then, carefully apply your favorite color of the glitter glue to the crown. Outline the crown to give it dimension or draw simple shapes to represent glittering jewels.[8]
- Purchase glitter glue either in a squeeze applicator or a jar at a local craft store or online with major retailers. If you get glitter glue that is in a jar, make sure to also get a paintbrush so you can easily apply it to your crown.
-
6Allow any glue on the crown to air-dry for 30-60 minutes. If any item seems loose once the glue is dry, add some more of the washable glue to the base of the item. Then, allow the crown to dry for another 30 minutes.
- If you did not use any glue to decorate your crown, you do not have to let it air-dry.[9]
-
7Join the ends of the crown so it forms a ring and secure it with washable glue. The ends of the crown should overlap about 1 in (2.5 cm) or less with your design facing outwards. Use a washable glue stick or liquid glue to secure the overlapped ends. Hold the seam closed for 1-2 minutes to give the glue a chance to dry.[10]
- If needed, reinforce the inside of the seam with clear tape.
Community Q&A
-
QuestionWould this work for Halloween?
 Chloe LeeCommunity AnswerIt probably works for Halloween but might be better for like Father's Day or his/her father's birthday.
Things You’ll Need
- Thin cardstock or poster board
- Construction paper
- Scissors
- Washable glue, either a glue stick or liquid glue
- Coloring utensils like crayons, paint, markers, or pencils
- Assorted decorating items like stickers, glitter, rhinestones, and buttons
- Tailor’s tape measure
- Ruler and a piece of string (optional)
References
- ↑ https://www.firstpalette.com/Craft_themes/Wearables/royalpapercrown/royalpapercrown.html
- ↑ https://www.dltk-kids.com/crafts/mcrown.htm
- ↑ https://www.dltk-kids.com/crafts/mcrown.htm
- ↑ https://www.dltk-kids.com/crafts/mcrown.htm
- ↑ https://www.firstpalette.com/Craft_themes/Wearables/royalpapercrown/royalpapercrown.html
- ↑ https://www.firstpalette.com/Craft_themes/Wearables/royalpapercrown/royalpapercrown.html
- ↑ https://www.firstpalette.com/Craft_themes/Wearables/royalpapercrown/royalpapercrown.html
- ↑ https://www.firstpalette.com/Craft_themes/Wearables/royalpapercrown/royalpapercrown.html
- ↑ https://www.firstpalette.com/Craft_themes/Wearables/royalpapercrown/royalpapercrown.html
About This Article
To make a king’s crown, start by measuring the top of your head with a tape measure so you know how big to make it. Then, cut out a 5-inch-wide strip of construction paper. Make it a couple of inches longer than your head measurement so you can fasten it later. Once you’ve cut the paper out, cut a 3-inch-wide strip of poster board or cardstock and stick it to the bottom of the paper's long end with glue or double-sided tape. At the top of the paper, cut a zigzag pattern to make it look like a real crown. Once you’ve done that, you can decorate it however you want, using stickers, crayons, or glitter. When you’ve finished decorating it, overlap the ends an inch and glue them together to finish your crown. For more tips, including how to make a crown with leaves and flowers, read on!
