This article was co-authored by wikiHow Staff. Our trained team of editors and researchers validate articles for accuracy and comprehensiveness. wikiHow's Content Management Team carefully monitors the work from our editorial staff to ensure that each article is backed by trusted research and meets our high quality standards.
There are 8 references cited in this article, which can be found at the bottom of the page.
This article has been viewed 40,407 times.
Learn more...
Paracord is a type of stretchy rope used as suspension and parachute cables. Because of their uniquely knotted look, some people enjoy taking these cords and turning them into arm bracelets. Although it requires some knowledge of what you're doing to do so, making a paracord bracelet will give you an edge up if you're in any survival situation. Having ten or twenty feet of the stuff around your wrist can come in handy for virtually all kinds of situations.[1] King Cobra paracord bracelets are the most recommended kind of paracord bracelet to make for the facts that they store a lot of cord.
Steps
Making Your Bracelet
-
1Pick up some paracord. The amount of paracord you'll need depends on the size you want your bracelet to be. It's a good idea to put one foot of cord aside for every inch of bracelet. Measure your wrist with measuring tape and gauge how much you think you'll need based on that.
- Paracord can be purchased relatively cheaply from a wholesale outlet. You can get 50 feet of it for as little as 3.99 USD.[2] This roughly equals to about $1 per bracelet.
- There are different gauges of paracord. The most reliable and recommended of these is Paracord 550, a military-certified grade that supports up to 550 pounds of weight.[3]
-
2Stretch out a piece of paracord.[4] Bracelets start with a straight piece of paracord. It helps to measure out this paracord to make sure it will fit relatively well around your wrist. Keep in mind, however, that upgrading to a king cobra bracelet will make the bracelet a lot bigger. You should make sure you leave some room in between the bracelet and your wrist for the extra rope.Advertisement
-
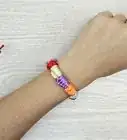
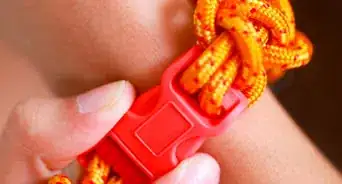
3Attach a buckle on either end.[5] Paracords are well-suited for making ties. If you include a bucket device on either end of your cord, you'll be able to attach it to your wrist and deploy it comfortably.
-
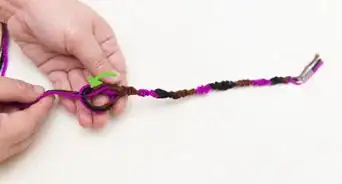
4Intertwine two cords around the foundation. A lot of your bracelet making will be spent alternating between tying two cords around the foundation of your work. Pull two separate cords through the top loop of your foundation, and entwine them down the length of the cord. Wrap one around one end of it, and take the cord from the opposing side and do the same. Alternate between the two as if you were lacing a shoe.
- Each opposing cord should make a loop shape for the other one to go through. This will result in a sequence of knots going down the length of the foundation.
- It's a good idea (but not necessary) to make the two cords different colours. Not only does this add a visual flair to your bracelet, you'll be able to identify more easily if you slip up in the knotting process.
-
5Gauge the tightness.[6] As you coil your cords around the bracelet, you should keep your bracelet's desired flexibility in mind. The tighter you pull the knots in place, the more rigid it will be. A certain level of rigidity is wanted in bracelets, but flexibility will allow it to hug the shape of your wrist. A fine balance between the two is often best.
- After making a few coils, feel the bracelet so far for a basic idea how your current knot tightness is affecting the flexibility.
-
6Melt the loose ends with a lighter.[7] When you've coiled the ropes across the full length of your bracelet, it's time to tie up loose ends. To do this, simply take a lighter to the ends and melt them. This will create a makeshift finish to the cords. If you've coiled the cords tightly enough around the foundation, there shouldn't be any risk of it coming apart.
- After melting the lighter, you should press on the end with the flat end of a wet knife. This will prevent the ends from fraying.[8]


Upgrading to a King Cobra
-
1Ready your basic paracord bracelet. A basic cobra bracelet is easy to make, but it doesn't leave a lot of paracord for you to use in survival situations. A king cobra bracelet is built on the foundations of a regular bracelet. You should make sure your basic bracelet is in solid shape before moving on with the king cobra.
- Supplies for a king cobra are roughly double that of a regular cobra bracelet. For example, if you had a 9 inch bracelet using 9 feet of cord, you'll need 18 feet for your king cobra.
-
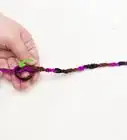
2Wrap fresh cords around the cobra bracelet. Making a king cobra bracelet is arguably easier than the basic cobra as your knots will have more room to link around. Wrap a cord around and tie it off at one end. Pull it diagonally downward and make another knot. Continue these basic steps until you've coiled your new cords around the span of the basic cobra bracelet.
- It's a good idea not to make these knots too tight. That way, you'll still be able to unfurl them without too much hassle if it comes time to use it.
-
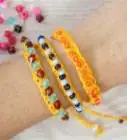
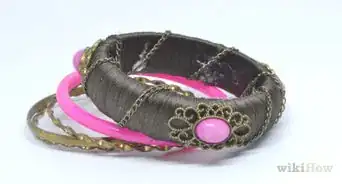
3Use two or more colours of paracord. The King Cobra paracords will be what defines the look of your bracelet. For the sake of adding beauty to your bracelet, you should use more than one colour. When you intertwine the cords together, it will result in an elaborate pattern.
-
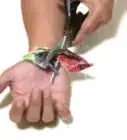
4Cut off loose ends. Although the regular cobra cords are often made a permanent part of the bracelet, a king cobra bracelet is meant to be unfurled. Cut off whatever excess length you have with a knife or some scissors. Melt the ends with a lighter to prevent them from fraying, and cool the molten edges with a wet knife.
-
5Take it out with you. Although some may prefer to keep their paracord bracelets simply for show, a king cobra bracelet is essentially made for survival use. The king cobra layer of your work can be uncoiled and used however you'd like. Hunting, fishing, camping and climbing are but a few of the uses you may have for it.
- Alternatively, you can leave it for decoration's sake if you want. Paracord bracelets are good because of their practical uses, but some people prefer to leave it as a clothing accessory.
-
6Buy a premade paracord bracelet. If you're pressed for time and aren't into crafts projects, you can buy the bracelets in an already-made form professionally. Outlets like Gorilla Paracord specialize in paracord-related survival gear.
- There's a paracord community on eBay as well. You might try looking for an all-encompassing paracord kit.[9]


Community Q&A
-
QuestionIs it alright to use yarn?
 T. ChinsenTop AnswererNo. Paracord is denser than yarn and holds its shape when tied. Most yarns are spun and twisted, while paracord is woven to provide strength. Substituting yarn will result in a much thinner bracelet, and it will not be stretchy or as sturdy as paracord.
Warnings
- King cobra bracelets aren't as easy or comfortable to wear as a basic cobra bracelet. They're only really recommended if you'll be using them for a practical sake.⧼thumbs_response⧽
-Step-12.webp)
References
- ↑ http://paracordtime.com/
- ↑ http://www.homemade-gifts-made-easy.com/cobra-stitch.html#kingcobra
- ↑ https://www.paracordpaul.com/king-cobra-vs-cobra-275-cord-vs-550-paracord-size-comparison/
- ↑ http://paracordtime.com/cobra-paracord-bracelet/
- ↑ http://paracordtime.com/cobra-paracord-bracelet/
- ↑ http://www.homemade-gifts-made-easy.com/cobra-stitch.html
- ↑ http://www.homemade-gifts-made-easy.com/paracord-lanyard.html
- ↑ http://www.homemade-gifts-made-easy.com/paracord-lanyard.html
- ↑ http://www.ebay.com/bhp/king-cobra-paracord-bracelet
About This Article