X
wikiHow is a “wiki,” similar to Wikipedia, which means that many of our articles are co-written by multiple authors. To create this article, 13 people, some anonymous, worked to edit and improve it over time.
This article has been viewed 43,587 times.
Learn more...
Data packs provide an easier way for players to customize their game in Minecraft. They allow the customization and addition of new advancements, loot tables, recipes, structures, and more. This article provides a basic introduction to data packs and a few of their uses so that players may learn to customize and enhance their own Minecraft experience.
Steps
Part 1
Part 1 of 5:
Creating Necessary Files
-
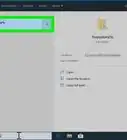
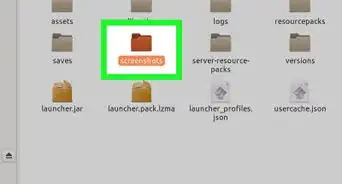
1Open up a Minecraft world folder. You can do this by typing in %appdata% in your Windows search bar and hitting enter. Then, click the .minecraft folder and then the saves folder.
-
2Open up your world's data packs folder. Open the world's folder and then click on the data packs folder inside. This will be where the data pack will be created.Advertisement
-
3Create a folder for your data pack. Create a new folder and name it what you would like your data pack to be called.
-
4Create an MCMETA file. Create a new text document and rename it to pack.mcmeta. Make sure that you are changing not only the document name but the extension name as well. You should get a message warning that changing the file name extension might make it unusable.
-
5Make sure that your MCMETA file is the correct extension. You can make sure of this in Windows Explorer by clicking "View" and making sure the box next to "File name extensions" is checked. This will allow you to see the extension of every file on your computer.
-
6Open the MCMETA file with any text editor and enter the text shown above.
- This will work in Notepad but it may be more convenient to use a text editor like Notepad++.
- The number next to "pack" depends on which version of Minecraft you will be running this data pack on. If your version is 1.16.2, keep the number as 6. If your version is 1.17, change the number to 7. If your version is 1.15-1.16, change the number to 5. If your version is 1.13-1.14, change the number to 4. If your version is 1.16.2 or newer, keep the number as 6. If your version is 1.15-1.16, change the number to 5. If your version is 1.13-1.14, change the number to 4.
- The text next to "description" is what will show up in the game when you highlight your mouse over the data pack. The description can be changed to anything but keep in mind that files like these may only contain letters, numbers, underscores, hyphens, forward slashes, and periods.
-
7Create a data folder. Inside your data pack folder, create a folder called data. The two items inside of your data pack should be the data folder and the MCMETA file.
-
8Create a Minecraft folder. Inside your data folder, create a new folder called Minecraft. This is where you will be putting the rest of your files for your data pack.


Advertisement
Part 2
Part 2 of 5:
Modifying a Mob's Existing Loot Table
-
1Create a folder inside the Minecraft folder called loot_tables. This is where you will be putting any folders that modify the current loot tables in the game.
-
2Create a folder inside the loot_tables folder called entities. This is where you will be putting any files that modify the current loot tables for entities in Minecraft.
-
3Find the .jar file for the version of Minecraft that you are working with. You can access this by typing %appdata% in your Windows search bar and going to .minecraft\versions and selecting the version you are working with.
-
4Open the Minecraft versions .jar file with a program like WinRAR or 7-Zip. This will allow you to view all of the files inside of this specific version.
-
5Open the entities loot tables folder. You can do this by going to data\minecraft\loot_tables\entities. This will allow you to see the files for the loot tables of all entities in the game.
-
6Choose the entity file for the loot table that you want to modify. Select the file and copy and paste it into your entities folder inside your own data pack.
-
7Open the entity's file in a text editor. Here you can see many things that affect the loot table of that given mob. The essential information that can be gathered from this is as follows:
- "rolls": This is how many times that particular table will be rolled. This may affect how many of those items the player may receive.
- "min" and "max": These are the minimum and maximum amounts of a particular item that an entity may drop.
- "name": This is the item that the entity will drop when the loot table is activated.
- "condition": This is the action that will cause the entity's loot table to be rolled. The current default for entities is "minecraft:killed_by_player"
-
8Look up namespace IDs for possible items to include in the modified loot table. You can see a list of all items by starting to type out the command /give player minecraft. In order for a list of item IDs to pop up, you must be in a world that has cheats enabled.
-
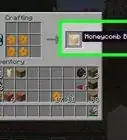
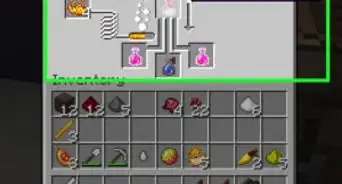
9Make desired changes to the entity's loot table. When making basic modifications to loot tables it is highly recommended to stick to changing values and names instead of trying to add new lines of text. In this example, the rabbit loot table is changed to drop 1 blaze rod when killed. This can be shown by changing the "name" value to "mineraft:blaze_rod".
-
10Save the file and test in the game. Save the text file and open the world in order to test and see if the loot table was successfully changed. Type the /reload command to reload the world's data packs and spawn a mob and kill it in order to make sure that the data pack was successful.


Advertisement
Part 3
Part 3 of 5:
Modifying a Crafting Recipe
-
1Create a folder inside the Minecraft folder of your data pack called recipes. This is where any modified recipes will be included in the data pack.
-
2Find the .jar file for the version of Minecraft that you are working with. You can access this by typing %appdata% in your Windows search bar and going to: .minecraft\versions and selecting the version you are working with.
-
3Open the Minecraft versions .jar file with a program like WinRAR or 7-Zip. This will allow you to view all of the files inside of this specific version.
-
4Open the recipes folder. You can do this by going to data\minecraft\recipes. This will allow you to see the files for all of the recipes for any given block in the game.
-
5Copy and paste the desired recipe into the recipes folder of the data pack. Make sure that the selected recipe is the desired one. Some items have multiple recipes in game and may have multiple files in the version's recipes folder. An example would be andesite slabs having two recipes: one from the crafting table and another from the stonecutter.
-
6Open the recipe's file in a text editor. There are a few things to note about a given crafting table recipe.
- "pattern": This is the pattern of the crafting recipe shown by a 3x3 grid identical to the grid seen in the game. If a recipe doesn't fill in the entire 3x3 grid, it will be able to be crafted in any row or column of the crafting grid. The pattern can be made using the item key below. Keep in mind that the quotations include a grid. This means that it is very important to leave spaces where necessary in order to keep the desired recipe.
- "key": This is where the items are defined. The character shown above the item is what will be used in the crafting recipe.
- "result": This is the item that will be crafted once the recipe is completed.
-
7Make desired changes to the recipe. Once again, it is highly recommended to stick to modifying current lines of text instead of adding new ones. If adding another item to the recipe is necessary, make sure that there is a comma after every item except for the last one. If you forget a comma, the recipe will not work. If there is only one item in the recipe, a comma is not needed. The example above shows a modified recipe for a cake. The modified recipe includes a horizontal line of milk buckets.
-
8Notice the difference between shaped and shapeless crafting recipes. If a shapeless recipe was selected, it will look slightly different. The "item" in the ingredients bracket shows which item will be the input and the "item" in the result bracket shows the item that will be the output. The count at the bottom shows how many of the result item will be crafted.
-
9Save the file and test in game. Save the text file and open the world in order to test and see if the loot table was successfully changed. Type the /reload command to reload the world's data packs and test out the recipe in a crafting table to make sure the change was successful.


Advertisement
Part 4
Part 4 of 5:
Changing a Block's Loot Table
-
1Create a folder inside the loot_tables folder called blocks. This is where any modified loot tables of blocks will be placed. A block's loot table is the block that will be dropped when a player mines it.
-
2Find the .jar file for the version of Minecraft that you are working with. You can access this by typing %appdata% in your Windows search bar and going to: .minecraft\versions and selecting the version you are working with.
-
3Open the Minecraft versions .jar file with a program like WinRAR or 7-Zip. This will allow you to view all of the files inside of this specific version.
-
4Open the blocks loot tables folder. You can do this by going to data\minecraft\loot_tables\blocks. This will allow you to see the files for the loot tables of all blocks in the game.
-
5Choose the block file for the loot table that you want to modify. Select the file and copy and paste it into your blocks folder inside your own data pack.
-
6Open the block's file in a text editor. Here you can see many things that affect the loot table of that given block. The essential information that can be gathered from this is as follows:
- "rolls": This is how many times that particular table will be rolled. This may affect how many of that item the player may receive.
- "type": This decides which item can be dropped. For example if a grass block is mined with a silk touch enchanted pickaxe it will drop a grass block, but if it is mined with anything else, it will drop a dirt block.
- "name": This is the item that will drop based on the given type.
-
7Look up namespace IDs for possible items to include in the modified loot table. You can see a list of all items by starting to type out the command /give player minecraft. In order for a list of item IDs to pop up, you must be in a world that has cheats enabled.
-
8Make desired changes to the block's loot table. When making basic modifications to loot tables it is highly recommended to stick to changing values and names instead of trying to add new lines of text. In this example, the birch planks block loot table is modified. The change involves a diamond shovel dropping when a birch plank is mined.
-
9Save the file and test in game. Save the text file and open the world in order to test and see if the loot table was successfully changed. Type the /reload command to reload the world's data packs and break the specific block in order to test and see if the data pack was successful.


Advertisement
Part 5
Part 5 of 5:
Moving Your Data Pack to Other Worlds
-
1Open the world folder that holds you data pack. You can either do this by going to the same folder that you were working with. Or you can go to the Minecraft main menu and click on edit and then open world folder for that particular world.
-
2Open the data packs folder inside the world and the data pack will be there. The data pack can be copy and pasted into any world and will work as long as the versions are the same.


Advertisement


About This Article
Advertisement