X
wikiHow is a “wiki,” similar to Wikipedia, which means that many of our articles are co-written by multiple authors. To create this article, 11 people, some anonymous, worked to edit and improve it over time.
This article has been viewed 49,721 times.
Learn more...
Say farewell to your boring notebook cover that looks just like everyone else's. It's time to make this book your own! We'll talk about fabric covers, washi tape, glitter, decoupage, and more.
Steps
Part 1
Part 1 of 2:
Using Felt or Fabric
-
1Take the notebook's measurements and cut your fabric to match. Any size notebook will be just fine. Start by measuring around the spine, back to front. Whatever number you get, add 8" (16 cm). You'll need the extra to wrap it around later. As for from top to bottom, add 1/2" (1.25 cm). If your notebook was 5x11, your final results are 5 1/2" wide by 19 inches tall.
- You can either use one or two pieces of fabric/felt. For felt, you generally only need one; for fabric, you may want to use two thin pieces so each side is pretty. If this is the case, cut out two and sew them together, each exposing their pretty side.
- You could also use an old t-shirt!
-
2If you'd like a pen holder, form one now. (If you don't need this step, skip it.) Grab your favorite pen and cut a piece of felt that's about 3" (7.5 cm) long and extends about 1" from your pen on both sides.
- Place the notebook, open, centered on the fabric. Wrap the sides around it snugly. Looking at the outside edge of your front cover, mark where you would like your pen holder to be attached (a washable marker is good for this). You should be drawing a line down the edge of the right-hand side.
- Cut a slit along said line.
- Insert the pen into the small rectangle of fabric to know how snug it needs to be.
- Pin the edges in place and sew along the very edge with a machine. The ends should lightly curve toward the fold on the edge.
- Cut off any extra material. Done!
Advertisement -
3If you're going to sew a design on the front, do so at this point. Because later the flaps will be sewn down and you won't be able to -- decisions, decisions! You could do more fabric or felt shapes or you could sew on some cute buttons! Since fabric shapes are self-explanatory (cut to shape, sew on), we'll cover adding buttons:
- Put a couple of dabs of glue (just dabs!) on your button. Place where you'd like it on your cover. Repeat for all the buttons until your design is glued down in place. Let dry.
- Sew the buttons to the felt, with 2 or 3 stitches through each button.
-
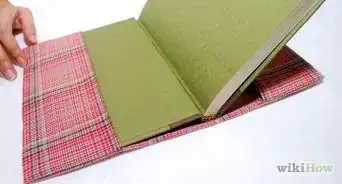
4Place the cover face down on a flat surface. Fold in the sides of the cover (the part that flaps over the insides) and set with pins.
- You may need to recenter with your notebook to double-check how big your flaps should be.
-
5Blanket stitch along the top and bottom sides of the cover. Pearl cotton embroidery thread works well with felt. Start at one corner, end at the other, and repeat for the other side.
- Hand sewing works, too, it just takes more time and diligence. Remember to stay within 1/4" of the edge on each sides to leave room for your notebook!
-
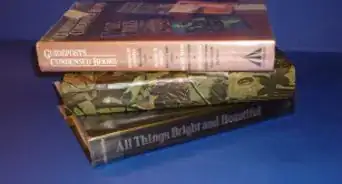
6Slide your notebook into the pockets. Tada!


Advertisement
Part 2
Part 2 of 2:
Exploring the Extras
The following are ideas if you already have a notebook cover, but it's just plain ol' boring. You could also take a gander at wikiHow's How to Decorate Your Notebook for details.
-
1Use washi tape. With the only materials needed being tape and scissors, this method's only downfall is the precision and time it takes. But if you have an afternoon to spare, you can create a design that's intricate, beautiful, and straight up impressive. Washi tape is like normal tape, only it's patterned and sturdy.
- The idea here is to have several different patterns of tape cut into different geometrical shapes (triangles, generally). A hundred carefully placed pieces of tape combine to form one amazing, abstract masterpiece. If you've a steady hand, give it a shot!
-
2Use your decoupage skills. Have some colored, pretty paper lying around? Or some sheet music, maybe a book you tear up? Even some wrapping paper? Excellent. With a glue stick, some varnish (decoupage glue is 1 part water to 1 part white glue), and a brush, you're set!
- Cut your paper into pieces -- or rip it for a distressed look. You can make it totally haphazard or more patchwork-y.
- Glue each piece down to your cover, overlapping a tiny bit. Make sure the papers on the edge wrap around the side, leaving none of the original cover visible when the notebook is turned over or inspected.
- Be sure to press out the air bubbles as you glue each one down.
- Put one or two coats of varnish on the entire thing. Let dry and you're finished!
-
3Add your favorite quote. If your notebook cover is papery (plastic won't work), there's an easy way to make it uniquely you: add your favorite quote!
- In Photoshop (or similar program), write out your favorite quote in the font and design you like. Make sure the dimensions match the size of your notebook cover.
- Print out the paper and attach it the front of your notebook with a piece of transparent tape to keep the design from moving. Make sure the tape doesn't cover any of the letters.
- Pressing down firmly with a ballpoint pen, trace the letters. Check near an edge to see if the ink is lightly transferring, creating a stencil.
- Once you're finished tracing, remove the cover and the tape.
- Paint your letters with acrylic paints. If you'd like, take a black scrapbooking pen and outline them. Cover each letter with a layer of glossy varnish to seal and let dry.
-
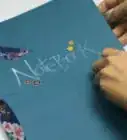
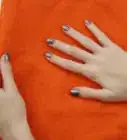
4Go for glitter. When in doubt, glitter to the rescue. With modge podge and a brush, you can create shiny, sparkly designs that will be totally transfixing. Just apply your modge podge to the cover wherever you want your first color. Dunk in glitter and let dry. Then modge podge the next area, dunk in glitter, and let dry. Repeat this for as many colors as you'd like!
- A sponge brush works best, but a paintbrush will work, too. If you're in a hard spot, you could even use your fingers. Just keep a bowl of water and a towel nearby!
-
5Finished.


Advertisement
Community Q&A
-
QuestionIf my notebook cover fell off, how can I attach a new one?
 Ravenwolf123Community AnswerYou could use anything you like that may work. Some materials you could use are glue or paste, tape, staples et cetera.
 -
QuestionWhere can I get this stuff?
 Goodvillain034Community AnswerYou should be able to get these things at local craft or superstores. I got the materials from Walmart.
Advertisement
Things You'll Need
- Notebook
Optional materials:
- Felt
- Sewing supplies
- Scissors
- Washable marker
- Ruler
- Buttons
- Glitter
- Decoupage materials
- Washi tape
- Paper and acrylics


References
About This Article
Advertisement