wikiHow is a “wiki,” similar to Wikipedia, which means that many of our articles are co-written by multiple authors. To create this article, 12 people, some anonymous, worked to edit and improve it over time.
The wikiHow Video Team also followed the article's instructions and verified that they work.
This article has been viewed 246,546 times.
Learn more...
Listening to your favorite songs or podcasts can make it seem like getting a good-quality recording is a cinch. Try it yourself, however, and you'll find that it's not easy without the right equipment and techniques. Luckily, one essential piece of equipment — the pop filter — is easy to make with household materials. With your new filter, you'll be able to get rid of the pesky "popping" that can result from "P" and "B" sounds in a recording.[1]
Steps
Wire and Pantyhose Filter
-
1Bend a wire coat hanger into a circle. Pull the "bottom" of the triangle part of the hanger away from the hook like a bow and arrow. You should now have something roughly square-shaped.
-
2Keep pulling on the flat sides to make something more circular — it doesn't have to be perfect.
- If you're having difficulty bending the wire, try using a pair of pliers to get a better grip. If you have a vice, you can also grab one part of the hanger in the vice and pull the other side.
Advertisement -
3Pull a pair of tights or pantyhose over the circle. Pull them as tight as possible to get a flat, drum-like surface. Gather the extra slack around the hanger's hook. Use tape or rubber band to hold the slack and keep the stretched portion tight.
-
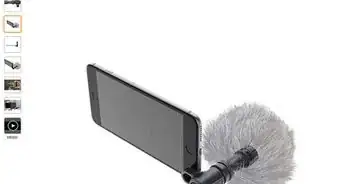
4Position the filter right in front of the mic. You want it about an inch or two away from the mic. It should not be touching it.[2] It should sit between your mouth and the mic when you're recording. There's no "right" way to do this — anything you can do to get the new filter to stay in front of the mic is fair game. A few ideas are below!
- If you like, you can straighten out the hanger's hook and bend it into a wide curve, then tape the end to a spot on the mic stand behind the mic. Bend the wire as needed to get the screen in exactly the right spot.
- Use a clamp to hold the filter to the mic stand. You can get small, cheap clamps from most hardware stores for just a few dollars.
- Tape the filter to a second mic stand and position this in front of the first.
- Keep in mind that some mics are designed to take in sound from the top, while others are designed to take in sound from the front. You want the filter directly in front of the recording surface of the mic.
-
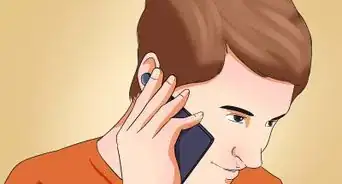
5Sing or talk through the filter into the mic. Now, you're ready to record. Turn on your recording equipment and stand or sit so that the filter is between you and the mic. Your mouth should be a few inches from the filter. Break a leg!
- Listen to the way your "P," "B," "S," and "Ch" sounds come out on your recording. You shouldn't hear any "clipping" with these sounds as long as your volume levels are configured correctly. By contrast, not using a pop filter can leave your recording riddled with distortion.

Sewing/Embroidery Hoop Filter
-
1Obtain a embroidery hoop filter.
-
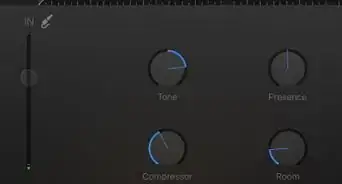
2Stretch nylon embroidery material across a sewing hoop. A sewing or embroidery hoop is a simple hoop made from metal and/or plastic that holds a piece of fabric in place when you're sewing. Any size hoop will work, but a hoop of about six inches across will be the same size as most pop filters.
- Embroidery hoops usually have a fairly simple latch on one side. Undo this latch and slip the fabric over the inner hoop so that it stretches beyond its edges on all sides. Seat the inner hoop back inside the outer hoop and close the latch, keeping the fabric tight. See our embroidery hoop article for more help.
-
3Alternatively, use screen door material. It may seem counter-intuitive, but stiffer fabrics tend to make better pop filters. If you have the tight metal or plastic netting that's usually stretched across the open spaces of screen doors, this works especially well. Simply stretch it across the embroidery hoop as you would with the embroidery fabric.
- Screen door mesh can be found at most large hardware stores. It's cheap, but you may be forced to buy a roll of the material, rather than the small amount that you actually need.[3]
-
4Position the hoop in front of the mic. Now, all you need to do is move your new pop filter into position. As in the section above, one easy way to do this is to tape, glue, or clamp the outside the hoop to a free mic stand. You can also attach the hoop to a stick or a straightened-out coat hanger and then attach this behind the microphone.
- Sing or talk through the filter and into the mic as normal. With this method, the filter is only one layer thick, but this is OK. It should work just as well.


Coffee Can Lid Filter
-
1Take the plastic lid off of a large can of coffee. In this method, you'll use a coffee can lid to make a circular frame for fabric that will act as the filter. Many different sizes can work, but in general, wide, stiff lids of six inches across work well.
- Stiffer plastic lids are best. Flexible, floppy lids are not ideal.
-
2Cut the middle of the lid out, leaving the rim. Use a pair of scissors or a craft knife to cut out the entire center portion of the lid. When you're done, you should have a stiff plastic hoop. Through the cut-out center part of the lid away.
- For the stiffest plastic lids, you may need to use a drill, awl, or saw to get started. Be very careful when using these tools. A heavy pair of work gloves and proper eye protection are musts.
-
3Stretch pantyhose or nylon material tight across the gap. Now that you have a stiff hoop of plastic, all you need to do is make the filter with a tight layer of porous fabric. Pantyhose or tights work very well. Simply slide a stocking over the hoop, pull it tight, gather the slack at the bottom, and secure it with rubber bands or tape.
- You can also use embroidery material or screen door mesh like in the section above, but this is a little harder. You can use clamps, binder clips, or tape along the back of the rim to keep these materials reasonably tight.
-
4Use the filter as directed above. Your pop filter is now ready to use. Use tape or clamps to position it in front of the mic just like you would for the methods above.


References
- ↑ http://www.soundonsound.com/sos/may05/articles/popshields.htm
- ↑ http://www.soundonsound.com/sos/may05/articles/popshields.htm
- ↑ http://www.homedepot.com/b/Doors-Windows-Screens-Tools-Accessories-Rolls-of-Screen/N-5yc1vZbch7
- ↑ http://www.audiomentor.com/beginner/what-is-a-pop-filter-really-for
- ↑ http://blogs.voices.com/voxdaily/2011/01/pop_filters.html
About This Article
To make a pop filter, start by bending a wire coat hanger into a circular shape. Then, pull a pair of tights over the wire until you get a flat, drum-like surface. When you're ready to position the filter in front of your mic, attach it to the mic stand with tape or buy a clamp to keep it in place. Alternatively, you can make a filter by stretching the thin metal or plastic netting found on a screen door over a sewing hoop. Clamp the material in place, then attach the filter in front of your mic. To learn how to use a coffee can lid to make a pop filter, read on!