This article was co-authored by wikiHow staff writer, Travis Boylls. Travis Boylls is a Technology Writer and Editor for wikiHow. Travis has experience writing technology-related articles, providing software customer service, and in graphic design. He specializes in Windows, macOS, Android, iOS, and Linux platforms. He studied graphic design at Pikes Peak Community College.
The wikiHow Tech Team also followed the article's instructions and verified that they work.
This article has been viewed 137,911 times.
Learn more...
Do you want to record vocals, instruments, songs, and other audio in VLC Media Player? In addition to playing audio and video files and ripping CDs, you can also use VLC to record audio and video into your Windows or macOS computer. his wikiHow article teaches you the easiest way to use VLC Media Player to record audio on your computer.
Things You Should Know
- VLC is free to download for PC, Mac, or Linux.
- You need to select your capture device in order to record audio.
- You can open the Capture Device menu in the "File" or "Media" menu.
Steps
On Windows
-
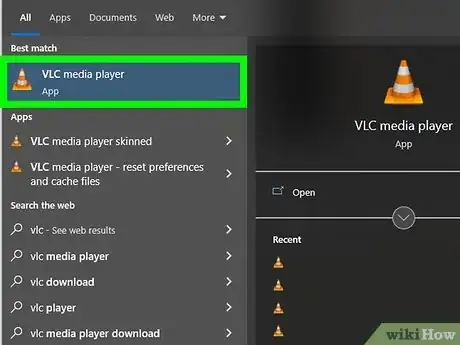
1Open VLC. It's the app that resembles an orange traffic cone with white stripes on it. Click the VLC icon in your Windows Start menu to open VLC.
- If you haven't already done so, go ahead and download and install VLC media player.
-
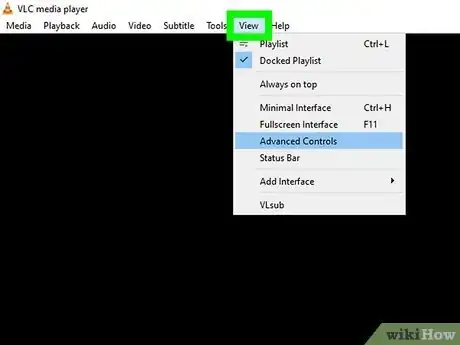
2Click the View tab. It's in the menu bar at the top right-hand side. This opens a drop-down menu.Advertisement
-
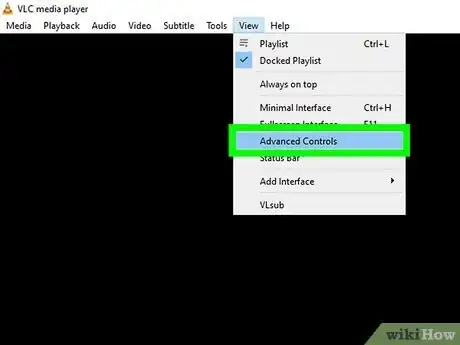
3Click Advanced Controls. It's in the middle of the drop-down menu. This enables a new row of controls with the record button above the play button.
-
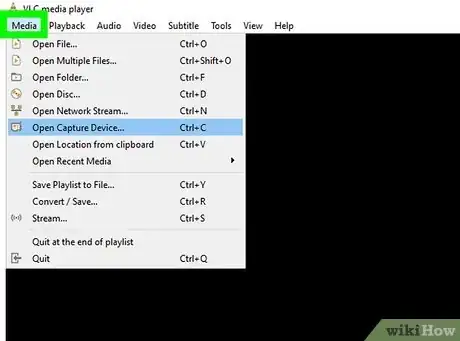
4Click the Media tab. It's the first option in the menu bar at the top.
-
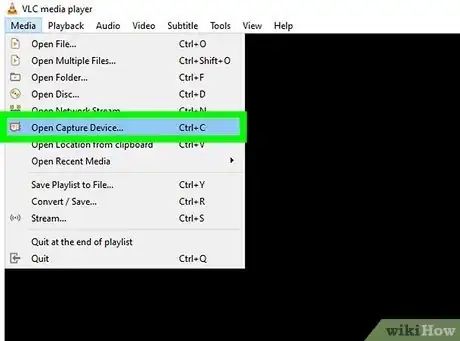
5Click Open Capture Device. It's in the middle of the drop-down menu.
-
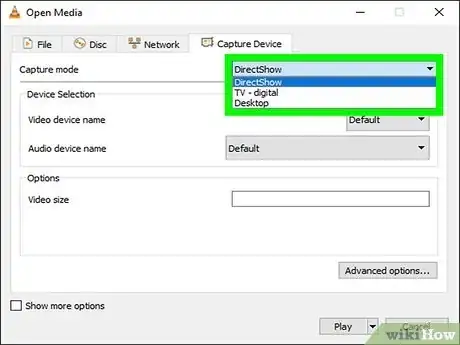
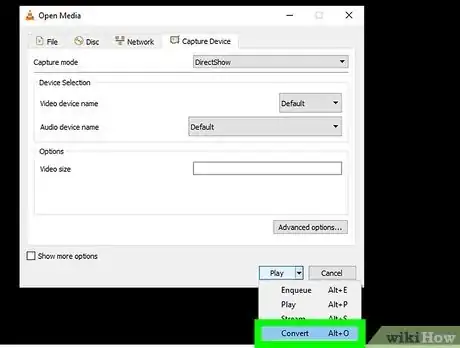
6Select your preferred capture mode. Use the drop-down menu next to "Capture Mode" at the top to select your preferred capture method. If you want to capture audio using a microphone, select DirectShow. If you want to capture audio from your computer, select Desktop.
-
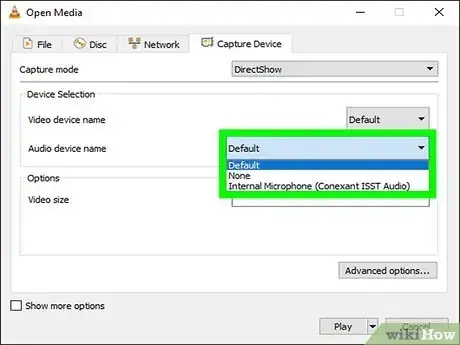
7Select your input device. Use the drop-down menu next to "Audio device name" to select your preferred microphone. You can select your computer or laptop's internal microphone (i.e, Realtek Audio) or if you have an external mic or an audio interface connected to your computer, you can select that device.
- If you want to record video in addition to audio, you'll also need to select a camera device in the drop-down menu next to "Video device name."
-
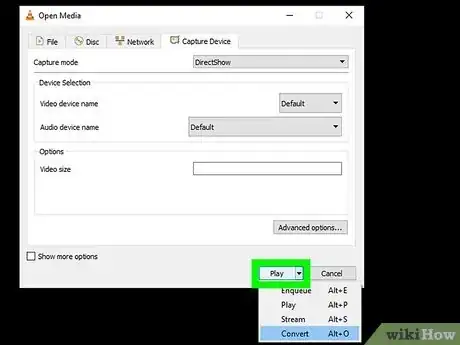
8Click the drop-down menu next to play. To do so, click the icon that resembles a triangle pointing down next to the "Play" button in the lower-right corner of the dialogue box. This displays a drop-down menu.
-
9Click Convert. It's the last option in the drop-down menu that appears when you click the triangle icon next to "Play."
-
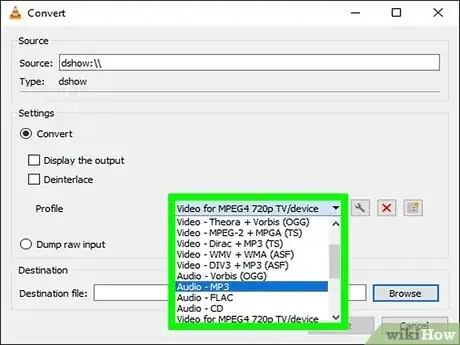
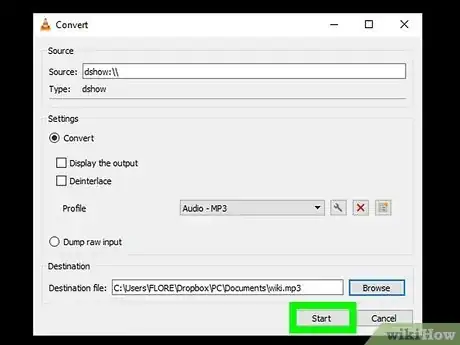
10Select an audio format. Use the drop-down menu next to "Profile" to select an audio format. The most common audio format is "mp3." You can also select a video format if you want to record a video.
-
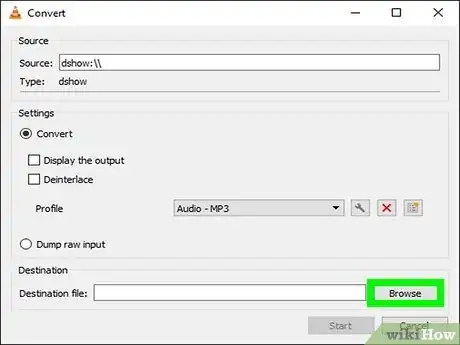
11Select a file destination. To do so, click Browse next to "File destination." Then select a folder you want to save the recording in.
-
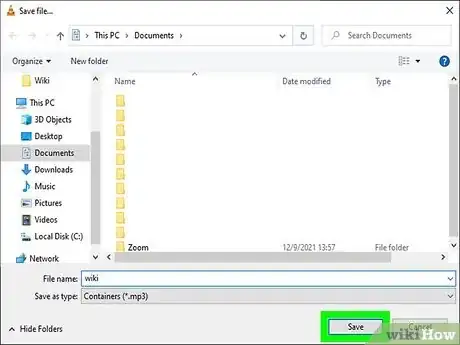
12Create a file name for the audio file. To do so, type a name for the file next to "Filename." Then click Save.
-
13Click Start. It's in the lower-right corner of the dialogue box. This will save the file format and start recording automatically. It may take a few seconds for the recording to start.
-
14Click the record button to stop recording. When you are finished recording, press the record button again to stop the recording.
-
15Click the stop button. It's the square button at the bottom of the VLC player window. This will save the audio file in the location you selected.[1]
On Mac
-
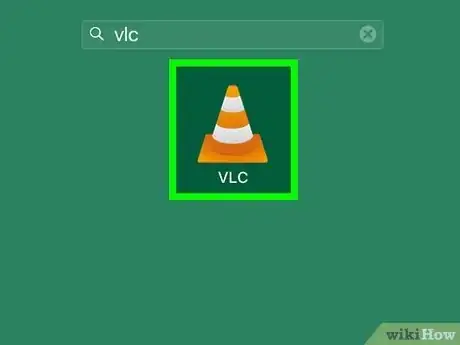
1Open VLC. It's the app that resembles an orange traffic cone with white stripes on it. Click the VLC icon in your Applications folder to open VLC.
- Download and install VLC media player if you haven't already.
-
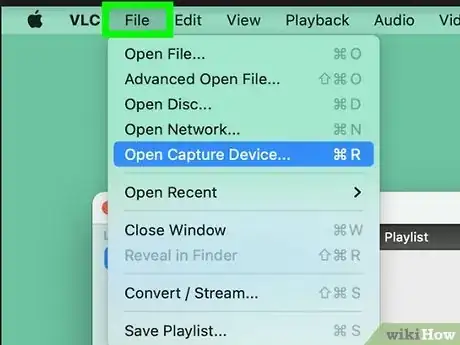
2Click File. It's in the menu bar at the top of your Mac's screen. This opens a drop-down menu.
-
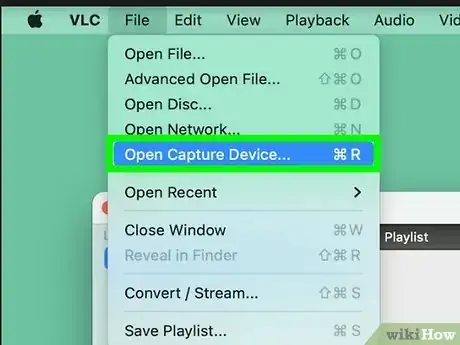
3Click Open Capture Device. It's in the middle of the drop-down menu.
-
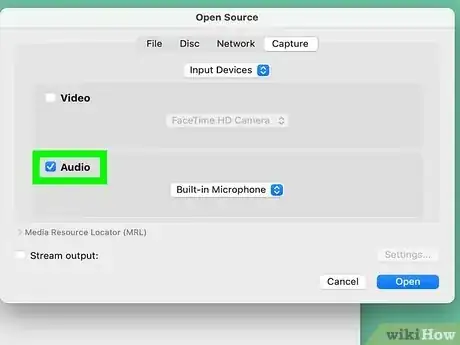
4Click the checkbox for "Audio". The checkbox will turn blue with a white checkmark to indicate it's been selected.
-
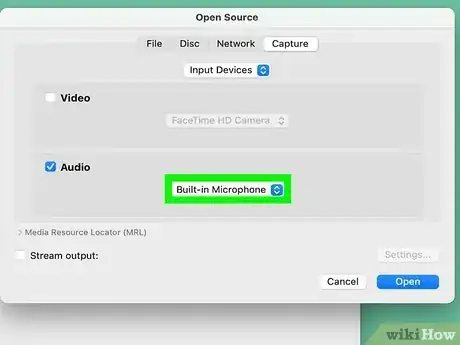
5Click the "Audio" drop-down box and select a source. A drop-down list will appear with your Mac's options. Select the audio source you want to record:
- Select Built-in Microphone if you want to use your Mac's internal microphone.
- Select Built-in Input if you have an external mic or other audio source plugged into your computer.
- You'll need to install Soundflower and select a Soundflower input if you want to record your Mac's audio.
-
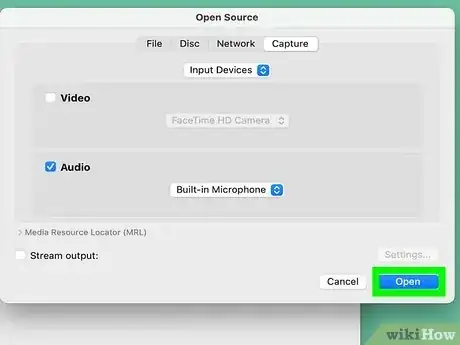
6Click Open. It's the blue button at the bottom of the Open Source window.
-
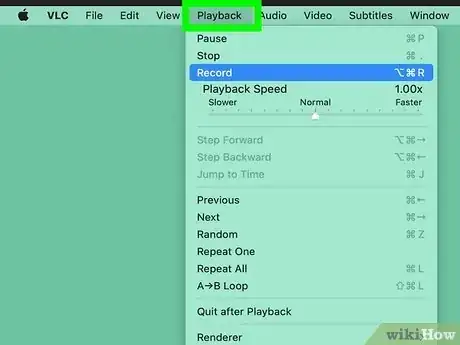
7Click Playback. It's in the menu bar at the top of your screen. This opens a drop-down menu.
-
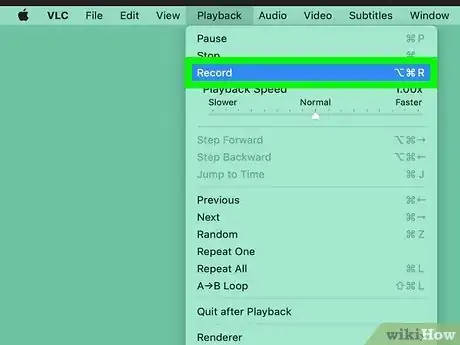
8Click Record to start recording. It's the third option at the top of the drop-down menu.
- Play the audio track if you want to record your computer's audio playback.
-
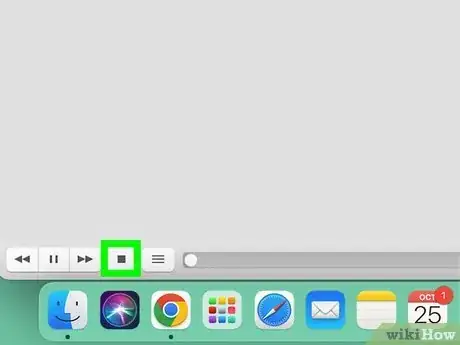
9Click the "Stop" button to finish recording. It's the square button at the bottom of the VLC window.
-
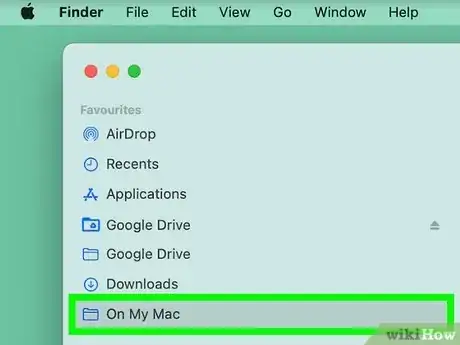
10Open your recorded audio file. Go to your computer's Music folder. You can open the music folder by clicking on Finder (the blue and white face icon in your dock) and then click the "Music" folder on the left side column. The audio filename will start with "vlc-record-" and then end with the date and time the recording was made.
- By default, VLC stores recorded audio files in the Mac's "Music" folder.
Community Q&A
-
QuestionThanks! Whatever I speak or sing, VLC plays it like an echo. This confuses me. How can I turn it off? Has VLC changed a lot or what has happened? I use the Windows version 3.0.8 "Vetinari".
 KookieCommunity AnswerNavigate to the bottom right corner, where you'll find the Audio Effects icon. Once you're in the Audio Effects folder, select Equalizer. This will allow you to begin the process of deleting or muting each unwanted sound manually, one band at a time.
 -
QuestionCan I record both my microphone audio and my desktop screen using VLC?
 KookieCommunity AnswerYes, you can. By using different applications it's possible or if you have an advanced version of the software, you can record your screen and voice.
About This Article
1. Click View followed by Advanced Controls to display the Record playback controls.
2. Click Media followed by Open Capture Device.
3. Select your DirectShow or Desktop in the drop-down menu next to "Capture Mode."
4. Select your recording device in the drop-down menu next to "Audio device name."
5. Click Play at the bottom.
6. Click the Record button to stop recording.
7. Click the Stop button.
8. Locate the audio file in your Music folder.
