This article was co-authored by wikiHow Staff. Our trained team of editors and researchers validate articles for accuracy and comprehensiveness. wikiHow's Content Management Team carefully monitors the work from our editorial staff to ensure that each article is backed by trusted research and meets our high quality standards.
There are 13 references cited in this article, which can be found at the bottom of the page.
This article has been viewed 79,750 times.
Learn more...
Large punching bags need to be suspended from some type of structure in order for them to take punches and move as they're designed to do. If you'd rather not purchase a punching bag stand, you can make your own at home. You'll essentially build an X-shaped frame from 2 long pieces of 4x4 lumber, attach it to a sturdy anchor point (like a sizeable tree), and hang the punching bag from the leaning X-frame.
Steps
Framing the Bag Stand
-
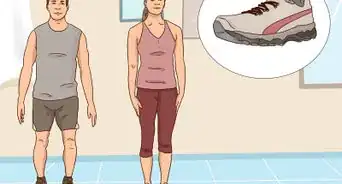
1Buy 2 4x4 timber beams that are roughly twice as tall as you. Visit your local hardware store and select 2 timber beams for your stand. The type of wood isn't important, so choose something cheap and sturdy like pine, fir, or spruce.[1] Select beams roughly twice your own height, so if you're 6 feet (1.8 m) tall, buy 12 ft (3.7 m) timber beams.[2]
- These tall beams will ensure that the punching bag is suspended high enough for you to punch it in the center.
-
2Purchase 1 8mm eye bolt and an eye nut to match. An eye bolt, as the name suggests, is a hefty metal bolt with a large gap (or “eye”) on one end instead. Pass a rope or cord through the gap on the bolt. Then, once you screw the threaded end of the bolt into a beam, the rope will be able to pass through the “eye” while still being firmly attached to the beam. [3]
- The size (e.g., 8 mm) refers to the diameter of the threaded end of the bolt, not the size of the eye diameter.
- Purchase the eye bolt and eye nut at any hardware store or home-supply store.
Advertisement -
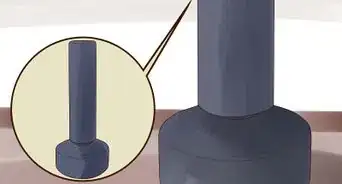
3Drill a hole 2 feet (0.61 m) from the top of each timber beam. Hold the drill perpendicular to the board, and press the drill down so the bit drills a straight hole through the wood.[4]
- This hole needs to be big enough for the eye bolt to go through, so if using the 8mm eye bolt, drill an 8mm hole.
-
4Drill a second hole 2 inches (5.1 cm) from the top of each timber beam. As with the first hole, drill clean through each beam using an 8mm drill bit. While you won't be putting an eye bolt through this hole, it's best to drill the holes the same size for the sake of convenience.
- Be careful when using a power drill. Always keep your fingers clear of the spinning bit, and don't let baggy clothing or long hair hang down near the bit.
-
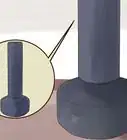
5Connect the beams together with the eye bolt and eye nut. Lay the two timber beams down, one on top of the other, so that they intersect at the holes you drilled. Then, thread the eye bolt through the lower holes of the two beams and attach the eye nut on the other end. Tighten the nut using your fingers until it's firmly in place.[5]
- Do not tighten the nut as tight as you can get it. Leave it a little loose to allow enough space for the beams to open and close easily, so that they can be folded away when needed.


Attaching the Weight Distribution Rope
-
1Measure and cut 20 feet (6.1 m) of synthetic rope. You'll use this rope to connect the eye bolt with the 2 holes near the tops of the beams. This will support the weight of the punching bag and disperse it among these 3 points so that the entirety of the bag's weight isn't hanging on the eye bolt.[6]
- It's best if you lay the beams down for this process. Spread the 2 beams apart so they form an X shape on the ground.
- Buy synthetic rope at a hardware store or home-improvement store.
-
2Thread about 3 feet (0.91 m) of the rope through the top hole in 1 beam. Take the other end of the rope and thread it through a carabiner.[7] Then thread the second end of the rope through the eye bolt connecting the timbers. Thread the end of rope back through the same carabiner. Finally, thread the second end of rope through the other timber's top hole.
- This will securely fasten the rope to all 3 of the weight suspension points: the eye bole and the 2 holes near the top of your beams.
-
3Tie the ends of the ropes together using a double sheet bend knot. This sturdy knot will attach the 2 rope ends together in a way that will support the weight of the punching bag once you've attached it.[8]
- The double sheet bend is a variation of the well-known sheet bend knot. This knot is used most commonly in sailing, to tie together 2 ropes of similar or different widths.
-
4Attach 1 carabiner through the rope looped through the 2 top holes. Carabiners are easy to attach: just press in on the spring-loaded side of the carabiner and slip it through the segment of rope passing through each of the 2 top holes on your timber beams. Then, release the spring-loaded segment.[9]
-
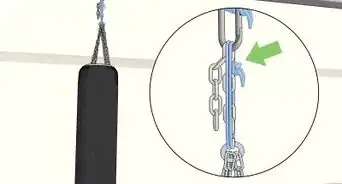
5Tie an overhand bow knot on the end of the main length of rope. Then pass a carabiner through the loop that the knot creates. Hook this carabiner to another which is anchored to a tree to support the weight of the punching bag stand.[10]
-
6Anchor the stand by attaching the loose end of the rope to a tree. Correctly anchoring your stand is a crucial part of setting it up.
- Do not anchor the stand to any walls, as the constant jarring could cause the wall to shatter. The best anchor point is the base of a tree or a solid branch.
- If you must build the stand indoors and you have a concrete floor, you could anchor the stand to a link bolted to the floor.
-
7Tie a second piece of synthetic rope around a tree trunk. This support rope will be your punching bag stand's sturdy anchor point. The length of the rope will depend on how far from the anchor the stand will be situated.[11] As a rough guideline, cut the rope so it's 10 feet (3.0 m) long.
- Or, if your punching bag stand will be located very close to the support rope, cut it only 2 feet (0.61 m) long.
-
8Tie a bowline knot at the end of the support rope not attached to the tree. The bowline knot will leave a small loop at the very end of the rope. Attach a carabiner to the loop created by the bowline knot.[12]
- Attach this carabiner to the other carabiner at the end of the rope attached to the 3 anchor points on the X-frame.
-
9Connect the 2 carabiners to attach the X-frame to the anchor point. To firmly anchor the stand in place, hook the carabiner attached to the X-frame to the carabiner on the rope attached to the tree (or other anchoring point). Position the stand upright so that it leans away from the anchor point at roughly a 20-degree angle.[13]
- If the stand is set correctly, it should remain upright.


Hanging the Punching Bag
-
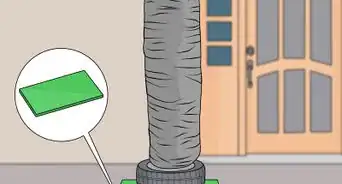
1Secure the stand's feet in position so it won't fall over during use. Once the stand is up, make sure that the feet can't slip from their positions. If you're setting up the punching bag stand outdoors, use a saw to cut wedges into the bottoms of the timbers, so that they can dig into the lawn or dirt.
- If you're setting the bag up indoors on a concrete floor, try cutting the bottom of each timber at a (roughly) 15-degree angle so that the foot is flat on the floor when in position.
- Alternatively, you could cut out 4 in (10 cm) rubber patches from a rubber mat such as a yoga mat and glue to the bottoms of the feet to prevent slippage.
-
2Run a 3 ft (0.91 m) rope through the 3 attachment points on the X-frame. If you're facing the front of the X-frame, you should see 3 attachment points: the eye bolt and the 2 carabiners attached 2 inches (5.1 cm) down from the tops of each beam.[14] Cut a 3 feet (0.91 m) piece of synthetic rope and run it through each of these 3 attachment points.
- Then, hook 2 carabiners on the rope to attach to the top of your punching bag.
-
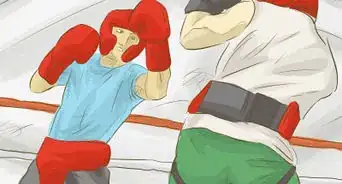
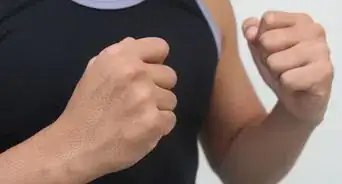
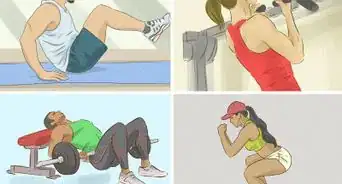
3Hook the loops on the punching bag to the hanging carabiners. There should be 2 or 3 heavy-duty straps attached to the top of your punching bag. Lift the bag up and attach 1 hanging carabiner to each of the straps. Once the punching bag is fully attached, you're ready to practice boxing!
- If your punching bag already has carabiners attached to the heavy-duty straps, simply hook these carabiners into the hanging carabiners.


Community Q&A
-
QuestionIf the timbers are small in length and we have to hang the punching bag at height, how can it be done?
 TheThinkingPanda ZhaoCommunity AnswerConnect the timbers together with nails. Make a triangular part in the back so it won't fall.
 -
QuestionHow much would it cost?
 Community AnswerIf you were to make a good one it would cost around $70-140 dollars.
Things You'll Need
- 2 beams
- 8-mm eye bolt
- 1 eye nut to fit the bolt
- 7 carabiners
- Electric power drill
- Synthetic rope or cord
- 40 pounds (18 kg) punching bag
- Saw (optional)
- Rubber yoga mat (optional)


References
- ↑ https://www.woodmagazine.com/wood-supplies/lumber/buying-and-working-with-home-center-lumber
- ↑ https://youtu.be/1brftwQTSOw?t=2m7s
- ↑ https://www.ccohs.ca/oshanswers/safety_haz/materials_handling/eye_bolts.html
- ↑ https://youtu.be/1brftwQTSOw?t=3m4s
- ↑ https://youtu.be/1brftwQTSOw?t=3m19s
- ↑ https://youtu.be/1brftwQTSOw?t=3m56s
- ↑ https://youtu.be/1brftwQTSOw?t=4m2s
- ↑ https://youtu.be/1brftwQTSOw?t=4m20s
- ↑ https://youtu.be/1brftwQTSOw?t=4m37s
About This Article