wikiHow is a “wiki,” similar to Wikipedia, which means that many of our articles are co-written by multiple authors. To create this article, 35 people, some anonymous, worked to edit and improve it over time.
This article has been viewed 320,575 times.
Learn more...
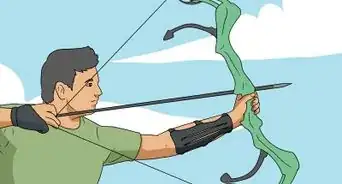
A recurve bow gives a traditional bow the ability to propel arrows further and with more power than a traditional bow. While it takes skill and years practice to make a perfect recurve bow, these steps will help get you started.
Steps
Preparing the Bow
-
1Buy or make a wooden stave. This is what your bow will be shaped from. It needs to be at the length that you want your bow to be, and it should be made from a wood that is strong, flexible, and malleable.
- Hickory, yew, lemonwood, and maple are all good woods to use when making a bow.
-
2Gather your tools. A hatchet, vice grip, bow shaping frame, tillering stick, large file, heat gun, a few screw clamps, and a draw knife will make the process far easier than just using a knife and a large, round object.
-
3Mark the outline. Make an outline of the limbs and arrow rest of your bow with a pen. Stand the stave up in one hand, and with the other, swing your hatchet. Make the stave as smooth on the sides as you can.[1]
- You can decide the specifics (flat limbs, wide or narrow limbs) on your own. Mark out where you want your handle to be.
-
4Test your stave. Make sure it will bend by putting the bottom tip against your instep, holding the upper tip with one hand, and pulling the back (side facing away from you while shooting) towards you. Don't do this too much, as it could damage your stave[2] .
-
5Form the limbs. After you have gotten your bow into an outline with the hatchet, you shape the limbs. Place the handle section of your stave in the vice, and tighten it. Make sure the back is facing upwards. Take the draw knife, and draw it along the stave in long strokes. Do this until your stave is at the thickness that you want your bow to be.[3]
- Sand down any rough edges in the stave.
- Making your bow too thin will cause it to break.


Shaping the Bow
-
1Place the stave in the bow shaping frame. Depending on what curve you want in your bow, you will have to move the bow to different segments of the frame.
- The recurve requires one curve away from the handle and one curve back towards the handle for each limb.
- Use the screw clamps to secure the stave to the frame.
- If you have trouble, use the heat gun to heat up the stave, and then secure that section to the frame.
-
2Make precise measurements. Both limbs should be as close to equally bent as possible. In order to ensure this, make sure that you are bending the stave at equal distances from both ends of the handle.
-
3Give each bend time to set. Try to leave each section secured in the frame for at least a few hours, ideally overnight.[4] This will give the wood time to set in the new position, and will make for a longer-lasting and more effective bow.


Stringing the Bow
-
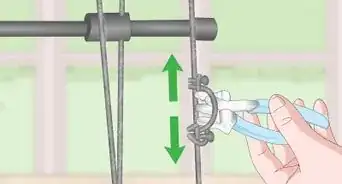
1Cut notches for the string. Put notches into the top and bottom of the limbs. These are what holds the bowstring in place. It's best if you do this with a long, cylindrical file, but it can be done with a knife and a flat, narrow file.
- Cut the notches on the inside of the bow to protect the integrity of the outside wood.
-
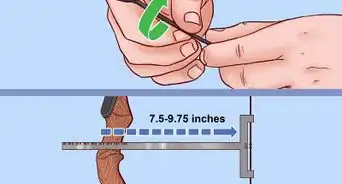
2Tiller the bow. Tillering is what gives your bow its draw. Once you have gotten your bow to the shape you want it to be, place a tillering string on it. The tillering string should be about twice as long as the intended bow string. Tie a loop in each end of the string and attach it to the notches on the limbs.
- Parachute cord works well as a tillering string.[5]
-
3Place the bow on a tillering stick. Pull the tillering string to one of the notches closer to the top of the stick. Slowly and gradually pull the bow further, taking note of how the bow is bending.[6]
- The tillering process takes a long time, and is very gradual.
- If you hear noise coming from the bow, stop, and use the large file to shape the limbs a little more.
- The tillering process can take months, and doing it slowly will allow you to increase the draw of the bow to a good length.
- Once your tillering process is started, you can smooth off the front of the bow with the large file.
-
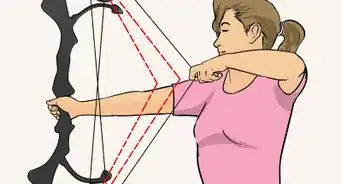
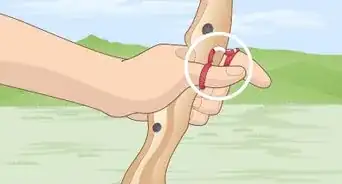
4String the bow. Once the bow has reached an acceptable draw, remove it from the tillering stick and take off the tillering string. Attach the bowstring. Loop both ends around the notches.[7]
- Nylon is a very popular bowstring.
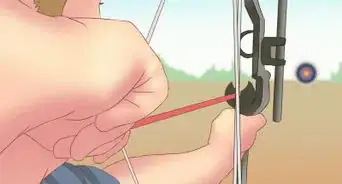
- The bow can be strung and fired during the tillering process, although it may not be at full strength, and firing might hinder the success of the tillering process.
-
5Finish the bow. Once you have completed the tillering process, you can add artwork, leather, or a protective coating to your bow.


Community Q&A
-
QuestionHow do I determine how long I want the bow to be? How do I know how long the string is going to be?
 HollaaaCommunity AnswerThe bow, without a string, should be a bit taller than you. The string should be 6 inches shorter than the unstrung bow.
 -
QuestionFrom start to finish, how long would it take a craftsman to make a recurve bow?
 Community AnswerIt would usually take a week or two, depending on the amount of time it takes to get the needed materials. Also, carving its design and polishing can add extra time.
 -
QuestionI am in South Africa. What wood can I use?
 Community AnswerBlack locust would be the best wood you could use. It's an excellent wood for a bow.
Warnings
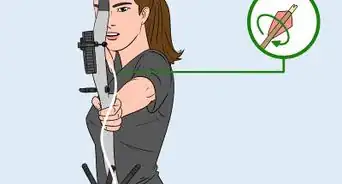
- Don't shoot at living things you don't intend to consume responsibly.⧼thumbs_response⧽
- Don't shoot it in highly populated areas.⧼thumbs_response⧽
- Use store-bought arrows. Those you make yourself can veer off course and hit something you didn't intend them to.⧼thumbs_response⧽
Things You'll Need
- Wood laminate
- Parachute cord (or another thick type of string)
- Vice grip
- Screw clamps
- Heat gun
- Bowstring
- Draw knife
- Tillering stick
- Bow shaping frame
- Large file
- Hatchet/Axe
- A long, cylindrical file or a knife and a flat file


References
- ↑ https://bowjudge.com/how-to-make-a-recurve-bow/
- ↑ https://bowjudge.com/how-to-make-a-recurve-bow/
- ↑ https://bowjudge.com/how-to-make-a-recurve-bow/
- ↑ https://www.popularwoodworking.com/projects/build-a-recurve-bow/
- ↑ https://www.popularmechanics.com/home/how-to-plans/how-to/a17108/make-a-bow-and-arrow-by-hand/
- ↑ https://www.popularmechanics.com/home/how-to-plans/how-to/a17108/make-a-bow-and-arrow-by-hand/
- ↑ https://www.youtube.com/watch?v=v3vjTH31v60
About This Article
To make a recurve bow, you’ll need to start by using a hatchet to make an outline of the bow from a wooden stave. Then, use a draw knife to shape the bow’s limbs and give them the desired thickness. Next, secure the bow in a bow shaping frame and leave it overnight so the wood can set in position. After that, cut notches in the top and bottom of the limbs, then attach a tillering string to the notches. Finally, put the bow on a tillering stick and leave it for several months to shape the bow before attaching a bowstring. To learn how to pick the right materials for your tillering string and bowstring, scroll down!