This article was co-authored by Korri Burton-Universe. Korri Burton-Universe is a Professional Tailor and the Owner of Uncommon Closet, a custom clothing and tailor resource for the LGBTQIA+ community and those with body types often overlooked by major clothing chains and shops. Korri specializes in custom clothing, tailoring services, and wedding clothes for people of all identities, genders, races, and sizes. Uncommon Closet creates a safe space for people to find or make outfits that make them feel safe and powerful.
There are 19 references cited in this article, which can be found at the bottom of the page.
This article has been viewed 11,442 times.
There are many ways to make your own shirt! It all depends on what you want to create, and how you want to go about it. You can sew a simple shirt using a pattern, design and custom order a shirt from a screen printing website, or embellish a shirt using crystals, fabric paint, and glue on appliques. Let your creativity run wild and create a unique shirt to wear yourself, to give to a friend, or to sell online!
Steps
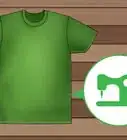
Sewing a Simple T-Shirt
-
1Purchase or print a T-shirt pattern. You can find lots of easy to follow T-shirt patterns in a craft supply store. There are also many free T-shirt patterns available online that you can download and print.[1] Choose a pattern that will allow you to sew the type of shirt you want.
- You can make a T-shirt with any type of neckline you want. For example, you could opt for a scoop neck, v-neck, or round collar.
- The sleeves can be as long or as short as you want them to be, such as cap-sleeves, elbow-length sleeves, ¾ length sleeves, or wrist-length sleeves.
- Choose the level of fitting you want for your shirt, such as loose-fitting, slightly fitted, or tight-fitting.[2] You can also find shirt patterns for unisex, men's, and women's styles.
-
2Make your own pattern using an existing shirt if desired. Fold an existing shirt in half lengthwise and trace the outline of the shirt about 0.5 in (1.3 cm) away (for seam allowance) from the edges all the way around it. Fold the sleeves under to get them out of the way. Then, trace around the entire body of the shirt including the area where the sleeve and shirt connect. Then, unfold the sleeve and trace around the edges of the sleeve separately to make a sleeve pattern.
- Keep in mind that the tracing the neckline might be a bit harder since it will need to be deeper in the front than in the back.
- Make sure to use a shirt in the style and size that you want your shirt to be.
Advertisement -
3Choose your fabric. Jersey is the most commonly used fabric for T-shirts and other types of casual shirts, but you can go with any type of fabric you like for your shirt. Keep in mind that a fabric with some stretch will help to ensure that your shirt fits comfortably, especially around the arms. Some common types of T-shirt fabric include:[3]
- Modal. Soft, stretchy, and slinky manmade material that drapes well.
- Jersey. Stretchy and comfortable synthetic or cotton knit.
- Burnout. Cotton that has been chemically treated for a patchy, sheer look.
- Combed cotton. Soft, strong T-shirt material.
- Rayon. A breathable, silky blend of cotton, woody plants, and trees.
- Linen. Textured and cool flax fabric.
-
4Lay out your fabric and fold it in half. Most patterns call for the fabric to be folded before you cut it and the pattern will go along the fold. Lay your fabric out on a flat, clean surface. Then, fold it in half so that the edges are aligned on all sides. Smooth out the fabric so that there are no bumps.[4]
- A table or desk works well as a work surface.[5] But you can also lay your fabric on a clean area of the floor.
- It will be better if you can lay the fabric out on a hard floor than a plush carpet since this will make it easier to flatten the fabric.
-
5Pin the pattern pieces to the folded fabric. Consult the pattern’s instructions for how and where to pin the pattern onto the fabric. If you created your own pattern, place the edge of the pattern that was along the fold in your shirt along the fold in your fabric. Place the pattern pieces on the folded fabric so that the edges of the pattern pieces are within the borders of the fabric. Then, place a pin along the edges of the pattern every 2 to 3 in (5.1 to 7.6 cm).[6]
- Make sure that each of the pins goes all the way through the pattern piece and fabric layers.
- You will likely need to pin the pattern along the fold of your fabric. Check the pattern for the word “fold” with arrows indicating which edge goes along the fold. Place the pattern piece so that the arrows are pointing towards the fold.
-
6Cut along the edges of the pattern pieces. Use a sharp pair of fabric scissors to cut through both layers of fabric. Follow the outline of the pattern pieces. Do not cut through the pattern or away from the edges. Make the cuts right along the edges to get the best results.[7]
- Do your best to make clean cuts through the fabric without any jagged edges.
- Remember that the neckline on the front and back of the pattern will be slightly different. The neckline will be higher in back and lower in the front.
- You will need to cut out 2 pieces for the front and back of the shirt, and 2 pieces for each of the sleeves. Check to see if any additional pieces are required for your pattern, such as material for the neckline or other types of details.
-
7Pin the shirt pieces at the shoulders with the right sides together. Take the front (lower neckline) and back (higher neckline) pieces of your shirt and lay 1 piece out flat with the right side facing up. Then, lay the other piece over that piece with the right side facing down. Line up the edges of the 2 pieces and then insert a few pins along each of the shoulders to keep them aligned.[8]
- Insert the pins so that they are perpendicular to the top of the shoulder.
-
8Use the straight or zigzag stitch setting to sew along the shoulders. A straight stitch will produce a more structured seam, while a zigzag stitch will produce a stretchier seam.[9] Sew a straight line 0.5 in (1.3 cm) from the top edge of the shoulders.[10]
- Remove the pins as you sew. Do not sew over them or you may damage your sewing machine.
-
9Open the shirt and pin a sleeve to the shoulder opening. Pin 1 sleeve along the opening on 1 side of the shirt. Make sure that the right side of the sleeve piece and the right side of the sleeve opening are facing each other. Center the sleeve on the sleeve opening, and start pinning it beginning at the shoulder seam.[11]
- Repeat for the other sleeve.
-
10Sew along the pinned edges to secure each of the sleeves. Sew a straight or zigzag stitch about 0.5 in (1.3 cm) from the pinned areas. Sew from 1 end of each sleeve piece to the other end of the area where the sleeve is pinned to the shirt.[12]
- Repeat this for both sleeves.
- Do not sew over the pins. Remove them before you sew over each area.
-
11Align the sides of the shirt and pin along the armpits and sides. Fold the shirt material back over so that the right sides of the shirt are facing each other again. Then, insert a pin every 2 to 3 in (5.1 to 7.6 cm) along the sides of the shirt and the undersides of the sleeves. Place the pins about 0.5 in (1.3 cm) from the raw edges of the shirt.[13]
- Place the pins so that they are perpendicular to the edges. This will make it easier to remove them as you sew.
-
12Sew along the pinned edges to secure the sides of the shirt. Use the straight or zigzag stitch to sew along the pinned areas. Position the stitches about 0.5 in (1.3 cm) from the raw edges of the shirt.[14]
- Make sure to remove the pins as you sew and do not sew over them. This may damage your sewing machine.
-
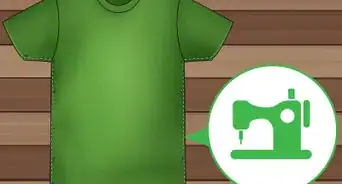
13Hem the sleeves, neckline, and bottom of the shirt. If you are using a pattern, follow your pattern’s instructions for hemming the sleeves, neckline, and bottom of the shirt. For a simple hem, fold the edges of the fabric over by 0.5 in (1.3 cm) and sew a straight or zigzag stitch about 0.25 in (0.64 cm) from the folded edge to secure the hem.
- Some types of material will not require a hem, such as jersey. The fabric will curl up slightly at the edges if left unhemmed. You can also do a cut neckline, which is when you cut around the edges as desired and then leave the neckline unhemmed.
- To sew a basic neckline, you will need to cut out a 1 to 2 in (2.5 to 5.1 cm) wide piece of fabric in the shape of your neckline. Then, pin the fabric to the neckline with the right sides of the fabric facing the right side of the shirt. Sew a straight stitch 0.5 in (1.3 cm) from the raw edges of the neckline. Then, turn the fabric into the shirt and sew another seam 0.5 in (1.3 cm) from the folded edge. This will secure your neckline.[15] You may need to sew the front of the neckline separate from the back.


Ordering a Customized Shirt
-
1Choose a shirt making company that meets your needs. There are many manufacturers who produce custom shirts. Check out some different manufacturers’ websites to see what they offer and choose one that meets your design needs and budget. Make sure that they have all of the options you are looking for as well, such as shirt color, style, and size.
-
2Select the type of shirt you want to make. Most custom ordering websites offer a wide range of shirts that you can design to your specifications. Choose the weight, neckline, and other special features that you want the shirt to have. Then, choose the color from the manufacturer’s offerings.[19]
- For example, you could customize a standard T-shirt, a long-sleeve shirt, a polo shirt, a sweatshirt or hoodie, or a button down shirt.
-
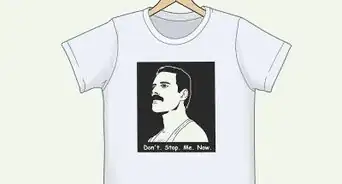
3Upload an image or logo if desired. Most custom shirt manufacturers allow you to upload your own image, so you can put anything you want onto your shirt. Some manufacturers also have a design tool that you can use to create an image or logo to put on your shirt.[20]
- Put a picture of a pet, person, or place on a t-shirt.
- Add your company’s logo to the back of a long-sleeved shirt.
- Include an image that you have designed on the sleeve of a shirt.
-
4Select text to put on the shirt. If you want your shirt to say something specific, then type it into the provided field.[21] Make sure to check the text for errors, such as misspellings, incorrect grammar, and punctuation issues, before you submit it.
- Try putting your company’s name and motto on a shirt to advertise your business.
- Put a special message on a shirt for an event or special occasion.
- Add your name or initials to a shirt to personalize it for your own use.
-
5Review and place your order. Once you have finished designing your shirt, review the design one more time to ensure that it looks how you want it to. You may also want to ask someone else to look at it for you to ensure that there are no errors in the text or image. Then, specify the quantity and place your order![22]
- Keep in mind that many shirt ordering websites provide discounts based on quantity. You might have to pay $12 per shirt if you only order 25 shirts, or you could order 100 shirts and pay only $9 per shirt.


Decorating a Shirt
-
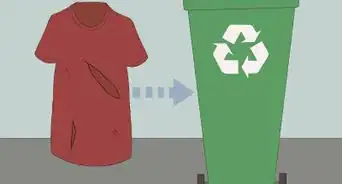
1Choose a shirt to decorate. Make sure that the shirt is 1 that you are okay with decorating. The decorations will permanently change the look of the shirt, so do not choose a shirt that you are not okay with changing.
- You could check out a thrift shop for old T-shirts that you can buy and decorate. You may also be able to find cheap shirts in a craft supply store.
- Try purchasing a solid color T-shirt so you will have free reign to decorate the shirt as you please. If you go with a print shirt, then you will need to work with the design to decorate it.
-
2Glue crystals onto a shirt. You can bedazzle a shirt with crystals by gluing them onto the shirt with fabric glue. Add crystals to the center of the shirt, along the neckline, on the edges of the sleeve, or anywhere else you want! This is an easy way to decorate any type of shirt.[23]
- Choose crystals in a color that will complement your shirt, such as yellow crystals with a purple shirt, or light blue and light pink crystals on a white shirt.
- Make sure to get crystals that have flat backs to them so that you can easily attach them to the shirt.
- Let the glue dry overnight to ensure that they are secure.
- Hand-wash the shirt in cool lukewarm water and let it air dry to avoid loosening the crystals.
-
3Use fabric paint to decorate a shirt. You can use fabric paint to create a special design on your shirt. Get some squeeze bottle fabric paint in the colors of your choice and squeeze it onto the shirt in the desired locations, such as around the collar, in the center of the shirt, or on the sleeves. Make sure to wash the shirt by hand using lukewarm water and hang it to dry.[24]
- Create a swirly design along the collar of a shirt.
- Write your name in fabric paint on the center of the shirt.
- Add fabric paint flowers to the sleeves.
-
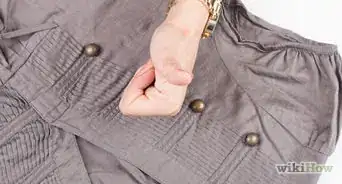
4Sew fabric appliques onto a shirt. Thread a needle and pull the strands until they are even. Then, tie a knot in the end of the thread before you begin. Insert the threaded needle into the applique and through the inside of the shirt. Go in and out of the applique and shirt fabric several times to secure it. Then, tie the thread on the back side of the shirt to secure the applique.[25]
- You can buy or make fabric appliques, such as bows, flowers, and ruffles, and sew them onto a shirt wherever you like. Choose the style and colors of your choice and sew the items onto the shirt with a needle and thread.
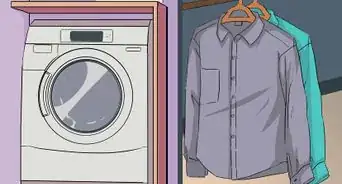
- Use the delicate cycle to wash a shirt with appliques sewn onto it and hang it to dry.
-
5Add ribbon to the collar or sleeves. Gluing a piece of lace or some other kind of ribbon onto the edges of a shirt’s collar or sleeves is another great way to embellish it. Cut the ribbon to the desired length, and then apply a thin layer of fabric glue where you want to attach the ribbon. Then, press the ribbon onto the glue.[26]
- Leave the shirt to dry overnight, such as by hanging it up or laying it flat.
- Make sure to place the shirt somewhere that it won’t be disturbed by pets or children.
- Wash the shirt using the delicate cycle and hang it to dry.
-
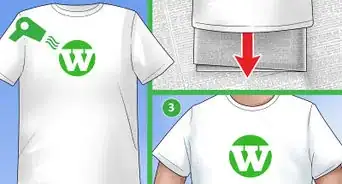
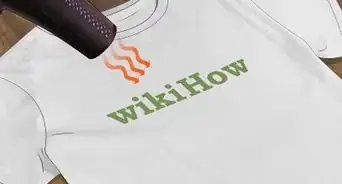
6Iron on a patch or decal. You can purchase iron-on patches and decals for an easy way to embellish a shirt in a hurry. Choose a patch or decal that will complement the color and style of your shirt, and then place it over the shirt where you want it to go. Press the patch or decal with the heated iron to secure it to the shirt.[27]
- Make sure to follow the patch or decal instructions for securing it to the shirt. You may need to use a specific heat setting or hold the iron over the patch or decal for a specific amount of time to attach it.
- Select the delicate cycle when you wash the shirt and hang it up to dry it.


Expert Q&A
-
QuestionIs it okay to take my measurements by myself?
 Korri Burton-UniverseKorri Burton-Universe is a Professional Tailor and the Owner of Uncommon Closet, a custom clothing and tailor resource for the LGBTQIA+ community and those with body types often overlooked by major clothing chains and shops. Korri specializes in custom clothing, tailoring services, and wedding clothes for people of all identities, genders, races, and sizes. Uncommon Closet creates a safe space for people to find or make outfits that make them feel safe and powerful.
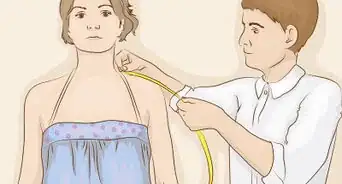
Professional TailorIt is necessary to have someone else take your measurements. Be careful while measuring so that the shirt is comfortable. It should not be very tight or loose. -
QuestionWhat measurements do I need to make a shirt?Korri Burton-UniverseKorri Burton-Universe is a Professional Tailor and the Owner of Uncommon Closet, a custom clothing and tailor resource for the LGBTQIA+ community and those with body types often overlooked by major clothing chains and shops. Korri specializes in custom clothing, tailoring services, and wedding clothes for people of all identities, genders, races, and sizes. Uncommon Closet creates a safe space for people to find or make outfits that make them feel safe and powerful.
Professional TailorYou should know your neck, chest, waist, hip, and shoulder measurements. You should also measure the length of the shirt and sleeves. -
QuestionHow do I get started?Korri Burton-UniverseKorri Burton-Universe is a Professional Tailor and the Owner of Uncommon Closet, a custom clothing and tailor resource for the LGBTQIA+ community and those with body types often overlooked by major clothing chains and shops. Korri specializes in custom clothing, tailoring services, and wedding clothes for people of all identities, genders, races, and sizes. Uncommon Closet creates a safe space for people to find or make outfits that make them feel safe and powerful.
Professional TailorYou should lay the fabric on a desk and press it. Pressing will make your garments look better.
Things You’ll Need
Sewing a Simple Shirt
- Shirt pattern
- Fabric
- Scissors
- Pins
- Thread
- Sewing machine
Ordering a Customized Shirt
- Logo or image to upload
Decorating a Shirt
- Crystals
- Fabric glue
- Fabric paint
- Appliques
- Lace ribbon
- Iron-on decals or patches

References
- ↑ https://www.itsalwaysautumn.com/free-t-shirt-sewing-patterns.html
- ↑ Korri Burton-Universe. Professional Tailor. Expert Interview. 12 January 2021.
- ↑ https://www.realsimple.com/beauty-fashion/clothing/sweaters-tops/t-shirt-fabric
- ↑ https://www.youtube.com/watch?v=qAIfrCViTBY&feature=youtu.be&t=177
- ↑ Korri Burton-Universe. Professional Tailor. Expert Interview. 12 January 2021.
- ↑ https://www.youtube.com/watch?v=qAIfrCViTBY&feature=youtu.be&t=184
- ↑ https://www.youtube.com/watch?v=qAIfrCViTBY&feature=youtu.be&t=196
- ↑ https://www.youtube.com/watch?v=A90PmZLvwFM&feature=youtu.be&t=127
- ↑ Korri Burton-Universe. Professional Tailor. Expert Interview. 12 January 2021.
- ↑ https://www.youtube.com/watch?v=A90PmZLvwFM&feature=youtu.be&t=134
- ↑ https://www.youtube.com/watch?v=A90PmZLvwFM&feature=youtu.be&t=140
- ↑ https://www.youtube.com/watch?v=A90PmZLvwFM&feature=youtu.be&t=152
- ↑ https://www.youtube.com/watch?v=A90PmZLvwFM&feature=youtu.be&t=163
- ↑ https://www.youtube.com/watch?v=A90PmZLvwFM&feature=youtu.be&t=168
- ↑ http://www.cottonandcurls.com/2014/04/perfect-neckline-facing-tutorial/
- ↑ https://www.vistaprint.com/clothing-bags/mens-t-shirts?couponAutoload=1&GP=10%2f16%2f2018+11%3a40%3a42&GPS=5196091468&GNF=1
- ↑ https://www.customink.com/
- ↑ https://www.rushordertees.com/custom/company-logo-shirts/
- ↑ https://www.customink.com/ndx/#/
- ↑ https://www.cafepress.com/make/custom-t-shirts
- ↑ https://www.customink.com/ndx/#/
- ↑ https://www.customink.com/ndx/#/
- ↑ https://diy-enthusiasts.com/diy-fashion/diy-t-shirt-ideas-projects-makeover/
- ↑ https://diy-enthusiasts.com/diy-fashion/diy-t-shirt-ideas-projects-makeover/
- ↑ https://diy-enthusiasts.com/diy-fashion/diy-t-shirt-ideas-projects-makeover/
- ↑ https://diy-enthusiasts.com/diy-fashion/diy-t-shirt-ideas-projects-makeover/
- ↑ https://diy-enthusiasts.com/diy-fashion/diy-t-shirt-ideas-projects-makeover/
About This Article

To make a shirt, try buying a shirt pattern or downloading an online pattern for free. Alternatively, use an old shirt if it's the exact size and style you want the new shirt to be. Additionally, choose a fabric that's soft and stretchy, like jersey. Then, pin your pattern pieces to the fabric before cutting them out. Next, sew the pieces together to create your new shirt. Once you've finished sewing, make the hems on the sleeves and the bottom of the shirt to complete your garment. For tips on how to decorate an old shirt, read on!