wikiHow is a “wiki,” similar to Wikipedia, which means that many of our articles are co-written by multiple authors. To create this article, 26 people, some anonymous, worked to edit and improve it over time.
This article has been viewed 379,473 times.
Learn more...
Try making your own easy, lightweight and portable cooking stove from used aluminum beverage cans. This project costs virtually nothing to create and it will cook for about 15 minutes. This is a really simple version of the beverage can stove. Other versions can be more complicated but this one works well despite its simplicity. You will be creating a top half and a base half from two different beverage cans, both halves which are then telescoped together to create a small, solid, lightweight stove. The steps outline creating the base and the top halves of the stove and slotting them together. The article also provides steps on priming and ignition of your stove.
Steps
-
1Assemble the materials needed for this project.
-
2Create the base of the stove. To cut the base, draw a straight, dashed line around one of the two beverage cans, approximately 1.5" (3.5 cm) from the bottom of the can. If you find it difficult to make this line straight, you can put an elastic band around the can, untwist it to make it even; then follow this band around as you make your dotted line.
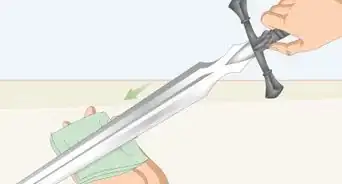
- Neatly and carefully cut around this line, using one of the suggested cutting implements.
Advertisement -
3Make the burner holes in the "top" can:
- Remove the tab from the top of the second can, otherwise it may wobble when you turn it over.
- Draw a straight, dashed line approximately 1" (2.5 cm) from the bottom of the can.
- Turn it upside down so you can make the holes with the can still whole.
- Around the rim of the upside down top, mark about 16 – 24 holes, evenly spaced (use a ruler or your fingers to space it out). Make more holes if your pin is very small; fewer holes if your pin size is larger.
- Take a push pin and pierce each hole. If this proves difficult to achieve with hand pressure, gently tap in with a small hammer. Hold the hammer close to its head and tap gently, while holding the push pin between your thumb and first finger, just under the pin's head. Take care not to hit your fingers. The top of the push pin should be protecting them. Make the holes as small as possible. If the holes are too big, too much gas escapes and you will not get a good burn. This is the hardest part of the stove, getting a good hole sizing and pattern.
- Try to keep all the holes the same shape to ensure even heating.
-
4Make the fuel drainage hole. There are two possible approaches to making the fuel drainage holes:
- The first is to make a screw sized hole in the middle of the top. Get a short, fat sheet metal screw that will act as fuel hole cap. Make sure this fits snugly, to prevent fuel escaping from this hole.
- The second method is to create a flower shape of the same small size as the pin holes made for the outer rim. To do it this way, make one hole in the center and 6 holes evenly spaced around the center hole. As these holes will be smaller, the fuel will drip through to the base, not pour through. This method is obviously easier if you do not have access to a screw but is a little slower than the first method for filling purposes.
-
5Cut the top can. Once you have made the holes using the strength of the whole can, it is time to cut the top part. Cut it along the line you drew earlier.
-
6Cut small vertical slits. Once you have the top piece cut, you will need to create slits to allow the two halves of the stove to telescope together. Cut vertical slits with scissors, taking care not to cut past the rim of the can (the rounded part). Cut in about four to six even places (you can always cut a few more slits if the top isn't easing in gently). As an optional step, you could use a paper punch to make holes halfway up the can, then cutting the slits up to them. This will stop the can from tearing when trying to mate the two halves.
-
7Fill the base with a suitable filling that will soak up the fuel such as perlite or vermiculite. At a pinch, you could even use sand. Perlite is a naturally occurring siliceous rock that is found in many parts of the world. You can purchase it at most gardening centers. In each case, the filling acts as a wick to hold the fuel and disburse it evenly and gradually.
-
8Fit the stove together. Once you have the filling in place in the base, and the slits made for the top, it is time to put the two pieces together. Steady the stove base by placing it on an even surface, such as a table top or flat ground. Take the top and gently but firmly push it down into the base of the stove until it fits snugly; shuffle the perlite or other filling around a little to help ease in the top. Some users recommend creating a wedge from some of the spare aluminum to ease it in. The top will now be sloping inwards (dimple), ready for pouring in your fuel.
-
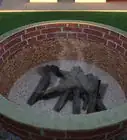
9Prepare the stove for use. Make sure the stove is sitting on a surface free of flammable material. Choose a spot of ground free of plant matter, or put the stove on a pie plate or a dinner plate. Depending on which fuel holes you have used, proceed to adding your fuel. Only some fuels should be used in this type of stove (see "Tips" for these fuels):
- Plugged hole - remove your fill hole plug (the metal screw). Slowly pour the fuel into the top, allowing it to drain into the fill hole. Fill the stove base about 1/4 to 1/2 way full. Replace the plug if you have used a large hole, to prevent further dripping of the fuel.
- Flower shaped hole - pour the fuel into the stove base via the small holes in the dimple, until the stove base is about 1/4 to 1/2 way full. This method relies on the fuel dripping through the small holes, so it will not be as fast as the first method.
-
10Prime the stove. Tip a little extra fuel (about a teaspoonful) in the dimple (middle) of the stove so that it pools there and even splash a little over the rim holes (it will burn off quickly).
-
11
-
12Cook. Put your cooking pans onto a stand and cook. You can make your own stand (see "Tips" below) or use a ready-constructed version. The fuel should burn for up to 15 minutes but this will depend on several variables, including the weather conditions, whether you are indoors or outdoors etc. Experiment to see how much time you get from the stove before trying to cook a meal.


Community Q&A
-
QuestionWhat fuels are suitable for the stove?
 Community AnswerUsually denatured alcohol is the best option for these stoves, because they produce blue flames, meaning they burn completely. Ethanol and methanol (HEET) are good fuels, because they also burn completely. Isopropyl alcohol (rubbing alcohol), although it can work, is not recommended since it does not completely burn (has yellow flames), so there is a lot of soot. If you are using isopropyl alcohol, try to use at least 90% or as close to pure as possible, since 70% has a lot of water and can prevent the stove from working.
 -
QuestionCan I adjust the fire?
 Community AnswerOnly by remaking the pennystove with more or less holes, or smaller/bigger holes. Try a different configuration for the optimal heat or burn time.
 -
QuestionWhat fuel can I use instead of alcohol?
 AdrianTop AnswererYou can try using Sterno (canned low-burning fuel), the kind used for keeping food trays hot. If you buy the canned type, scoop out the gel and place in the stove.
Warnings
- Be careful not to burn yourself.⧼thumbs_response⧽
- The flames from these fuels are practically invisible and if the fuel is spilled near the flames, this can result in a fire catching and spreading very quickly. Handle with care and be sure to have no flammable material around the area of the stove. Do not use a stove such as this near peat sites or tinder-dry vegetation.⧼thumbs_response⧽
- Ask for help from an adult, teacher or parent with cutting the cans if you are a child or if you do not feel confident in cutting it yourself. Take care not to slip with the knife or scissors while cutting.⧼thumbs_response⧽
- Be careful with sharp objects used to make the burner holes.⧼thumbs_response⧽
- This stove is designed to burn only denatured alcohol or absolute ethanol. It would be explosively dangerous to use gasoline, white gas, camp fuel, kerosene, or any other fuel in this stove. Isopropyl alcohol (rubbing alcohol) will not work properly, may boil over, and is strongly discouraged.⧼thumbs_response⧽
- The cut edges of the cans can be sharp. Use caution when working with them.⧼thumbs_response⧽
- If you have too many large holes in the top, the fuel will not burn cleanly. In a clean burn, the flames would look mostly blue, but this may be hard to see in the daytime. If the flames are mostly yellow, your holes are too big.⧼thumbs_response⧽
- Do not keep your hand too close to the heat or flame when lighting. If the stove becomes too hot while you are lighting it, take a rest until it cools down enough.⧼thumbs_response⧽
Things You'll Need
- 2 aluminum cans, for example, soft drink cans, beer cans; they must be in good condition, with no dents
- Push pin (a pin with a plastic head)
- Hammer (small)-optional
- Sharp knife, utility blade or scissors
- 1/4 cup perlite
- If making your own stand : Wire coat hanger (remove any paint with sandpaper beforehand)
- Fuel (denatured alcohol or absolute ethanol). Denatured alcohol is inexpensive and available at any hardware or big box store. Absolute ethanol will be harder to find and a lot more expensive.
- Some leak-proof container to carry your extra fuel. Camp stores have a selection of appropriate bottles that close tightly and dispense cleanly. Clearly mark the fuel bottle. Denatured alcohol contains methanol, which can cause blindness and death if swallowed. Do not use a bottle which resembles a water bottle; you definitely don't want to drink from the wrong one at night.