This article was co-authored by Lois Wade. Lois Wade has 45 years of experience in crafts including sewing, crochet, needlepoint, cross-stitch, drawing, and paper crafts. She has been contributing to craft articles on wikiHow since 2007.
wikiHow marks an article as reader-approved once it receives enough positive feedback. In this case, 91% of readers who voted found the article helpful, earning it our reader-approved status.
This article has been viewed 665,081 times.
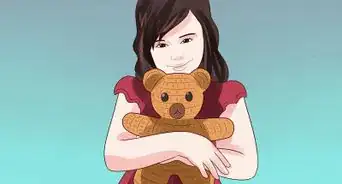
A teddy bear makes a priceless gift for a loved one, or even a cozy toy for yourself. And a hand-made teddy adds that much more love and care to your new fuzzy friend. It's easy enough for a beginner to craft, and won't break your bank. We'll show you how to make a lovable teddy out of a disused sock, or a cuddly cub out of a bit of felt and some sewing supplies.
Steps
Using a Sock
-
1Lay a sock out flat. Lay a sock out so that the flat of the foot is facing upward. This should create a fold at the heel.
-
2Cut the fabric for the head. Draw a circle at the end of the sock, using the curve of the toe as a base. Add ear at the top of the circle to make the outline of a bear's head. This should not take up more than a quarter of the length of the sock. Cut the fabric just above the line of the ears. Once it is cut out, cut off just a sliver of fabric at the very base of the circle to make a hole for the neck.Advertisement
-
3Cut out the fabric for the arms and legs. Just above the heel, you'll see the tube of fabric that goes up the leg. Starting right after the curve of the heel ends and going until the hem of the sock, visually divide that length in half. Cut at that middle point on the long part of the sock. The end bit will be divided in two to make the arms. Cut a short split down the middle of the larger piece, until you reach the beginning of the heel. This will form the body and the legs.
-
4Stuff and sew the head. Flip the head inside out and then use a sewing machine or your hands to sew the top of the head closed. Once it's closed, flip it right side out and then stuff the head with filling. Sew the neck closed when you've reached the desired head size.
- You can buy the stuffing used for stuffed animals at craft stores. If you don't want to do that, you can use cotton balls or scrap fabric to stuff your bear.
-
5Stuff and sew the body. Flip the body inside out and then use a sewing machine or your hands to sew the legs closed. Once they're closed, flip it right side out and then stuff the body with filling. Sew the neck closed when you've reached the desired body size.
-
6Attach the head to the body. Sew the head onto the body by hand using a basic running stitch or a saddle stitch.
-
7Sew on the arms. Cut the end piece into two pieces to create the arms. Sew them partially closed and then stuff them. Attach them to the body once you are happy with how they look.
-
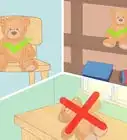
8Done! Enjoy your new bear friend! You can sew on button eyes or use embroidery thread to give him a nose.

Using Felt
-
1Make the arms. Cut out four bunny ear shapes. These will form the arms. Sew two pieces together using a machine or a basic stitch of your choice to form each one of the arms. Leave a slit at the end open for stuffing.
-
2Make the legs. Repeat the previous step bit with slightly larger shapes to make the legs. You can adjust the shape of the leg to get your bear to look or sit differently.
-
3Draw out and made the profile of the head. Draw a profile (side-view) of the head that you want for your bear. Cut out two pieces in this shape. Next, stitch them together from the neck up to the nose.
-
4Cut the gusset for the head. Cut the gusset, or middle piece, to go between the two head pieces you already cut and sewed. Draw out a shape like a men's tie and make it long enough to reach between the point of the nose, all the way around to the back of the neck. You will need to line it up at the neck and pin it in place before sewing.
-
5Sew the gusset in place. Once you've drawn and cut out the shape, sew the gusset into place between the existing head pieces.
-
6Make the body piece. Now you'll need to make the body pieces. Start with two pieces of fabric cut into rectangles. Now, make rounded cutouts at each of the corners. Sew the sides together, along the long edges, so that you end up with a sort of tube. Now, sew one of the short edges closed, leaving the circle cutouts open. The arms and legs will be joined to the body at the circles.
-
7Turn all of the pieces inside out. Using a pencil can help. Turning the pieces hides the seams you made.
-
8Stuff and attach the head. Pre-stuff the head and sew it to the top of the body piece, at the open, short end.
- Some stuffing may leak out into the body. That's okay.
-
9Attach the arms and legs. Now, sew on both of the arms at the upper circular cutouts. Attach one of the legs in a similar way, but leave the last leg off. Stuff the bear with filling and then sew on the last leg.
-
10Cut and attach some ears. Cut ears out, making a shape like a half circle. Fold the shape in half and then attach the ears to the head.
-
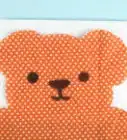
11Give your bear a face. Add facial details (like a nose and mouth) with embroidery floss or buttons.
-
12Sew on button eyes. Now you can sew on his eyes. Use buttons if you want to or buy stuffed animal eyes from your local craft store.
- Embroidered eyes are better for smaller kids who tend to put every thing in their mouth.
-
13Enjoy your new stuffed animal! Have fun taking care of your new stuffed animal or give him to someone you love as a gift.

Community Q&A
-
QuestionHow do I crochet a teddy bear?
 Community AnswerCheck out ravelry.com, it's a website designed for knitters and crocheters. There are a TON of patterns on it, and a huge community of people to help you.
 -
QuestionHow do I stitch the nose?
 Community AnswerLearn to embroider by watching videos online or have someone teach you. It's easy once you know how to do it.
 -
QuestionWhat if someone thinks my bear is ugly?
 Hi I Am ChristopherCommunity AnswerJust ignore their opinion. You made the bear for yourself and all that matters is that you like it. It has your love in it, it is beautiful.
Warnings
- Children should be closely supervised if they are attempting to make this.⧼thumbs_response⧽
Things You'll Need
- Needle and Thread
- Fake Fur or other sturdy fabric
- Stuffing material
- Scissors
- Embroidery floss or yarn
- Buttons for eyes
About This Article

To make a teddy bear from felt, cut out 8 shapes that look like bunny ears. Make 4 of the pieces smaller and 4 of the pieces larger. Sew the pieces together in pairs to form the bear’s arms and legs, leaving a slit at the end open. Next, cut out 2 pieces of felt for the profile of your bear’s face and a third piece for the back of the head. Pin these pieces together and sew the sides. For the body, cut 2 rectangles with rounded circles on the corners. Turn all of the pieces inside out to hide the seams. Stuff the head and attach it to the body, then sew the rest of the bear, except for one leg. Stuff the bear, then stuff and attach the last leg. If you want to learn about how to make a simple teddy bear from a sock, then keep reading the article!