wikiHow is a “wiki,” similar to Wikipedia, which means that many of our articles are co-written by multiple authors. To create this article, 33 people, some anonymous, worked to edit and improve it over time.
There are 7 references cited in this article, which can be found at the bottom of the page.
The wikiHow Video Team also followed the article's instructions and verified that they work.
This article has been viewed 299,083 times.
Learn more...
A treasure map can be useful for many things - school plays, homework, games, or just for a fun activity to do with your kids. Making your own authentic-looking treasure map is easy to do.
Steps
Making the Map Look Authentic
-
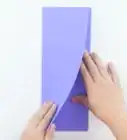
1Tear the edges off all four sides of the paper. This will make the map look more like a worn treasure map.[1]
-
2Use a tea bag to make the map look old. Wipe a wet tea bag over both sides of the paper.[2] The map will turn a light brown color. When you finish, the paper should be completely saturated.Advertisement
-
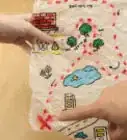
3Make the map look worn. Crumple the map into a ball several times to get it good and crumpled. Let it dry overnight in a ball.
-
4Use cooking oil to make the map feel authentic. Gently open the map, and wipe both sides with cooking oil. Blot off the excess with paper towels. This will make the paper feel slightly crunchy.
-
5Let the paper dry again. Once it is finished drying, the map should look very old.
General Tips on Map Design
-
1Think about the kind of map you want to make. It could be a path that uses landmarks, or it could be a verse that includes directions and distances.[3] There could be a game involved with a secret plot. Make sure the start is easy to find, and the treasure is hidden somewhere where it won't be disturbed until the treasure hunters find it.
-
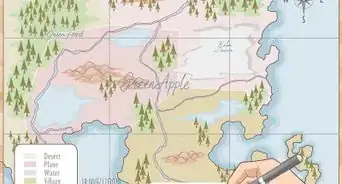
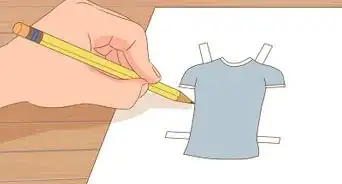
2Start drawing your map. Use a piece of plain white paper to start. Include the compass so the hunters can get their bearings and any written clues needed by the hunters to find the treasure.
- Note: You can also use a thicker piece of cardstock if you want a more durable map. Or you can use part of a brown paper grocery bag (just make sure you use a piece with no writing on it). [4]
-
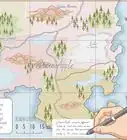
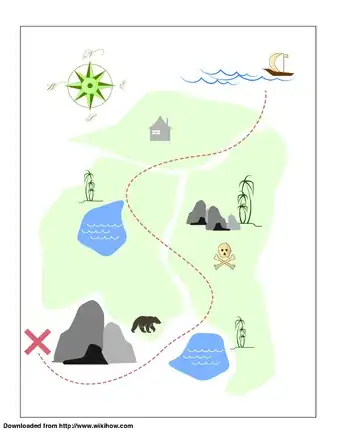
3Draw specific features on your map. Feel free to use different colored inks; you can also use colored pencils, Sharpies, or watercolor paint.[5] The features don't have to be perfect. After all, pirates aren't known as being great artists! Include things like:
- A red X to mark the spot. This is probably the most important feature!
- Landmarks to determine a starting point and a finishing point (the treasure spot), and landmarks to help the hunters find their way in the middle.
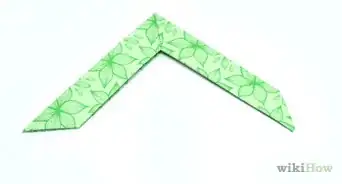
- Trees, shrubs, or plants. Trees can be made by a simple vertical line with horizontal lines squiggled on top of it that starts wider at the base and get increasingly smaller toward the top. Make sure to leave a small portion of your vertical line uncovered at the bottom to create the trunk of the tree. You can also make more detailed trees if you want to spend the time.[6]
- Houses or other buildings.
- Mountains or hills.[7]
- Rivers or other bodies of water. You can locate the treasure hunt on an island surrounded by water.[8]
- For a more imaginative look, include some fantasy elements like a sea serpent, some ships, or a castle.

Using the Map for Fun
-
1Create a scavenger hunt. Include clues and prizes/treasures to entertain your guests.
- This is a great idea for all kinds of events like birthday parties, holiday parties, kids' sleepovers,
-
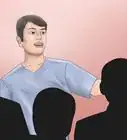
2Use it as a document in a play or other performance. Impress the other adults with your crafty skills by volunteering to create the map for your kids' school play or church activity.
-
3Spend an afternoon having fun with your children. Use the treasure map as a bonding experience for your family.


Sample Treasure Map
Community Q&A
-
QuestionHow do I make my map look mysterious?
 Community AnswerBurn the sides of the map carefully and make your self some tea and rub the damp tea bag all around the map to make it look old.
 -
QuestionHow do I make my treasure map more complicated?
 VioletLightningtailCommunity AnswerAdd more places, and more details. Or try to expand the area of land you are drawing so you have more details and places to draw. You can also leave out a little bit of information to make it harder.
 -
QuestionI'm creating a treasure map to lead someone to a place in my school. How should I lay it out?
 Community AnswerStart at the main entrance (front door) and then lead them to the treasure from there.
Things You'll Need
- White paper
- Pen(s) (colored inks, some pencil, crayons)
- Used tea bag
- Paper towel
- Cooking oil
References
- ↑ https://www.youtube.com/watch?v=rXcCE7aj_qc
- ↑ http://www.dltk-kids.com/crafts/pirates/mmap.html
- ↑ http://www.creativekidsathome.com/activities/activity_105.shtml
- ↑ https://www.youtube.com/watch?v=d0rkIXWPH7s
- ↑ https://www.youtube.com/watch?v=jbyTAHHYEK4
- ↑ http://www.easy-drawings-and-sketches.com/draw-a-tree.html
- ↑ http://www.yedraw.com/how-to-draw-pirate-map.html#.VH5gEjHF-So
- ↑ http://www.yedraw.com/how-to-draw-pirate-map.html#.VH5gEjHF-So
About This Article
To make a treasure map, sketch your map out on a piece of plain white paper. Add features like a compass rose, landmarks, a path to get to the treasure, and of course an X to mark the spot where the treasure is buried. Once you’re satisfied with your design, go over it in ink. You might use black ink for most of the features on the map and red for things like the X. If you want to make your map look old, tear off the edges of the paper to give it a worn look. Wipe both sides of the paper with a wet teabag to make it look brown and stained. Crumple the paper, then unfold it and brush it with a little cooking oil. Blot the excess oil away and let the map dry. This should age your map a bit more and leave it feeling slightly stiff and crunchy. To learn more, including how to use your treasure map for fun activities like scavenger hunts, read on.