This article was co-authored by wikiHow Staff. Our trained team of editors and researchers validate articles for accuracy and comprehensiveness. wikiHow's Content Management Team carefully monitors the work from our editorial staff to ensure that each article is backed by trusted research and meets our high quality standards.
There are 7 references cited in this article, which can be found at the bottom of the page.
The wikiHow Video Team also followed the article's instructions and verified that they work.
This article has been viewed 234,784 times.
Learn more...
Windsocks are a popular decoration to hang up on your porch. You can also hold them by the handle, and run around with them to make the streamers ripple in the wind. They come in all sorts of shapes and colors, making them a perfect craft project for children of all ages.
Things You Should Know
- To make a paper windsock, staple a roll of paper, cut tissue paper streamers, glue the steamers to the bottom of your windsock, and attach string to serve as a hook.
- For a plastic windsock, cut a plastic ring out of a soda bottle and punch two holes using a hole puncher.
- Then, slip knot strips of a plastic bag around the ring and tie a string through the holes to create your handle.
Steps
Making a Paper Windsock
-
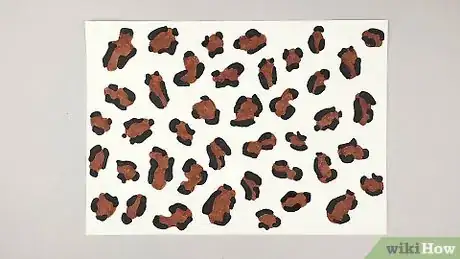
1Decorate a sheet of paper with markers, crayons, paint, or stickers. Get out a sheet of construction paper, printer paper, or cardstock. Set it down on a flat surface, then decorate it to your heart's content. If you use paint, be sure to let the paint dry.[1]
- Make spots or stripes for a simple design.
- Draw a pattern, such as hearts, stars, or fish.
- Decorate the windsock to look like an animal, such as a fish or owl.
-
2Roll the paper widthwise into a tube, then glue, tape, or staple it shut. Bring the narrow ends of the paper together to form a tube. Overlap them by 1 inch (2.5 cm). Secure the tube with glue, tape, or staples.[2]
- Make sure that the side that you decorated is on the outside of the tube.
- You can use a glue stick or liquid school glue. If you use liquid school glue, use clothespins or paper clips to hold the paper together until the glue dries.
Advertisement -
3Cut tissue paper or crepe paper into streamers. The streamers should each be about 15 inches (38 cm) long. Crepe paper is already cut into narrow strips, so you can leave it as-is, or you can cut it narrower. If you are using tissue paper, however, you should cut it into 1 to 2 in (2.5 to 5.1 cm) strips, and make them about 15 inches (38 cm) long.[3]
- Cut enough strips to glue all around the inside edge of your windsock. Plan on using 5 to 10 strips.
- The streamers don't all have to be the same color. Make each one a different color for a rainbow windsock!
-
4Tape or glue the streams to inside bottom edge of the windsock. Place the end of your first streamer into the windsock by 1 inch (2.5 cm). Tape or glue the streamer down, then move onto the next streamer. Keep going until you covered the entire inside edge with streamers.
- A glue stick or liquid school glue will work the best for this, but you can use a stapler too if you have nothing else.
-
5Punch 2 holes in the top of the windsock, directly across from each other. Turn the windsock so that the streamers are facing away from you. Use a hole puncher to make 2 holes in the top of the windsock. Make sure that the holes are across from each other.[4]
-
6Thread a piece of string through both holes, then tie the ends together. Cut a piece of string that is about 3 to 4 times the width of your windsock. Feed the end through both holes. Bring both ends of the string together, then tie them into a knot. Rotate the handle so that the knot is inside the windsock.
- Yarn works great for this, but you can use any type of string you want, as long as it is thin enough to fit through the holes.
- Alternatively, you can feed the end of a pipe cleaner through each hole, then bend the ends to hold them in place.[5]
-
7Hang the windsock from a hook. If you really want to see it in action, hang it outside or in front of a fan. Be careful not to leave it outside when it is rainy or snowing. You should also bring it indoors at night, or the dew will damage it.[6]
Making a Plastic Windsock
-
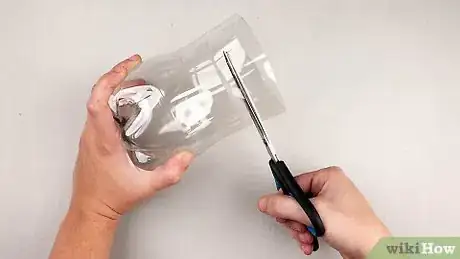
1Cut a 1 in (2.5 cm) ring from a plastic bottle. Find a plastic water bottle or soda bottle. Cut the bottle in half using a pair of scissors or craft blade. Next, cut a 1 in (2.5 cm) wide ring from 1 of the bottle halves. Keep the ring and recycle the rest.[7]
- Young children will need help with this step.
- If the bottle was dirty inside, wash the ring using soap and warm water. Dry it off with a towel.
-
2Punch 2 holes into the plastic ring. Use a hole puncher or an awl to make the holes. Make sure that the holes are across from each other, or the windsock won't hang evenly.[8]
-
3Thread a piece of string through the holes to make a handle. Cut a piece of string that is 3 to 4 times the length of your ring. Thread it through both holes, then tie both ends together to make a handle.
-
4Cut 1 in (2.5 cm) wide strips from a plastic bag. Spread a plastic bag out flat on the table. Use a marker and a ruler to draw 1 in (2.5 cm) wide stripes across the bag from top-to-bottom. Cut along these lines with a pair of scissors. Make sure that you cut through both layers of plastic.[9]
- How many strips you cut depends on how many strips you want your windsock to have. Plan on having about 5 to 7 strips.
- Use different colors of plastic bags to make a rainbow windsock.[10]
- You can also use party streamers, ribbon, or even cellophane!
-
5Tie the strips to the plastic ring using slipknots. Fold a plastic strip in half. Place the folded end into the ring so that it sticks out from the bottom by a few inches/centimeters. Wrap the tail ends of the strip over the top edge, and pull then down through the loop. Tug on the tails to tighten the knot.[11]
- Do this for all of the strips until the plastic ring is covered. You may need to cut more strips of plastic, depending on the size of the bottle.
-
6Hang the windsock from a hook. You can hang it anywhere you want, but outside on a windy day would be the best. If there is no wind, you can hang it in front of a fan instead. Because this windsock is made from plastic, you don't have to worry about it getting wet or damp![12]
Community Q&A
-
QuestionDo I make a hole in the front of it?
 Community AnswerYes, the wind needs to be able to flow through it.
 -
QuestionHow can I make the tissue paper move faster?
 Community AnswerPut the windsock out on a day when the wind is stronger, or try making sure that the windsock is within full reach of the wind.
 -
QuestionWhere can I get colored tissue?
 Community AnswerGo to your nearest craft store like Hobbycraft or Michael's and ask if they have tissue paper: then, look at the range of different colors!
Warnings
- An adult should handle all steps involving cutting plastic.⧼thumbs_response⧽
- Do not leave paper windsocks outside in the rain or snow.⧼thumbs_response⧽
Things You'll Need
Making a Paper Windsock
- Construction paper
- Crayons, markers, paint, stickers, etc.
- Crepe paper streamers or tissue paper
- String
Making a Plastic Windsock
- Plastic bottle
- Plastic bags or cellophane
- Scissors
- Glue or stapler
- Hole puncher
References
- ↑ http://www.123homeschool4me.com/2015/03/simple-windsock-spring-craft-for-kids.html
- ↑ http://www.123homeschool4me.com/2015/03/simple-windsock-spring-craft-for-kids.html
- ↑ http://www.123homeschool4me.com/2015/03/simple-windsock-spring-craft-for-kids.html
- ↑ https://www.easypeasyandfun.com/rainbow-windsock-toilet-paper-roll-craft/
- ↑ http://www.123homeschool4me.com/2015/03/simple-windsock-spring-craft-for-kids.html
- ↑ https://childrens-museum.org/blog/2020/05/wacky-art-windsock-craft
- ↑ http://www.pbs.org/parents/crafts-for-kids/windsock-craft/
- ↑ https://www.chestercountyswa.org/DocumentCenter/View/179/windsock?bidId=
- ↑ http://www.pbs.org/parents/crafts-for-kids/windsock-craft/
