This article was co-authored by wikiHow staff writer, Hannah Madden. Hannah Madden is a writer, editor, and artist currently living in Portland, Oregon. In 2018, she graduated from Portland State University with a B.S. in Environmental Studies. Hannah enjoys writing articles about conservation, sustainability, and eco-friendly products. When she isn’t writing, you can find Hannah working on hand embroidery projects and listening to music.
There are 10 references cited in this article, which can be found at the bottom of the page.
The wikiHow Video Team also followed the article's instructions and verified that they work.
This article has been viewed 87,762 times.
Learn more...
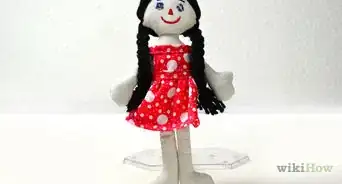
Guatemalan worry dolls have been around for centuries, providing comfort and entertainment to small children.[1] Making them on your own can be therapeutic, and it’s a fun craft for kids of almost any age to do. You can spend a creative afternoon forming your own worry dolls in different sizes, shapes, or colors.
Steps
Forming the Body
-
1Fold a pipe cleaner in half. Pipe cleaners are the easiest material to make a worry doll out of since they bend and twist. Grab a thin pipe cleaner and fold it in half so you have 2 equal sides.[2]
- You can choose whichever color you’d like, because most of the pipe cleaner will get covered up by yarn.
- If you’re making a worry doll with small children, they may not be able to twist the pipe cleaner on their own. Consider pre-forming the bodies of each doll and letting your child decorate it.
Alternative: Traditional worry dolls are made out of wooden pegs. You can use those if you’d like to and avoid the hassle of twisting a pipe cleaner into a doll shape.
-
2Make a loop around your finger and twist it into place. Stick out your pointer finger on one hand and drape the folded pipe cleaner over it. Use your other hand to twist the pipe cleaner directly underneath your finger 2 times to hold the loop in place.[3]
- This loop creates the head of your doll.
Advertisement -
3Bend 1 side of the pipe cleaner toward the loop, then twist it into place. Take 1 of the pieces of the pipe cleaner that’s hanging down and bend it about half way, keeping it parallel with the loop you just made. Twist the end of the pipe cleaner to keep it in place.[4]
- This first bend creates the first arm for your doll.
-
4Do the same thing to the other side to make the arms. Try to bend the other side of the pipe cleaner at the same length you bent the other one so that the arms are even. You’ll be left with 2 arms sticking out and some excess pipe cleaner hanging down.[5]
- If the arms aren’t totally even, that’s okay. Try to make them similar so that your doll looks proportionate.
-
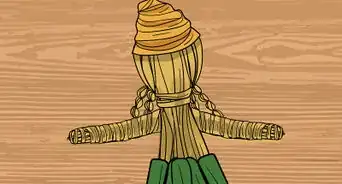
5Twist the excess pipe cleaner around itself 3 to 4 times. Pull the 2 sides of the pipe cleaner together underneath the arms and twist them around each other a few times to create the body. Leave the excess ends untwisted so your doll has 2 distinct legs.[6]
- Make sure the twists on the body are pretty tight so they don’t unravel as you’re decorating your doll.
- If the legs are too long, trim them with a pair of scissors.

Adding Hair and Clothes
-
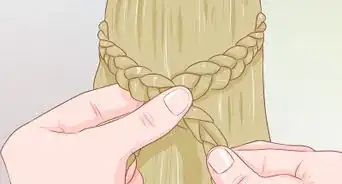
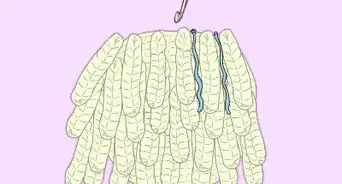
1Tie 6 in (15 cm) lengths of yarn around the top to make hair. Cut 10 to 12 strands of yarn or embroidery thread that are about 6 inches (15 cm) long. Tie each strand in a knot around the top of the loop, and let the excess flow down the back of the doll.[7]
- If the hair is too long, cut the excess off with sharp scissors.
- If you’re using a wooden peg instead of a pipe cleaner, tie a few strands of yarn or thread together and then glue them to the top of the wooden peg to make hair.
- For fluffier hair, cut a pom pom in half and glue each portion to the top of the doll.
- To make a head wrap instead of hair, cut a 1 in (2.5 cm) length of fabric and fold it into a triangle. Then, glue the triangle to the top of the doll’s head.
-
2Wrap a length of yarn or thread around the loop to make the face. Choose a yarn or thread color that you’d like to use for the face of the doll. Cut out a strand that’s about 6 inches (15 cm) long, then hold 1 end in place at the bottom of the loop. Wrap the rest of the yarn or thread around the entire top loop to create the face of the doll.[8]
- If you’re working on a wooden peg, adding yarn or thread on the face is optional. You can keep the wooden part bare if you’d like to.
-
3Glue the end of the yarn in place. When you run out of yarn or thread, hold the end of the strand against the back of the head and use a dot of hot glue to keep it in place. Hold the strand down for about 30 seconds to make sure it dries.[9]
- If you’re making this craft with a small child, use the hot glue gun yourself and don’t let them touch the glue until it’s dry.
-
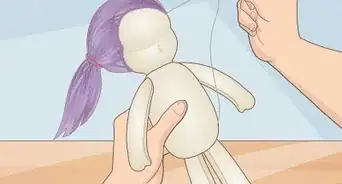
4Wind another length of yarn around the torso to make a shirt. Now you can pick what clothes you’d like your doll to wear! Cut a strand about 6 inches (15 cm) long, then hold 1 end in place on the doll’s neck. Wrap the strand around the torso of the doll until you run out, then glue the end in place with hot glue.[10]
Did You Know? Traditional worry dolls wear bright colors, like white, orange, red, and yellow.
-
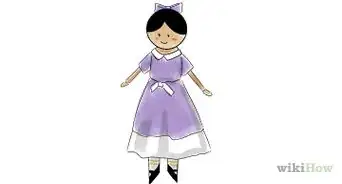
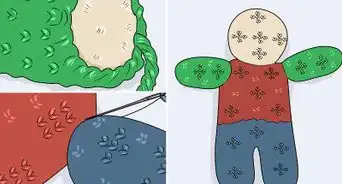
5Wrap yarn around each leg to give the doll pants. Cut out another strand that’s about 6 inches (15 cm) long, then hold the end just underneath the bottom of the doll’s shirt. For pants, wrap down and up one leg, and then the other. To make a skirt, wrap the strand around both of the legs at the same time. Glue the end of the strand in place.[11]
- You can make a couple different dolls that are all wearing different items of clothing.
- To make a flowing skirt for your doll, cut out a 3 in (7.6 cm) circle of fabric and then poke a small hole in the center with scissors. Slide the skirt up over the doll’s legs until it rests just underneath the shirt.
- For a dress, cut a 5 in (13 cm) circle of fabric and poke a small hole in the center. Slide the skirt up to the doll’s arms and rest it just underneath the armpits.
-
6Draw a small face on the doll with a permanent marker. To finish off your doll, use a black marker to give them eyes and a mouth. Give them a smiling face so they can comfort you in your times of worry.[12]
- You can also use glitter glue or a fabric marker for a brighter, more colorful face.
- If you’re crafting with a small child, you may need to draw the face for them.

Community Q&A
-
QuestionDoes the yarn have to be skin tone? Do I have to burn it? Does it need a skirt?
 T. ChinsenTop AnswererThe yarn can be any color. It is your choice. There is no need to burn it. Use a marker to darken or color the tip to make "hair." It does not need a skirt. It can be as detailed as you wish or kept simple. There are no hard and fast rules. Instructions are a guide, so feel free to use whatever you have to make the item.
 -
QuestionWhat is the purpose of a worry doll?T. ChinsenTop AnswererThink of it as a place to "bank" your worries. Instead of keeping the worries in you, you "deposit" them into the worry doll. It's like if you were carrying too much change in your pocket, you could put some in a piggy bank to lighten your load!
Warnings
- Use caution with hot glue, and ask an adult if you need help.⧼thumbs_response⧽
Things You’ll Need
- Pipe cleaner or wooden peg
- Scissors
- Yarn or embroidery thread
- Hot glue
- Hot glue gun
- Permanent marker
- Fabric (optional)

References
- ↑ https://www.commonhope.org/the-legend-of-the-guatemalan-worry-doll/
- ↑ https://www.youtube.com/watch?v=JJWmReMZSAA&feature=youtu.be&t=28
- ↑ https://www.youtube.com/watch?v=JJWmReMZSAA&feature=youtu.be&t=32
- ↑ https://www.youtube.com/watch?v=7lcoBtyUVVM&feature=youtu.be&t=71
- ↑ https://www.youtube.com/watch?v=7lcoBtyUVVM&feature=youtu.be&t=71
- ↑ https://www.youtube.com/watch?v=JJWmReMZSAA&feature=youtu.be&t=52
- ↑ https://www.youtube.com/watch?v=TjveptMteAQ&feature=youtu.be&t=250
- ↑ https://www.youtube.com/watch?v=JJWmReMZSAA&feature=youtu.be&t=255
- ↑ https://www.youtube.com/watch?v=7lcoBtyUVVM&feature=youtu.be&t=62
About This Article