This article was co-authored by Connie Tao. Connie Tao is a Bridal Designer and the Founder of Connie Tao Designs in Pasadena, California. Connie has over 12 years of experience and specializes in creating handmade custom wedding dresses and evening gowns. She and her team also do alterations and redesigns to existing garments. Connie received her Bachelors Degree in Fashion Design from Otis College of Art and Design.
This article has been viewed 220,183 times.
Barbie clothes are essential for keeping your doll in the latest fashions, but they can be expensive! You might also want to create a custom outfit for your Barbie to create a special look. Sewing your own Barbie clothes is easy if you have some basic sewing skills and a sewing machine or needle and thread. Grab some scrap fabric, choose a pattern or 2, and start sewing a fantastic new outfit for your Barbie doll!
Steps
Designing an Outfit for Barbie
-
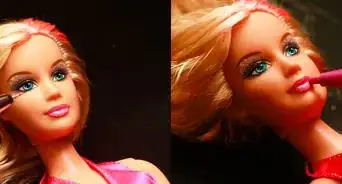
1Decide what clothing pieces you want to make. Think about how you envision your Barbie doll’s new outfit. Where is she going to wear it? To a party? To school? To the beach? What will she be doing in her outfit? Dancing? Studying? Swimming? What type of outfit will work best for the place and purpose of the outfit?
- For example, you might choose to create a full skirt and short-sleeved top if Barbie needs a new outfit for a party. Or, you might make a pair of leggings and a sweater if Barbie needs something to wear to school. Or, you might make a new swimsuit and cover-up for a day at the beach!
-
2Choose a pattern. There are lots of free online sewing patterns for making Barbie clothes, or you can purchase patterns in a craft supplies store. Find a pattern that matches up with your sewing skill level to ensure that you will be able to complete it. You can make any kind of Barbie clothing you want, but you have to use a pattern.[1]
- Make sure that any pattern you choose is meant specifically for Barbie dolls. Not all dolls have the same dimensions, so using a pattern meant for a different type of doll may result in clothing that will not fit your doll.
Advertisement -
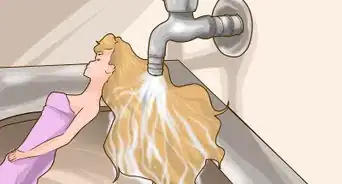
3Select your fabric and thread. You can use just about any type of scrap fabric you have around to make an outfit for your Barbie, or you can visit your local craft supply store to get new fabric. For thread, opt for a color that will blend in well, such as white thread for lighter color fabrics, or black thread for darker color fabrics.
- If you want to create multiple pieces, such as a shirt and skirt, then try to choose fabric colors and prints that will coordinate well.
- If you purchase fabric from a craft supply store, check the remnants bin to find small-sized, discount pieces of fabric.


Cutting out the Fabric Pieces
-
1Read the instructions and print out the pattern. Depending on the type of pattern you have selected, the instructions may vary greatly. Read the instructions for your Barbie clothing pattern all the way through to see what materials you will need and what process you will need to follow to sew the clothing. Then, print out the pattern on a plain white piece of paper.[2]
-
2Cut along the lines of each of the pattern pieces. There may only be a couple of pieces to cut out, or there may be several pieces depending on the type of clothing you are making. Make sure to cut right along the lines using a pair of sharp scissors.[3]
- Go slow to ensure that you do not create a jagged edge or cut in the wrong place!
-
3Pin the pattern pieces to the fabric. After you have cut out the paper pattern pieces, pin them onto the fabric as instructed by your pattern. You might need to fold the fabric in half first, or you might need to pin the paper pattern pieces onto a specific area of the fabric or going in a specific direction.[4]
- If desired, you may also trace along the edges of the paper pattern piece to create guides for cutting the fabric. Trace directly onto the fabric and then cut along the lines you have traced.[5]
-
4Cut the fabric along the edges of the paper pattern pieces. With the paper pattern piece pinned to the fabric, cut the fabric right along the edges of the paper pattern piece. Make sure to cut the fabric cleanly using a pair of sharp scissors.[6]
- If you traced lines onto the fabric, then you can simply cut along these lines.[7]
- Cut your fabric on a flat surface to ensure you get clean, straight lines without bunching up the material.


Sewing with a Pattern
-
1Pin the fabric pieces together as indicated by the pattern’s instructions. To get the fabric pieces you have cut out ready for sewing, pin them together as indicated by your sewing pattern. Place 1 pin about every 2 inches (5.1 cm). Insert the pins going perpendicular to the edges of the fabric. This will make it easier to remove them before sewing over each area.[8]
- The right sides (print or outer sides) of the fabric pieces should be facing each other to ensure that the seams will be hidden on the inside of the clothing.
-
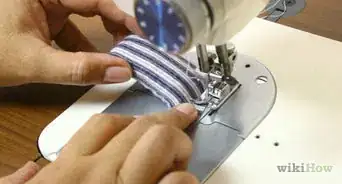
2Sew along the pinned edges. Next, sew a straight stitch along the pinned areas of the fabric pieces. Place the stitch so that it is about 0.25 inches (0.64 cm) from the raw edge of the fabric. This will be plenty of seam allowance for a piece of doll clothing.[9]
- Make sure to check your pattern for any special sewing instructions. It may recommend a special type of stitch or stitch setting to ensure that you get the best results.
-
3Hem the raw edges if desired. To prevent the fabric from fraying, it is a good idea to sew a hem along any remaining raw edges. However, this is not always necessary and your pattern may not require a hem. If you want to sew a hem even if it is not part of the pattern, then fold the edges of the fabric inward by 0.25 inches (0.64 cm) so that the raw edge is hidden. Then, sew a straight stitch along the edges of the folded fabric.[10]
- Check your pattern to see if hemming the raw edges of your fabric is recommended.
-
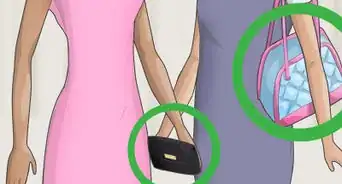
4Attach Velcro to the clothing for closures if needed. If you want to add closures to any of your clothing pieces, then Velcro is a great option. Get some small 0.5 inches (1.3 cm) pieces of self-stick Velcro and apply them to the open edges of your Barbie’s clothing as needed.[11]
- For example, you could place interlocking Velcro pieces on either side of the opening for a dress, jacket, top, or on the waistband of a pair of pants.
- Make sure that your place the pieces so that they will line up and secure properly.
-
5Repeat for the other outfit components you want to sew. After you finish making 1 piece of Barbie clothing, repeat the process with a different pattern to create another piece. Keep making Barbie clothing pieces until you have completed your doll’s outfit, and then try it on her!
- Make a dress with a coordinating jacket or shrug to wear to a special event.
- Sew a sweatshirt with a pair of jeans for a warm, fall look.
- Create a tank top and shorts or a miniskirt for a cute hot weather outfit.


Community Q&A
-
QuestionIs there a way to go with the flow and not use a pattern?
 Community AnswerIf you have a lot of experience sewing, it is possible to make Barbie clothing without a pattern. If you are beginner sewer, you can work without a pattern, but it may take a lot of trial and error before you get it right.
 -
QuestionWhere can you get a pattern?
 Community AnswerYou can usually find them at fabric stores. I got some from Jo-Ann's. There are also some free patterns online, just Google "Barbie Outfit Patterns."
 -
QuestionWhat if I don't have any of the supplies?
 Katie KunCommunity AnswerIf you need cloth, you could cut up some old clothes that don't fit anymore. You don't really need a pattern. You could even just measure your Barbie and cut pieces of paper that fit. The only thing you really need is a needle and thread.
Warnings
- Be extra careful with pinning, cutting, and sewing. You might even want to ask an adult for help.⧼thumbs_response⧽
Things You’ll Need
- Fabric
- Barbie clothing pattern
- Scissors
- Pins
- Pen or pencil
- Self-stick Velcro
- Sewing machine or needle for hand sewing
- Thread

References
- ↑ https://www.thesprucecrafts.com/sewing-patterns-for-fashion-doll-clothes-2977747
- ↑ https://www.thesprucecrafts.com/sew-a-barbie-shirt-2978488
- ↑ https://www.thesprucecrafts.com/sew-a-barbie-shirt-2978488
- ↑ https://www.thesprucecrafts.com/sew-a-barbie-shirt-2978488
- ↑ http://www.hellokids.com/c_29702/kids-crafts-and-activities/how-to-make-clothing-for-your-fashion-doll/barbie-doll-matching-skirt-tank
- ↑ https://www.thesprucecrafts.com/sew-a-barbie-shirt-2978488
- ↑ http://www.hellokids.com/c_29702/kids-crafts-and-activities/how-to-make-clothing-for-your-fashion-doll/barbie-doll-matching-skirt-tank
- ↑ http://www.hellokids.com/c_29702/kids-crafts-and-activities/how-to-make-clothing-for-your-fashion-doll/barbie-doll-matching-skirt-tank
- ↑ http://www.hellokids.com/c_29702/kids-crafts-and-activities/how-to-make-clothing-for-your-fashion-doll/barbie-doll-matching-skirt-tank
About This Article