wikiHow is a “wiki,” similar to Wikipedia, which means that many of our articles are co-written by multiple authors. To create this article, 131 people, some anonymous, worked to edit and improve it over time.
The wikiHow Video Team also followed the article's instructions and verified that they work.
This article has been viewed 4,974,665 times.
Learn more...
Homemade envelopes can add a personal touch to any card or letter. You can easily make an envelope at home using a few basic supplies.
Steps
Making a Pouch Envelope
-
1Get a paper that's about twice as large as your desired envelope size. If in doubt, a standard size of 8.5 by 11 inches will do fine; you can fold and cut it in half before beginning if you want a small envelope.
-
2Fold the paper over evenly. You should get a rectangle half the size of your original piece.Advertisement
-
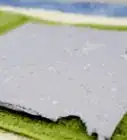
3Tape together the open left and right sides. Use tape to securely close the two open edges of the rectangle, leaving the top open. The top is where you will insert your letter.
-
4Fold down the top to make a flap. Make a small flap by folding down the open edge of the rectangle. This will keep the letter from falling out of the envelope. A flap that is about 1/2 of an inch will work.
-
5Insert the letter or card. Bend back the flap, and insert your letter, card, or other contents. Fold the flap down again after this is done.
-
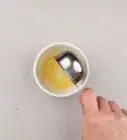
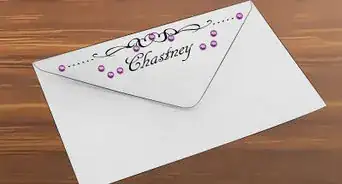
6Glue the flap to keep your message enclosed. Place a thin line of glue along the inner edge of the flap, then press the flap down. This will keep the envelope closed until the recipient opens it. You can also secure the flap with decorative tape or a sticker.

Making a Taped Envelope
-
1Lay a rectangular piece of paper down lengthwise (landscape-style).[1] You can experiment with paper sizes, but if in doubt, a standard-sized (8.5 x 11 inches) will do.
-
2Fold the paper in half lengthwise. Match up the edges of the paper to ensure the fold is straight, and press down on the folded edge with your fingers to make a crease. Then, you can unfold the piece of paper, and it will have a crease in the middle.
-
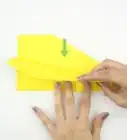
3Fold the top right corner along the center crease. When the edge of the top right corner is touching the center crease in a straight line, fold the corner down. This will make a triangle shape with the top right corner.
-
4Fold the top left corner along the center crease. Fold the top left corner down as you did the right corner. Remember to smooth out the paper with your fingers to make a straight fold. You will now have two small triangles sitting on top of a rectangle.
-
5Fold one inch of the top and bottom edges toward the center crease.[2] The measurement here does not have to be exact, so you can eyeball the fold. Both the top and bottom edges should be folded towards the center, leaving enough room in the center for a letter or card to fit, about one inch.
- At this point, the paper should still be lying lengthwise
- The triangular point of the paper should still be facing left.
-
6Fold the right edge of the paper along the bottom of the triangle. The edge of the folded triangle on the left-hand side of the paper should be parallel with the edge of the right hand side. The triangle itself will still be visible. Smooth out the fold with your fingers, then unfold it.
-
7Fold your message so it fits into the envelope. Large cards may be too big for this method, but regular letter-sized paper will fit if folded in half or in thirds.
-
8Insert your message. Your note can go between the horizontal creases of the envelope. Use the bottom flaps of the triangle and the two length-wise flaps at the side to keep the message in the envelope.
-
9Close the envelope. Fold the right hand edge of the paper back up to the edge of the triangle, just like did a moment ago. Fold the triangle top towards the center of the rectangle. Now, you will notice the back of your envelope looks like those bought in stores.
-
10Tape the edges shut. Use small pieces of tape to secure the sides of the envelope. Tape the flap of the envelope closed as well.
-
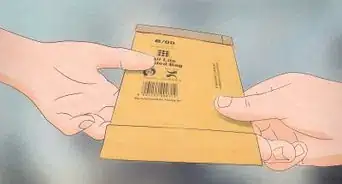
11Hand-deliver your letter. Unfortunately, postal services often charge more for mailpieces that are not precisely rectangular and those that do not have exact edges. Hand-deliver your homemade envelope if you do not want to pay extra shipping costs.

Making a Square Origami Envelope
-
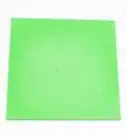
1Get a square sheet of paper larger than your letter or card.[3] If your letter or card is very large, you may need to go to a craft store to find the right size of paper. For example, if your card is 8.5 x 11 inches, then you will need at least a 12 x 12 inch piece of paper. For a small 4 x 5 inch card, a 7 x 7 inch piece of paper will work.
-
2Place the paper so its corners are in a diamond shape. The corners should face up and down, and right and left, like a diamond.[4]
-
3Fold the square corner to corner. This will create one crease going from the upper left to the bottom right corner and another crease going from the upper right to the bottom left corner. First, line up two of the opposing edges, crease, and then unfold. Repeat this for both the other corner, then unfold the edges so the paper lies flat in a diamond shape again.
-
4Fold the bottom corner up to the middle crease. Touch the bottom corner to the point where both creases intersect in the middle of the paper. Then, crease the edge of the fold so the paper lies flat.
-
5Fold the flat bottom of the corner up to the middle crease. Now, the paper will be triangular. The outer edges of the paper should line up almost perfectly. Smooth the fold so the paper lies flat.
-
6Fold the left corner towards the center. Fold the left edge of the triangle so the point goes slightly over the middle crease.
-
7Fold the right corner towards the center. The right corner of the triangle corner should overlap the crease, too.
-
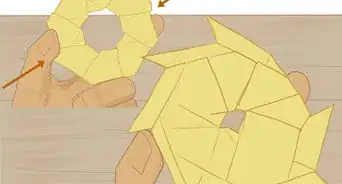
8Fold back the edge of the right corner. The right corner did not line up perfectly with the middle crease, so fold the overlapped point back slightly. The edge of the right corner should line up with the vertical crease. This will make a small triangle.
-
9Spread the small triangle open. When you stick your finger into the fold the of the small triangle, you will notice the small triangle naturally opens into a diamond shape. Spread and flatten the small triangle. The tiny diamond will have a crease down the center.
-
10Insert the top edge of the envelope into the small opening. Now, the envelope is finished! You can reopen the envelope to insert your card or letter, and close the top edge after it is inserted. You may want to secure any loose edges with tape if you have trouble keeping them shut.


Community Q&A
-
QuestionCan you make an envelope without tape?
 wikiHow Staff EditorThis answer was written by one of our trained team of researchers who validated it for accuracy and comprehensiveness.
Staff AnswerwikiHow Staff EditorStaff AnswerYes. The origami method is a great way to make an envelope without tape, although you may want to use some to keep the flap from coming open. You can also use stickers or a glue stick to keep the flap in place if you don’t have any tape on hand. -
QuestionWhat are the common sizes of envelope?wikiHow Staff EditorThis answer was written by one of our trained team of researchers who validated it for accuracy and comprehensiveness.
Staff AnswerwikiHow Staff EditorStaff AnswerThere’s a huge range of envelope sizes. The most common mailing envelope is 4 1/8 by 9 1/2 inches (10.5 by 24.1 cm). A typical greeting card envelope is 5 1/4 by 7 1/4 inches (13.3 cm by 18.4 cm). Many manila envelopes are designed to hold a standard sheet of printer paper. These envelopes are usually 9 by 12 inches (22.9 by 30.5 cm). -
QuestionCan we make the taped envelope with a different size of paper?
 Community AnswerYes, these instructions should work for any size. If the proportions seem way off partway through, you can trim off part of the paper.
Warnings
- Don't make your creases until you are sure that they are where you want them to be.⧼thumbs_response⧽
- Handle paper with caution, since paper cuts can hurt.⧼thumbs_response⧽
Things You'll Need
- Letter/A4 sized paper
- Tape
- Glue

References
About This Article
To make your own envelope, you just need a rectangular piece of paper and some tape. First, fold your piece of paper in half lengthwise and unfold. Then, rotate the paper 90 degrees and fold the top right corner down to the center crease. Do the same thing with the top left corner. Now, fold the right edge of the paper in 1 inch (2.5 cm), then repeat with the left edge of the paper. Fold the bottom edge of the paper up to the bottom of the triangle at the top of the paper. Fold up your message so it fits inside the envelope, then stick it inside. Finally, fold the triangle down to close the envelope and tape the edges of the envelope shut. For other ways to make envelopes, including a square origami envelope, read on!