This article was co-authored by Christina Millikin. Christina Millikin is the Founder and former CEO of Glow Events, an event planning agency based in San Francisco, California. Glow Events is a boutique event planning firm specializing in full event production and creative design for corporate and social events. Christina has worked with clients such as Salesforce, Heroku, Okta, and Netflix. Glow Events' work has been featured in Martha Stewert Weddings, InStyle, and SanFrancisco Magazine. Christina is an advisor to the management team at Glow, as well as a business advisor for the Goldman Sachs 10,000 Small Businesses program, and she has a BS in Marketing from the University of Florida.
There are 9 references cited in this article, which can be found at the bottom of the page.
This article has been viewed 37,809 times.
Making your own invitations gives you complete creative control over your event announcements and can be a fun way to get people excited about a party before the date even rolls around. And let's not forget, when you do things yourself, you can save some money, too. Here's a simple how-to guide for crafting homemade invites.
Steps
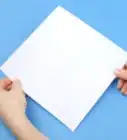
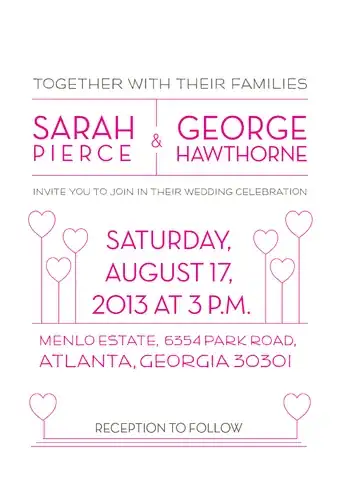
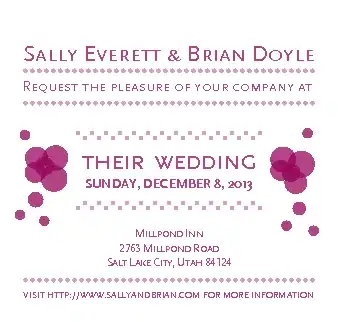
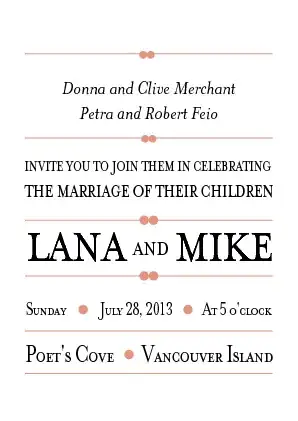
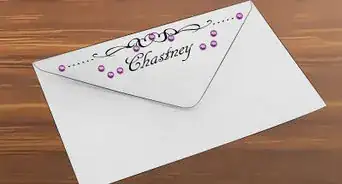
Sample Wedding Invitations
Getting the Basics Down
-
1Think about the color scheme. The colors you choose for your invitations are often determined by the occasion itself. For example, a birthday party invitation may be done in the honoree's favorite colors or be related to the theme of the event (bright colors for a "Mexican Fiesta" theme, red and blue for a Spiderman theme or black and white for a formal wedding.) If you're sending invitations on behalf of someone else, be sure to consult with them about color preferences.[1]
- The number of colors you use may impact the final cost of your invites. Purchasing paper in multiple colors or designs or printing in colored ink vs. black can add a bit to your cost, so keep that in mind.
-
2Decide on your text. You need to include basic information on your invitations so that everyone arrives at the right time, on the right day at the right place. Be sure you've confirmed all your arrangements regarding time, date and place before you sit down to make your invitations.
- Think about additional information you may need to include such as a contact or RSVP phone number, instructions about attire or gifts, directions and/or a map and a web address (if you've created one for the occasion).[2]
- Some events, such as weddings, often include multiple events--rehearsal dinner, post-wedding day brunch and the like. Be sure all the information about auxiliary events has been decided and confirmed.
Advertisement -
3Decide on size. The two biggest considerations when it comes to size are finding envelopes and postage costs. Make a visit to your local stationery or art supply store to look at options and contact or visit the website of the delivery service in your area.
- Envelopes. The most common style of envelopes are A-style (also called A-line) They have side seams and square, sometimes deep flaps. They come in a range of sizes and their numeric designation corresponds to set dimensions. For example, A1 envelopes are 5.125' x 3.625' while the larger A-8 are 8.125' x 5.5'.
- You can do some research online about envelope sizes. Be sure to make note of the size of the invite that will fit into the envelope you choose.
- Mailing costs. Mailing regulations vary from country to country, so you want to check with the service you'll use about the specific regulations that govern cost. For example, the United States Postal Service (USPS) requires that letters not exceed 11 1/2" long x 6 1/8" high or be more than 1/4" thick.[3]
- Envelopes that are square or another unusual shapes incur an additional mailing cost because their size makes it difficult for them to be processed on mail sorting machines. Before you decide to get clever with addressing your invites, know, too, that envelopes on which the address is written parallel to the shorter edge cost more to mail.[4]
- Envelopes. The most common style of envelopes are A-style (also called A-line) They have side seams and square, sometimes deep flaps. They come in a range of sizes and their numeric designation corresponds to set dimensions. For example, A1 envelopes are 5.125' x 3.625' while the larger A-8 are 8.125' x 5.5'.


Creating Layered Invitations
-
1Choose your backing(s). The backing layer(s) will be the piece onto which you will mount the actual text of your invitation. Using multiple layers gives your invitation depth, interest and can emphasize the color scheme or theme of your event.
- Pick a medium- to heavy-weight piece of Cardstock for the first layer of your invitation. This will give some weight and firmness to your invitation. This kind of paper is most readily available in solid colors.
- Chose one or more coordinating papers to glue to your first backing sheet. Pick papers in different patterns, related colors or different textures to add interest.
- Layered invitations are not folded before being inserted into the envelope, so don't worry about creasing the slightly heavier stock or multiple layers.
-
2Print out your invitation text. To end up with the correct size insert, it makes sense to first print out the text for your invitation. Once you see how much length and width you need for a text box, you can work back from there to arrive at the finished sizes of your backing paper(s).
-
3Cut your paper. How much of your backing paper shows depends on what size you cut each layer. You can standardize your cuts so that, for example, a 1/2" border of each backing paper shows, or you can create different size borders and allow varying amounts of different papers to show along the edges of your invite.[5]
- Measure your paper carefully and cut it using a paper trimmer or scissors. A paper trimmer will help ensure straight, even cuts, but as long as you take your time and are careful, you can do as good a job with a pair of scissors.
- You can purchase scissors that have a decorative blade so that when you cut, your paper will have an interesting edge.
- Measure your paper carefully and cut it using a paper trimmer or scissors. A paper trimmer will help ensure straight, even cuts, but as long as you take your time and are careful, you can do as good a job with a pair of scissors.
-
4Glue the layers in place. Use a glue stick to glue your layers to one another. Lay your back layer down on the table and glue the next layer on top of it. Some people can simply "eyeball" the paper and know where to glue in order to create even edges. Other people need to measure and create small pencil dots so that they can line up the paper exactly when creating their bordered look.
- Press the paper down firmly and allow it to dry completely before gluing the next layer in place to ensure layer number one doesn't move when you apply pressure to adhere it to the next layer.
- The invitation text should be the last layer glued into place.
- If any of your layering paper is particularly delicate, use double-stick tape rather than glue to avoid the chance of any bleeding through.
-
5Add decorative elements. Once all your layers are glued in place and completely dry, you can add some decorative elements if you'd like. If you've used more than three layers (remember, your invitation text counts as a layer) or bold paper designs, you may not want to add anything else at this point. However, if you think an additional element may complete the invitation, go ahead and put one in place.
- Punch two holes at the top of the invite, thread a pretty piece of ribbon through and tie in a bow.
- Glue three buttons, stickers or punched-paper shapes in one corner of your invitation.
- Get out your sewing machine and zig-zag stitch around your layers for a custom look.
- Rubber stamp a large image on the back of your invitation as a bit of a fun surprise for anyone who turns the card over after reading the invite.

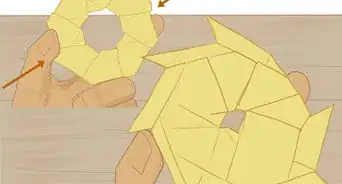
Creating Pocketfold Invitations
-
1Measure your pocket. Place the piece of paper stock (80lb to 100lb paper recommended)that will serve as your folder horizontally on the table in front of you. With a ruler, begin at the bottom left-hand corner of the paper and draw a horizontal box that measures 1 1/2" high by 7" long.
-
2Make your cuts. Use a pair of scissors or an Xacto knife to cut out the horizontal box you just measured. Discard this piece of paper.[6]
- The longer "flap" of paper that's left on the right-hand side will fold up to become your pocket.
-
3Fold across. With your paper back in place in front of you and the cut-out space in the bottom left-hand corner, you'll work from left to right to make your folds. Measure in 2" from the left and create a vertical fold. Measure 5" from that fold (7" from the left-hand edge of the paper) and create a second fold.
- Use a paper scorer or folding bone to create sharp folds in your paper.
-
4Fold up. Measure up an 1 1/2" from the bottom edge of the long "flap" of paper on the right-hand side and fold to create your pocket. Glue the pocket into place.
-
5Create the invitation text. Use your computer and home printer to print out the text of your invitation. The final, cut size of your text should be 4 3/4" wide x 6 3/8" tall.
- If you find it easier, you can print "corner guides" around your text box to give you the proper dimensions and help you cut your paper to the proper size.
- Use a glue stick to glue the invitation text to the middle panel of your pocket fold.
-
6Create your inserts. Print out the text for the inserts that will sit in the pocket of your invitation and cut them to size. A simple guideline is to make the inserts just a little smaller than the pocket. In this case, make them just under 4" wide and a little less than 6 1/2" tall.[7]
- Inserts could include directions and/or a map; if this is a wedding invitation, they could also be a reception card, information about local accommodations or an RSVP card and envelope.
- Plan to stagger the height of your inserts. You can go with what looks good to your eye or standardize the height of your inserts, perhaps making each one 1 1/2" shorter the one behind it in the pocket.
- Whatever you decide about the height of your inserts, be sure to give each one a title that'll show when the invitation is open. Place the copy for each insert so that it falls below the edge of the insert that gets layer on top of it. In that way, the overall look of the invitation won't be cluttered, and readers can simply pull each insert out of the pocket in order to read the information.
-
7Assemble your invitation. Place the inserts in the pocket; the tallest goes in first and each progressively shorter insert is placed in until the pocket is full.[8]
-
8Fold and tie. Fold the right-hand pocket side of your invitation closed and then fold the left-hand flap over. Tie a piece of decorative ribbon around the invite to hold it closed.


Expert Q&A
-
QuestionWhat info do you need in an RSVP?
 Christina MillikinChristina Millikin is the Founder and former CEO of Glow Events, an event planning agency based in San Francisco, California. Glow Events is a boutique event planning firm specializing in full event production and creative design for corporate and social events. Christina has worked with clients such as Salesforce, Heroku, Okta, and Netflix. Glow Events' work has been featured in Martha Stewert Weddings, InStyle, and SanFrancisco Magazine. Christina is an advisor to the management team at Glow, as well as a business advisor for the Goldman Sachs 10,000 Small Businesses program, and she has a BS in Marketing from the University of Florida.
Founder & CEO, Glow EventsYou should have all the information the guests will need to attend the party, like location, time, dress code, etc.! It's okay if you don't have all of the details ready by the time you want to send the invitations, as you can always have an event website where you'll list relevant information. -
QuestionHow many weeks in advance should you send out invitations?Christina MillikinChristina Millikin is the Founder and former CEO of Glow Events, an event planning agency based in San Francisco, California. Glow Events is a boutique event planning firm specializing in full event production and creative design for corporate and social events. Christina has worked with clients such as Salesforce, Heroku, Okta, and Netflix. Glow Events' work has been featured in Martha Stewert Weddings, InStyle, and SanFrancisco Magazine. Christina is an advisor to the management team at Glow, as well as a business advisor for the Goldman Sachs 10,000 Small Businesses program, and she has a BS in Marketing from the University of Florida.
Founder & CEO, Glow EventsIn this day and age, send them out earlier than you would commonly think. Try to get RSVPs back one month before the event, so that you have time to make adjustments based on the guest count.
Things You'll Need
- Cardstock
- Decorative paper
- 8.5 x 11 paper (80 – 100 lb weight for the pocketfolds)
- Ruler
- Adhesive
- Scissors or paper trimmer
- Paper scorer or bone folder
- Ribbon, stickers, buttons and other decorative items
- Rubber stamps
- Printer

References
- ↑ https://www.theknot.com/content/wedding-invitation-tips
- ↑ Christina Millikin. Founder & CEO, Glow Events. Expert Interview. 11 February 2020.
- ↑ http://pe.usps.com/text/dmm100/tips-measure-letters.htm
- ↑ http://pe.usps.com/text/dmm100/tips-measure-letters.htm
- ↑ https://www.youtube.com/watch?v=6CBvaaqI-_U
- ↑ https://www.youtube.com/watch?v=__Bns1MxqpA
- ↑ https://www.youtube.com/watch?v=umqnCHPJnSk
- ↑ https://www.youtube.com/watch?v=QFqHTa6dX4U
- https://digital-photography-school.com/make-great-photo-invitations-in-photoshop/
About This Article

To make invitations, start by printing out your invitation text onto card stock. Then, paste the card stock onto some paper backing to give it a fun, colorful border. When you're choosing paper backing for your invitations, try to stick with a color scheme that goes with the theme of your event. For example, if you're having an under-the-sea themed party, your color scheme could be blue, purple, and green. Finally, embellish your invitations with ribbon, stickers, gemstones, or other fun add-ons. To learn how to make pocketfold invitations, scroll down!