This article was co-authored by wikiHow staff writer, Hannah Madden. Hannah Madden is a writer, editor, and artist currently living in Portland, Oregon. In 2018, she graduated from Portland State University with a B.S. in Environmental Studies. Hannah enjoys writing articles about conservation, sustainability, and eco-friendly products. When she isn’t writing, you can find Hannah working on hand embroidery projects and listening to music.
There are 8 references cited in this article, which can be found at the bottom of the page.
The wikiHow Video Team also followed the article's instructions and verified that they work.
This article has been viewed 10,724 times.
Learn more...
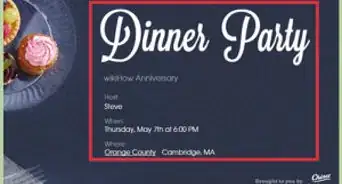
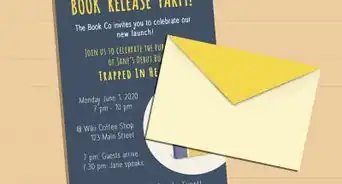
Invitations are the most important part of any gathering. They let your guests know when to show up, where to go, and how to get there, so there can be a lot of pieces involved. If you’d like to tie your invitations together in a delicate and pretty way, you can wrap them in twine, make a belly band out of kraft paper, or add a ribbon. No matter what you choose, your invitations will look neat and chic!
Steps
Wrapping with Twine
-
1Cut twine into 2 ft (0.61 m) pieces. Use sharp scissors to cut enough pieces of twine to cover all of your invitations. They don’t have to be perfect, but leave yourself enough wiggle room to work with.[1]
- If you don’t want to use plain brown twine, look for colored twine that has been dyed.
- You can also use hemp cord or yarn if you don’t have twine.
Tip: Twine is a great addition for a rustic themed party or wedding.
-
2Stack the invitation bundle in size order. Your invitations probably incorporate many pieces of paper. Lay the invitation, or the largest piece of paper, down first. Stack the reception card, map, and RSVP card on top of the invitation in size order with the smallest one on top. Make sure all pieces of the invitation are print side up so they are easy to read.[2]
- If you are worried about your invitation smearing, place a thin piece of tissue paper on top of it before you stack the rest of your inserts.
Advertisement -
3Center your invitation bundle over a strip of twine. Lay 1 piece of twine out on a flat surface. Place a bundle of invitations over the center of the twine. Make sure your invitations are centered length-wise over the twine.[3]
- It is important to center the invitation over the twine up and down so that the bow sits directly in the middle.
-
4Pull the twine to the right, leaving 6 in (15 cm) of twine on the left. Hold your invitations steady with 1 hand and use the other hand to pull on the length of twine to the right. Leave about 1 foot (0.30 m) of twine on the left to work with later.[4]
-
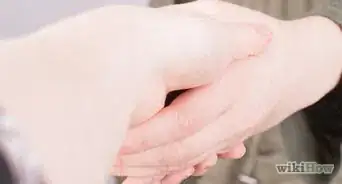
5Wrap the right side of the twine once around the invitation. Move the right side of the twine over the entire invitation and then bring it around the back of it. This creates a nice wrap around the invitation to keep everything in place. Make sure you have a length of twine on the right side of your invitation again.[5]
- Adjust your invitation bundle if things moved around in the process. Make sure everything is centered and in line again.
-
6Tie the ends of the twine together in a neat bow. Take the loose ends of the twine and tie them together in a bow with large loops. If you have too much twine, cut the excess off using sharp scissors.[6]
- If you have a small, monogrammed cardboard cut-out, you can hole punch 2 holes in the top of it and tie it into the twine bow.
-
7Create an “X” out of your twine for added decoration. Grab the top piece of twine on either side of the bow and move it upward so that it is separated from the bottom one. Move the bottom piece of twine downward so that the twine creates an “X” shape over your invitations.[7]
- This adds a little more flair to your invitations and can create a stronger hold.


Creating a Belly Band
-
1Cut kraft paper into 11 by 2 in (27.9 by 5.1 cm) strips. Kraft paper is brown paper that is similar to cardboard, but pliable enough that you can bend and cut it like normal paper. Cut a normal-sized piece of kraft paper into as many strips as you have invitations.[8]
- You can find kraft paper at most craft supply stores.
- If you’d like to use colored paper, you can use cardstock or construction paper instead.
Tip: Use a ruler to make sure that you are cutting your strips in a straight line.
-
2Assemble your invitations in stacks. Place your invitations, RSVP cards, maps, and whatever else you are sending along in a neat stack. Make sure the largest part of the stack, usually the invitation itself, is at the very bottom.[9]
-
3Place the invitation in the center of 1 strip of kraft paper. Lay out a single strip of kraft paper onto a flat surface. Place 1 invitation stack over the strip of paper and center it both left to right and up and down.[10]
- It’s okay if it’s not perfectly centered, since you can adjust it later on. Just make sure it is mostly in line.
-
4Overlap the ends of the strip to close them in front. Grab the left side of the strip of kraft paper and bring it over the front of the invitations. Grab the right side of the kraft paper and bring it over so that it overlaps the left side.[11]
- If you are using cardstock or construction paper, you may need to crease the parts of the paper that are folding to get them to bend easier.
-
5Seal the ends of kraft paper with a sticker. Use a monogrammed sticker with you and your spouse’s names on it, or choose a wedding themed sticker, like a cake or dress. Make sure to get both sids of the kraft paper underneath the sticker so that it stays shut.[12]
- You can order monogrammed stickers online.
- The sticker will be the first thing each of your guests see, so make sure it stands out!


Adding a Ribbon
-
1Cut pieces of ribbon 33 inches (84 cm) long. Use sharp scissors to cut enough pieces of ribbon for each invitation. Choose a satin or silk ribbon without any wire on the inside in a color that goes with your wedding or invitations.[13]
- You can purchase spools of ribbon at most craft supply stores.
-
2Stack your invitation bundles in descending size order. Place the largest part of the invitation down first. Add each insert on top of it in descending order of size, leaving the smallest one on top.[14]
- The largest part is usually the invitation itself.
-
3Center your invitation over a piece of ribbon. Place your invitation bundle over the center of 1 piece of ribbon. Make sure there is roughly the same amount of ribbon on each side so that your bow is even.[15]
- If you have an invitation with pre-cut ribbon slits in the back, thread your ribbon through the slits instead of wrapping it around the entire invitation.
-
4Tie the loose ends of the ribbon together in a bow. Take the ends of the ribbon and tie them together to create a large bow with big loops. Make sure the center knot is tight so that your invitation stays together.[16]
- If the ribbon is not perfectly centered over your invitation, gently slide it around after you tie it until the bow is in the middle.
-
5Cut off the excess ribbon at an angle. Take sharp scissors and cut off any excess ends of the ribbon at an angle so that they look neat. Make sure the ends are roughly the same length so that the ribbon looks symmetrical.[17]
Tip: Ribbon is slightly slippery, so put your invitations into an envelope right away so that they don’t slide around.


Things You’ll Need
Wrapping with Twine
- Twine
- Scissors
Creating a Belly Band
- Kraft paper
- Scissors
- Sticker
Adding a Ribbon
- Ribbon
- Scissors


References
- ↑ https://www.evermine.com/weddingblog/bundled-wedding-invitations-two-ways/
- ↑ https://www.marthastewartweddings.com/228650/addressing-and-mailing-your-wedding-invitations?slide=f8ad18dc-00a2-406b-8326-bc5b0f1a1629#f8ad18dc-00a2-406b-8326-bc5b0f1a1629
- ↑ https://www.evermine.com/weddingblog/bundled-wedding-invitations-two-ways/
- ↑ https://ohsobeautifulpaper.com/2014/05/how-to-add-your-personal-touch-diy-wedding-invitations/
- ↑ https://ohsobeautifulpaper.com/2014/05/how-to-add-your-personal-touch-diy-wedding-invitations/
- ↑ https://www.evermine.com/weddingblog/bundled-wedding-invitations-two-ways/
- ↑ www.evermine.com/weddingblog/bundled-wedding-invitations-two-ways/
- ↑ https://www.evermine.com/weddingblog/bundled-wedding-invitations-two-ways/
- ↑ https://www.evermine.com/weddingblog/bundled-wedding-invitations-two-ways/
- ↑ https://www.exquisiteweddingsmagazine.com/2012/09/finishing-touches-8-ways-to-tie-your-invitations/
- ↑ https://www.evermine.com/weddingblog/bundled-wedding-invitations-two-ways/
- ↑ https://www.evermine.com/weddingblog/bundled-wedding-invitations-two-ways/
- ↑ https://www.youtube.com/watch?v=T6H04XCRJOI&feature=youtu.be&t=115
- ↑ https://www.marthastewartweddings.com/228650/addressing-and-mailing-your-wedding-invitations?slide=f8ad18dc-00a2-406b-8326-bc5b0f1a1629#f8ad18dc-00a2-406b-8326-bc5b0f1a1629
- ↑ https://ohsobeautifulpaper.com/2014/05/how-to-add-your-personal-touch-diy-wedding-invitations/
- ↑ https://www.youtube.com/watch?v=T6H04XCRJOI&feature=youtu.be&t=136
- ↑ https://www.youtube.com/watch?v=T6H04XCRJOI&feature=youtu.be&t=169
About This Article