This article was co-authored by Palo Alto Humane Society and by wikiHow staff writer, Amy Bobinger. The Palo Alto Humane Society is a 501(c) 3 nonprofit, charitable, volunteer-supported organization based in Palo Alto, California, with nationwide education initiatives. PAHS has worked to keep animals out of the shelter for over 100 years, through humane programs in intervention, advocacy, and education. Their mission is to alleviate the suffering of animals, increase public sensitivity to animal issues, and elevate the status of animals in our society.
There are 23 references cited in this article, which can be found at the bottom of the page.
This article has been viewed 117,477 times.
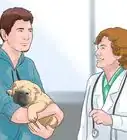
Parvovirus is a viral infection, which is why it is not easily treatable—in fact, you can only treat the symptoms, not the disease itself.[1] Putting your dog in the hospital is really the best option. Your vet knows how to treat a dog with parvo and will be able to administer the medications and liquids he needs. However, if you can't afford to put your dog in the hospital, you can try to treat your dog's intestinal parvo at home by providing fluids both under the skin and orally, giving medications, and following certain protocols.
Steps
Subcutaneous Fluids
-
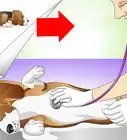
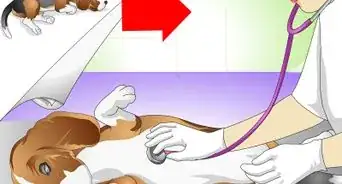
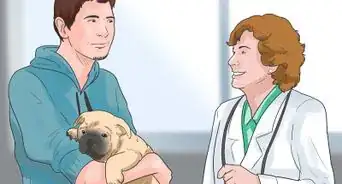
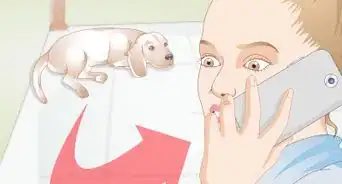
1See your vet right away if your dog has parvo. In the majority of cases, parvovirus is fatal without effective treatment. If you can, it's usually best to let your dog stay at a veterinary hospital if they're infected with parvo. Your dog might need IV fluids, medications to stop their nausea and vomiting, and sometimes a feeding tube or even blood transfusions.[2] However, if your dog is only mildly to moderately sick, you may be able to treat them at home under your vet's supervision.[3]
- Keep in mind that parvo is also extremely contagious, and your vet will be able to isolate your dog more effectively than you can do at home.
- Ask your vet what symptoms would indicate that you need to bring in your vet for treatment.
-
2Use subcutaneous fluids to rehydrate your dog while they're vomiting. Since your dog won't be able to hold down fluids while they're vomiting profusely, they can quickly become dehydrated. You can help by giving them subcutaneous fluids, which are delivered under the skin. Ask your vet exactly which fluids to use—veterinarians typically recommend a saline (isotonic sodium chloride) or lactated Ringer (LR) solution. They can also advise you on what dose to use and how often to give the fluids.[4]
- IV fluids are more effective for hydrating your dog, but these need to be administered by a vet. In seriously ill animals, their circulation is often so poor that the fluids are poorly absorbed from beneath the skin—you'll need to take the dog in for IV fluids for them to have the best chance of recovery.
- Your vet will typically provide you with a kit that contains a fluid bag, a tube and spike, and a subcutaneous needle. If you can't get to your vet, ask the vet clinic to recommend a veterinary supply store near you where you can purchase these items.
Advertisement -
3Attach the tube to the fluid bag. The subcutaneous fluids should be contained in a large bag, similar to an IV bag. Lay the bag on a flat surface and remove the plug from the end of the bag. Then, open the bag that holds the tube. One end will have a spike that you can insert into the fluid bag. Pull the cap off the spike, then push the spike into the nozzle on the end of the fluid bag. However, avoid touching the area where you're going to insert the spike—this is sterile, so you don't want to contaminate it.[5]
- Before you connect the tube, make sure the clamps on the tube are closed so the fluids won't flow out when you insert the spike.
- Properly dispose of the needle you're using away when you're done. Don't reuse a needle, as it can contaminate the fluids
- Talk to your vet about whether or not it's appropriate to keep fluids for more than one use.
-
4Hang the bag or hold it up. Once the tube is connected to the fluid bag, hang the bag from something like your shower rod or a doorknob. If you don't have anything to hang it from, ask someone to hold it for you—it just needs to be placed somewhere higher than the dog, because gravity will help the fluids flow more easily.[6]
-
5Bleed any air out of the tube. Undo any clamps that are on the tube. You'll see fluid start to collect in the small chamber under the bag. Then, it will start to flow into the tube. Let the whole tube fill up with water to make sure there isn't any air in the line. Then, reclamp the line.[7]
- If there's any air in the line, it will go under your dog's skin, which could be painful.
-
6Attach the needle to the tube. Take the cap off the end of the tube, then remove the cap from the bottom of the needle. The two ends you just uncapped will fit together—give them a twist to attach them securely.[8]
- Don't touch the end of the tube before you attach the needle—this should also remain sterile.
-
7Make sure your dog is settled. It's a good idea to calm your dog before you do the actual injection. Have them lay down, and if possible, have someone else hold on to them while you're working so the dog doesn't try to run away.
- If your dog is really anxious, it can help to wrap your dog in a towel to calm them.[9]
-
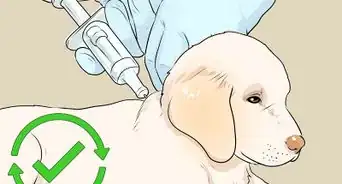
8Give the injection between your dog's shoulder blades. Pinch the loose skin on your dog's back to create a tent shape. Hold the needle so the bevel—or angled end—is pointed up toward the ceiling, then insert it straight into the loose skin in one quick motion. Hold it in place securely, then open the clamp so the fluids can flow under the dog's skin. You'll see the fluids dripping into the chamber and running through the tube.[10]
-
9Remove the needle when the fluids are injected. Place a piece of gauze over the needle, then slide the needle out from the skin. Hold the gauze in place for a few moments to keep the fluids from leaking out. If any fluid does leak out, it may have a little blood in it—that's normal.[13]
- Over time, the bump where you administered the fluids should disappear as the fluids are absorbed. If it doesn't, contact your vet.
- Talk to your vet about exactly how much fluid to use and how often to repeat it. However, a good rule of thumb is to give them 40ml of fluid for every 1 kg (2.2 lb) that your animal weighs. Do that every 8 hours.[14]


Oral Fluids
-
1Provide oral fluids once your dog stops vomiting. You only give subcutaneous fluids while you are trying to slow down your dog's vomiting. Once your dog is able to keep fluids down, you can use an electrolyte infusion meant for dogs to help them get hydrated.[15]
-
2Use a catheter syringe to control how much fluid your dog gets. Even after your dog starts to recover, they might get sick again if they drink too much, too fast. To avoid that, use a catheter syringe to administer the rehydration fluid. These syringes have a strong, wide tip, and you don't have to put a needle on the end to provide oral fluids.[18]
-
3Fill the syringe with fluids. Use the syringe to draw up fluids. Stick the syringe in the bottle, and pull back the plunger to the appropriate line.[19] Give 2 to 4 cc (cubic centimeters) for each pound your dog weighs per hour.
-
4Keep your dog secure while you administer the fluids. Your dog will likely be weak from parvo, anyway. However, if your dog resists, ask someone to help you hold them while you administer the oral fluids.[20]
- Try bracing the dog against your body so that he can't move around as much.
- Hold him with one arm while you give him the liquid with the other.
-
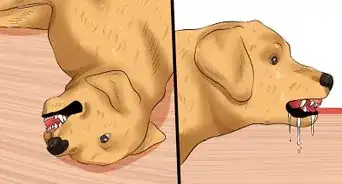
5Put the syringe in the dog's mouth. Start by inserting a finger into the mouth between the cheek and the teeth. Push the syringe gently in. The jaw does not have to be open. Push the plunger down, releasing the liquid into the mouth. The liquid should drain through the teeth.[21]
- Squirt in a small amount of the liquid at a time, pausing to let your dog swallow each time.[22]
-
6Don't tilt the dog's head back. It may be tempting to lift your dog's chin to help the liquid drain to the back of the throat. However, doing so can make your dog breathe in the liquid, causing aspiration.[23]
-
7Watch for vomiting. Keep an eye on your dog after giving them liquids. If your dog throws it up, wait until later to try giving oral fluids again.


Medications
-
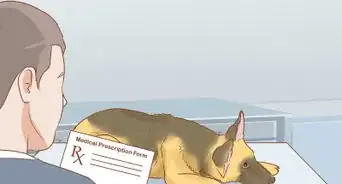
1Slow down the vomiting with anti-emetics. Your veterinarian can provide you with drugs to ease the vomiting. Since you can only treat the symptoms of parvo, not the actual disease, this step is one of the most important to provide comfort for your dog. Your dog may also need a medication to control diarrhea.[24]
- Talk to your vet about the way to administer these medications, as well as the size of the dose and how often to give it.
-
2Give antibiotics if your dog has another infection. Though antibiotics will not do anything for the parvo, they will stop another infection from taking over. If the vet suspects your dog has a secondary infection, they'll provide you with antibiotics. Follow the administration and dosage directions on the bottle.[25]
-
3Try pain medications to ease your dog's discomfort. Your vet may recommend that you give your dog pain medication to help them with abdominal pain due to parvo. This might make your dog feel comfortable enough to start eating again—which could help them start on the path to healing.[26]
- Don't give your dog pain medications for humans—these can be toxic.
-
4Try the new parvo protocol recommended by Colorado State. One study found that using a certain medication regimen at home greatly increased a dog's chances of surviving. The first part of the regimen is giving a strong anti-nausea drug, Maropitant, once a day. The other part of the regimen is having the vet give one dose of long-lasting antibiotic under the skin when the dog is diagnosed (Convenia), and then having the pet parent give subcutaneous fluids 3 times every day. Ask your vet if these drugs are right for your dog.[27]


Prevention and Aftercare
-
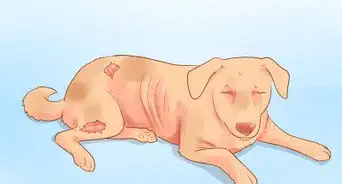
1Isolate your dog. Parvo is extremely contagious, which is one reason it is such a difficult disease. Your dog can remain contagious for as long as 2 months. Make sure to isolate your infected dog from other dogs in the family if possible, and keep them away from public spaces while they are still contagious.[28]
- Parvo is mainly passed through feces and fluids passing from one dog to another. It can even be passed by your dog sniffing another dog.
- If you have other dogs in the house, make sure that your sick dog is using the bathroom in a different area from your other dogs, as your dogs can catch it from the sick dog's feces as long as 2 months after the symptoms have passed.
-
2Feed your dog bland food. Once your dog has stopped vomiting and shows an interest in food, start with bland food, like boiled chicken, white rice, or pasta. Ask your vet for other options.[29]
- Don't let your dog eat a lot at one time, even if they seem hungry—this can cause vomiting and diarrhea to return. Instead, give them smaller meals while they recover.
-
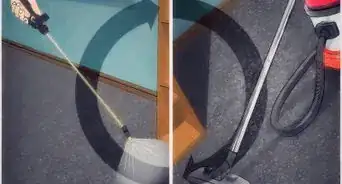
3Disinfect your home after a parvo outbreak. Mix 1 part water with 30 parts bleach. Use that mixture to sanitize hard surfaces in your home, especially ones where your dog has been. That will kill the virus—but it only works on hard surfaces.[30]
- For other areas, such as carpet and couches, wipe as clean as possible, and then get them steam cleaned. You might also consider quaternary ammonia for cleaning soft surfaces.
- For outdoor areas, the best you can do is pick up any of your dog's feces and water the yard a bit more often. The dilution can help lower the amount of virus in your yard over time, and the sun will also kill some of it. Try to keep other dogs out of the area for at least a few weeks.
-
4Bathe your dog. Once your dog has stopped showing symptoms, give them a bath to help get rid of any virus that might remain on their fur. Just be sure to use warm water and dry them off thoroughly afterward so they don't get chilled.[31]


Expert Q&A
Did you know you can get expert answers for this article?
Unlock expert answers by supporting wikiHow
-
QuestionCan a puppy get parvo more than once? Do adult dogs need to be revaccinated if a puppy in the home has parvo?
 Pippa Elliott, MRCVSDr. Elliott, BVMS, MRCVS is a veterinarian with over 30 years of experience in veterinary surgery and companion animal practice. She graduated from the University of Glasgow in 1987 with a degree in veterinary medicine and surgery. She has worked at the same animal clinic in her hometown for over 20 years.
VeterinarianA dog that recovers from parvovirus should remain protected for life, unless a new strain of parvovirus mutates. The parvovirus vaccine protects for a maximum of three years. A dog that was vaccinated over three years ago must have a new course of vaccines. Likewise, at times of high challenge, such as being in the house with a parvo pup, there is an argument for getting a top up dose of vaccine if the adult dog last had a booster more than a year (but less than three years) ago.
Support wikiHow by unlocking this expert answer.
-
QuestionCan I cure parvovirus at home?Pippa Elliott, MRCVSDr. Elliott, BVMS, MRCVS is a veterinarian with over 30 years of experience in veterinary surgery and companion animal practice. She graduated from the University of Glasgow in 1987 with a degree in veterinary medicine and surgery. She has worked at the same animal clinic in her hometown for over 20 years.
VeterinarianThere is no "cure" as such for parvovirus. It is up to the dog's immune system to fight off the virus and get rid of it from the body. The mainstay of treatment is supportive care, such as giving fluids to replace those lost through sickness or diarrhea, so the dog doesn't become dehydrated and go into organ failure. This is why hospital treatment is preferred where possible, since vets can give intravenous fluids which is much more effective at supporting the circulation than those given under the skin.Support wikiHow by unlocking this expert answer.
-
QuestionMy puppy just recently started vomiting, then stopped for a day, and is now doing it again, and she's very lethargic. Could this be parvo? It just came out of nowhere.
 SadxizzyCommunity AnswerIt could be parvo, but it could also very well be something else (less serious) that your dog picked up. I suggest taking her to the vet to start treatment for parvo if she has it.
References
- ↑ https://www.paloaltohumane.org/wp-content/uploads/2021/02/PARVO-Facts.pdf
- ↑ https://www.vet.cornell.edu/departments-centers-and-institutes/baker-institute/our-research/animal-health-articles-and-helpful-links/canine-parvovirus#Prevention
- ↑ https://www.medvetforpets.com/outpatient-protocol-dogs-parvoviral-enteritis/
- ↑ https://www.medvetforpets.com/outpatient-protocol-dogs-parvoviral-enteritis/
- ↑ https://youtu.be/F9O__u9Wazk?t=54
- ↑ https://youtu.be/F9O__u9Wazk?t=125
- ↑ https://vcahospitals.com/know-your-pet/subcutaneous-fluid-administration-in-dogs
- ↑ https://youtu.be/F9O__u9Wazk?t=144
- ↑ https://youtu.be/F9O__u9Wazk?t=216
- ↑ https://youtu.be/rpQ_QJbrAjg?t=12
- ↑ https://youtu.be/F9O__u9Wazk?t=319
- ↑ https://youtu.be/rpQ_QJbrAjg?t=116
- ↑ https://youtu.be/F9O__u9Wazk?t=432
- ↑ https://www.medvetforpets.com/outpatient-protocol-dogs-parvoviral-enteritis/
- ↑ https://www.revivalanimal.com/pet-health/parvo-prevention-plan/learning-center
- ↑ https://www.medvetforpets.com/outpatient-protocol-dogs-parvoviral-enteritis/
- ↑ https://pubmed.ncbi.nlm.nih.gov/27968756/
- ↑ https://pubmed.ncbi.nlm.nih.gov/27968756/
- ↑ http://www.vetstreet.com/dogs/how-to-give-your-dog-liquid-medicine
- ↑ https://vcahospitals.com/know-your-pet/giving-liquid-medication-to-dogs
- ↑ http://www.vetstreet.com/dogs/how-to-give-your-dog-liquid-medicine
- ↑ https://www.vet.cornell.edu/hospitals/pharmacy/consumer-clinical-care-guidelines-animals/giving-your-dog-oral-medications
- ↑ https://www.vet.cornell.edu/hospitals/pharmacy/consumer-clinical-care-guidelines-animals/giving-your-dog-oral-medications
- ↑ https://www.paloaltohumane.org/wp-content/uploads/2021/02/PARVO-Facts.pdf
- ↑ https://www.paloaltohumane.org/wp-content/uploads/2021/02/PARVO-Facts.pdf
- ↑ https://emergencyvetsusa.com/how-to-treat-parvo-at-home/
- ↑ http://csu-cvmbs.colostate.edu/pages/parvo-puppies-new-protocal.aspx
- ↑ https://www.paloaltohumane.org/wp-content/uploads/2021/02/PARVO-Facts.pdf
- ↑ https://veterinarypartner.vin.com/default.aspx?pid=19239&id=4951465
- ↑ https://www.paloaltohumane.org/wp-content/uploads/2021/02/PARVO-Facts.pdf
- ↑ https://veterinarypartner.vin.com/default.aspx?pid=19239&id=4951465
About This Article

To nurse a dog through parvo, start by taking it to the vet, since parvo can be fatal without the right treatment. The vet may need to administer IV fluids in the office, or they will show you how to deliver subcutaneous fluids at home. It's also important to provide plenty of electrolyte-infused oral fluids, like Pedialyte, to keep your dog hydrated through the illness. If frequent vomiting is a problem, talk to your vet about medications that can ease vomiting. For more tips from our Veterinary co-author, like how to administer medications with a syringe, read on!