This article was co-authored by Sarah McDonald. Sarah McDonald is a Certified Stylist and Image Consultant and the Owner of Pivotal Style. She helps both men and women feel confident through clothing by guiding them on how to dress based on body type, color tone, lifestyle, and personal and professional goals. Sarah received her Image and Style Professional Certification from The Fashion Stylist Institute.
There are 22 references cited in this article, which can be found at the bottom of the page.
This article has been viewed 11,198 times.
Packing for a big camping trip can seem a little overwhelming your first time, but it gets easier when you figure out the essentials for your backpack. A lot of the preparation work comes down to picking a backpack that balances comfort with space to carry what you need. Choose supplies according to the length and conditions of your trip, then arrange them from top to bottom in your backpack. By taking a systematic approach to packing, you can prepare what you need to enjoy your trip.
Steps
Choosing a Backpack
-
1Choose a backpack big enough to carry what you need for your trip. One of the biggest concerns about backpack selection is getting something comfortable with just enough space to store what you need. Backpacks are sized by volume. As a rule of thumb, stick to backpacks 30 to 50 L (7.9 to 13.2 US gal) in capacity for trips up to 2 nights in length. Try a pack that carries over 50 L (13 US gal) for trips up to 5 nights long and 70 L (18 US gal) packs for trips longer than that.[1] [2]
- Remember that larger packs are often heavier and may tempt you to carry additional items you don’t really need.[3] Keep the weight limit in mind if you plan on doing a lot of walking during your trip.
-
2Select a backpack with fewer features to reduce weight. Pick features according to what you need for your specific trip. Almost all modern backpacks contain a frame to help keep your gear organized, so expect a small amount of weight from that. Backpacks differ by the number of storage pouches, padding, ventilation slots, and other details. Try to pick a backpack with only the features that are essential for the conditions you think you will face.[4]
- For example, select a lightweight backpack if you're going to carry it outside of the camp. Usually, 2 or 3 pouches and belt loops are enough for a basic camping trip.
- If you’re going to be close to a campground, vehicle, or another storage spot for most of your trip, minimizing weight becomes less important. Still, reserve your backpack for what you need to carry.
- If you’re the kind of person that braves the outdoors with minimal supplies, consider using an ultralight backpack. These packs have very few features and storage space. Try one if you’re going to do a lot of walking and plan on sleeping out under the stars.[5]
Advertisement -
3Get a backpack that fits your torso and hips. Measure your back so you are able to find the perfect fit. To do this, have someone hold a tape measure from the bottom of your neck to the top of your hips. Backpacks are made in various sizes, and not every pack is a great fit for your specific body structure. Before buying a new pack, check the manufactuer's tag for sizing information.[6]
- If you don't have a friend with you to help you measure yourself, visit a camping supply store. Most store employees are more than happy to help size you.
- Your waist size is also handy to have on hand. Wrap tape measure around the top edge of your hips to take this measurement.
-
4Test the backpack’s fit to fine-tune it. Many backpacks have adjustable straps, especially for your waist. Tighten the band until the pack fits snugly over your hips. Check the shoulder straps as well, adjusting them as needed so the pack fits close to your body without digging into your skin. Make sure you have a full range of movement and can walk without bending over.[7]
- Always give a pack a test run before buying it. Make sure it fits your body well so you’re not stuck carrying something that causes you pain.
- Wear the backpack after putting all your supplies into it. This is the best way to test the fit while also identifying spots where the weight balance feels off.


Arranging a Backpack Efficiently
-
1Gather and sort all the items you plan on bringing. Check that you have everything you need for your trip, then pair similar items together. Grouping similar items together ensures you always know where to find what you need. Also, pack away loose items like batteries and hygienic supplies so they aren’t rattling around in your bag.[8]
- Most camping suppliers sell zippered bags that are great for keeping your pack organized. Bring some resealable plastic bags for liquids or anything that gets wet during the trip.
- For example, separate all the utensils into one pile, the cooking gear into another, and the emergency items into another.
-
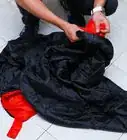
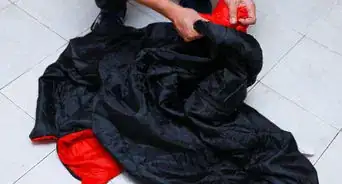
2Group similar items into compression sacks to save space. Compression sacks, also called stuff sacks, are a nifty organizational tool you can use to efficiently organize your backpack. All you have to do is put something like your sleeping bag or your clothing into the sack. Pull the drawstring to close the sack, pushing out as much air as possible.[9]
- These organizers are available online and at camping supply stores. You could also use plastic bags and trash bags, but they aren’t quite as efficient.
- Compression sacks are waterproof, so they are a great way to protect the contents of your backpack as well as save on space.
- Some items commonly stored in compression packs include bulky sleeping bags and piles of clothing, but you could use a pack to organize anything you’re bringing.
-
3Leave behind items that aren’t essential to your trip.[10] Space comes at a premium on most trips, so avoid taking anything you know you don't need. In most cases, this means making compromises between what you want to bring and what you actually need. Set aside big or heavy items, including large pillows, bulky cooking supplies, additional sets of clothing, and unnecessary electronics.[11]
- Choose your gear so your backpack weighs 20% to 30% of your total body weight. This is considered the standard weight limit for a comfortable trip. Heavier backpacks take much more energy to carry and may throw off your balance.[12]
- The amount of stuff you take varies from trip to trip. If you’re going to be close enough to a vehicle, for instance, you can store extra supplies in there. Otherwise, cut down on your supplies as much as possible.
-
4Place your sleeping bag in the bottom of your backpack. Items you use the least frequently belong at the bottom of your pack. Since you only need your sleeping bag once a night, pack it first. Place sleeping bag pads and pillows, if you're bringing them, down at the bottom as well.[13]
- The sleeping bag also boosts up heavier items you pack so they are closer to the center of your back.
-
5Place the heaviest items in the center of your backpack. Layer the heavy items next to increase your stability. Start with your tent or shelter components, then move on to your cooking kit. Food items are lighter and more likely to be used throughout the day, so put them on top of the cookware. Keep these items pressed up against your back so they don’t pull you backward while you walk.[14]
- Combine items as much as possible to save space. For example, put fuel canisters inside pots. Group your utensils and food items into separate zippered bags.
-
6Balance clothing and additional items on the sides of your backpack. Divide the remaining items up to distribute the weight evenly throughout your backpack. Keep the heaviest items centered for stability, then stuff everything else around them. Fill the remaining space with clothes, water filters, medical kits, and other items you need once a day or less.[15]
- For instance, store a change of clothes in a bag, then stuff it behind your cookware. The bag of clothing prevents the heavier cookware from shifting while you move.
-
7Store essential items like sunscreen in the top area. Many backpacks have a storage pouch at the very top. Use this space for small but important items you need to keep accessible throughout your trip. Besides medical supplies, this space is great for small knives, headlamps, flashlights, maps, compasses, and a hat.[16]
- Keep valuable items here to prevent them from getting lost or damaged in the rest of your pack.
- The top storage area is also great for keeping extra layers of clothing accessible. Put a rain jacket there, for instance, or a warm shirt if you suspect you will need it.
-
8Use outside pouches and loops to separate larger essentials. Most backpacks have several exterior storage pouches and loops. Reserve these spots for items you expect to use throughout the day, like large flashlights, knives, and cameras. Slip a water bottle into a belt loop and keep some snacks in one of the pouches.[17]
- Limit the amount of items you tie to the outside of your pack. You could lose them if they come loose. They also tend to affect your balance and may get in the way while you walk.
- Some backpacks have a place to rest your tent or shelter horizontally below your backpack. If you have this option, take advantage of it to free up space inside your pack.
- The additional storage pouches are also a great place for items that get wet, such as a rain jacket or water filter. Place them there to prevent them from dripping water onto the rest of your supplies.


Selecting Supplies to Pack
-
1Bring a tent or an alternative shelter to camp in.[18] Choose your shelter according to the season and the number of people you need to cover. A 3-season tent is perfect for most trips, but upgrade to a 4-season tent for winter trips. Pick a tent size that balances weight and features with the amount of storage space you have available. Alternatively, go without a tent and bring something like lightweight poles and a tarp to set up at your campsite.[19]
- Keep the campsite conditions in mind. Setting up a lightweight shelter with tarp, rope, and poles is fine during warm weather in wooded areas. Tents are useful in almost all conditions.
- If you’re bringing a large tent or shelter to house multiple people, you could split the weight between everyone carrying a backpack. For instance, remove the tent poles and give them to different people in your group.
- If you’re driving to the campsite, bringing a heavier family tent isn’t usually a problem. Opt for lighter tents to save weight when you walk longer distances.
-
2Choose a sleeping bag to suit the weather at the campsite. Sleeping bags are similar to tents in that there are many different models to choose from. Regular 3-season sleeping bags are perfect for most trips, but summer and winter bags are also available. In addition, bags are made with different materials that can affect your comfort during the trip.[20]
- For example, down bags are warm but dry slowly. Synthetic bags are not as insulated but dry off much more quickly than down and may be a better choice for rainy summer trips.
- Also, bring blankets, pads, and pillows as needed to complete your sleeping bag.
-
3Select a stove and other cooking supplies. Gas and wood stoves are options for preparing food on the fly. You can look for wood to burn in a wood stove, but you need to bring fuel to operate a gas stove. Matches are a must for lighting the stove and any campfires. Include a limited amount of pots, cups, plates, and other cooking supplies to save on weight.[21] [22]
- Many commercial campsites have places to start fires, so you may not need a stove. Stoves are useful for trips out in the wilderness or if you plan on walking.
- You usually do not need to bring a lot of cooking tools and utensils. For an average trip, a single pot and pan is often enough. Pack a spoon and a knife for each camper.
-
4Bring at least 1 extra set of clothing to protect against the weather. Wear one set of clothing when you set out on your trip and keep another set in reserve.[23] Make sure the clothing is suitable for the weather. Bring along additional items like swimsuits, rain jackets, gloves, and insulated layers as needed depending on the conditions you expect.[24]
- Have a good pair of hiking boots if you plan on doing a lot of walking. Bring along something comfortable and possibly water-resistant, like flip-flops, to wear around camp if you have space in your backpack.
- Warm, quick-drying materials like polyester and Merino wool are ideal for most long trips. Bring your regular, everyday clothing only if you’re staying close to your campsite.
-
5Bring plenty of food and water for your trip. Plan to bring simple meals that are easy to store and prepare outdoors. Items like bread, peanut butter, trail mix, and jerky are good to have around as snacks no matter where you’re going. Dehydrated and canned foods are common since they don’t spoil, but monitor the additional weight added to your pack. Also, pack a refillable canteen and spare water bottles for each camper.[25]
- For short trips without much walking, try bringing a cooler along. It gives you the option of cooking with eggs, meat, and frozen fruits that spoil on other types of trips.
- If you’re going to be walking a lot, consider getting a water filtration system so you always have a way of obtaining fresh water.
- Don’t forget pet food if you plan on bringing a pet with you!
-
6Pack entertainment to stay busy while you’re at your camp. A deck of cards is the standby for most camping trips. You might also try bringing books, travel-sized board games, sports gear, and other items that are easy to carry. Check out your campsite and choose items according to how much weight you can carry.[26]
- A lightweight kayak or fishing gear, for instance, is worth considering if you’re camping near water. You have a lot more options for packing entertainment when you’re able to drive to the campsite. Pack sparingly if you’re going to walk long distances.
- Avoid bringing electronics in most cases. You often won’t find places to hook them up, so they become dead weight in your pack.
-
7Include medical supplies and navigational essentials in your kit. Devote the rest of your pack to the essentials. Preparations aren’t complete until you have a first-aid kit. Include hygienic items like soap, toothbrushes, and toothpaste as well as protectors like bug spray and sunscreen. Also, pack maps, compasses, and anything else you need for direction.[27]
- A good first aid-kit consists of items like bandages, antiseptics, and a sewing needle. Remember to include a supply of any prescription medication you take.
- GPS devices and cell phones are okay to bring, but remember that they may not work in some places. Save them for emergencies and include emergency contact information in case you need it.


Expert Q&A
-
QuestionHow full should I pack my backpack?
 Britt EdelenBritt Edelen comes to wikiHow after graduating in 2019 from Brown University, where he studied English and German literature and philosophy. While at Brown he contributed frequently to campus publications and worked in the university’s Writing Center. More recently, he has had several articles published in various journals devoted to literary criticism. During his time at wikiHow, Britt supervised and collaborated with writers and editors to continue producing high-quality content and promote wikiHow’s mission of enabling everyone to learn anything.
BA in English Literature, Brown UniversityYou don't want to bring too much for your trip, or else your backpack will feel too heavy. But you'll want to bring enough so you have food and supplies that will last the entire time. -
QuestionWhat should I pack if it's just me, my parents, and my siblings?
 Community AnswerFirst, you will need to pack food. Canned food is not suggested, unless you have a way of heating it. Stick to power bars and ready-to-eat food. Also, bring a knife for safety. You will need a tent, some flashlights, and a few liters of water per person. Staying hydrated is key.
Things You’ll Need
- Backpack
- Tape measure
- Tent or shelter
- Sleeping bag
- Clothing
- Cooking supplies
- Utensils
- Matches
- Food
- Water
- First-aid kit
- Entertainment


References
- ↑ https://www.msrgear.com/blog/how-to-pack-a-backpack/
- ↑ https://www.wildbackpacker.com/backpacking-gear/backpacks/buying-guide/
- ↑ Britt Edelen. Outdoor Educator. Expert Interview. 7 February 2020.
- ↑ https://www.wildbackpacker.com/backpacking-gear/backpacks/buying-guide/
- ↑ https://www.backpacker.com/trips/the-skills-ultralight-or-bust
- ↑ https://pangolinswithpacks.com/the-definitive-guide-that-you-never-wanted-fitting-and-adjusting-your-backpack-157f510d46cd
- ↑ https://pangolinswithpacks.com/the-definitive-guide-that-you-never-wanted-fitting-and-adjusting-your-backpack-157f510d46cd
- ↑ https://www.backpacker.com/videos-photos/how-to-pack-a-backpack
- ↑ https://www.youtube.com/watch?v=9Beo1-zU3Ns&feature=youtu.be&t=38
- ↑ Britt Edelen. Outdoor Educator. Expert Interview. 7 February 2020.
- ↑ https://www.nps.gov/glac/blogs/what-to-bring-what-to-leave-behind.htm
- ↑ https://www.wildbackpacker.com/backpacking-gear/backpacks/how-to-pack-a-backpack/
- ↑ https://www.backpacker.com/skills/how-to-pack-your-backpack-the-right-way
- ↑ https://www.youtube.com/watch?v=HB7ZOjnnFS8&feature=youtu.be&t=44
- ↑ https://www.backpacker.com/skills/how-to-pack-your-backpack-the-right-way
- ↑ https://www.cleverhiker.com/essential-trail-skills/episode-4-packing-a-lightweight-backpack
- ↑ https://www.cleverhiker.com/essential-trail-skills/episode-4-packing-a-lightweight-backpack
- ↑ Britt Edelen. Outdoor Educator. Expert Interview. 7 February 2020.
- ↑ https://www.backpacker.com/videos-photos/choose-right-tent
- ↑ https://www.backpacker.com/videos-photos/choose-right-sleeping-bag
- ↑ https://bearfoottheory.com/how-to-pack-a-backpacking-pack/
- ↑ https://www.nps.gov/subjects/camping/what-to-bring.htm
- ↑ Sarah McDonald. Certified Stylist & Image Consultant. Expert Interview. 26 August 2021.
- ↑ https://www.wilderness.org/articles/article/45-tips-foolproof-fall-camping
- ↑ https://www.nps.gov/subjects/camping/what-to-bring.htm
- ↑ https://www.thrillist.com/travel/nation/things-to-do-while-camping
- ↑ https://www.nps.gov/articles/10essentials.htm
- ↑ https://boyslife.org/outdoors/ask-the-gear-guy/3239/internal-or-external-frame-on-backpack/
- ↑ http://fpdcc.com/camping/first-time-camping/
About This Article