This article was co-authored by Andres Matheu and by wikiHow staff writer, Aly Rusciano. Andres Matheu is the Owner of Hömm Certified Painting Systems, an Interior and Exterior Residential painting business based in the Washington, DC Metro area. Andres specializes in interior and exterior residential painting, color consultations, cabinet refinishing, wallpaper removal, and epoxy flooring among other services. An EPA Lead-safe Certified Firm, Hömm Certified Painting Systems has been awarded the Best of Houzz 2019 Service, Angie's List Super Service Award 2019, and Northern Virginia Magazine's 2018 Best Home Experts (painters) award.
There are 13 references cited in this article, which can be found at the bottom of the page.
This article has been viewed 60,832 times.
Wanting to give your kitchen a makeover? Painting cabinets can brighten and modernize a space, and the task can be made that much quicker and easier by skipping sanding. We’ve got the best tips and tricks to help you paint wooden kitchen cabinets without sanding and get amazing results, so keep reading to learn more.
Steps
Prepping the Cabinets
-
1Remove the cabinet doors, shelves, and drawers. Empty the cabinets and remove the doors by unscrewing the hinges with a drill or screwdriver. Take out the drawers and shelves. If the drawers are stuck, try lifting them up slightly to pull them off their tracks.
- Some cabinet drawers don’t come out of the frame. If that’s the case for yours, leave them in the frame and paint them when you paint the frame.
- Some shelves are built into cabinets. If you don’t have brackets holding up your shelves, you probably won’t be able to remove them. If this is the case, you’ll have to paint the shelves when you paint the frame.
-
2Use a drill to remove the hinges and hardware from the cabinets. Unscrew the hardware from the cabinets and frame, and set all of the pulls, handles, and screws aside if you plan to reuse them. Organize these parts by size and location, so they’re easier to reassemble later.[1]
- If your cabinets have special hardware, put the hinges and handles in a labeled bag. For instance, if you have a corner cabinet that has a different pull, label the bag “corner” and place the hardware in the bag.
- If you have a variety of door shapes and sizes, it may be helpful to take a picture of the cabinets before you remove the doors. Then, when you rehang the doors, you can reference the picture to make sure you hang them in the right places.
Advertisement -
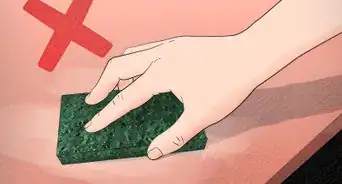
3Clean the cabinets with a degreaser and scrubbing sponge. Use a degreasing cleaner of your choice, and thoroughly scrub the cabinet doors, shelves, drawers, and frames to remove any leftover dirt or grime from the kitchen.[2]
- Dawn liquid dish soap and Krud Kutter are commonly used to clean cabinets.[3]
- Try to avoid scrubbing in one section for too long, as this can scratch the wood, causing a dull spot when you paint.
- When you’re done, wipe off the degreaser with a wet cloth and let everything dry for at least 1 hour.
-
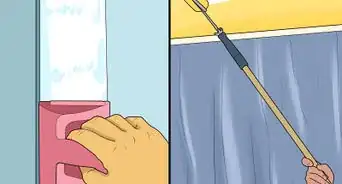
4Rub liquid deglosser on the cabinets and let them dry for 30 minutes. Take your doors and drawers outside or to a well-ventilated area. Then, put on a pair of work gloves and add a quarter-sized amount of deglosser to a scouring pad. Rub the deglosser on all of the door and drawer fronts and backs following the grain of the wood. This step replaces sanding and preps the cabinets for painting.[4]
- You don’t need to apply the deglosser to the frames since they tend to be cleaner and have less varnish than the door fronts.
- Never apply deglosser indoors as the potent fumes can be harmful if inhaled in a closed space.
- Avoid touching the deglosser with your hands to see if it’s dry, as it can damage your skin.


Painting the Cabinets
-
1Apply oil-based primer to the cabinets 1 hour after the deglosser has dried. Use a medium bristle paintbrush to paint a layer of primer on the fronts of the doors, drawers, and cabinet frames. Start with the detailed areas first and work your way out, watching to make sure the primer doesn’t pool in the corners or edges.[5]
- Try using a foam roller for larger flat areas to coat the wood faster.[6]
- If you don’t paint on the primer within an hour after the deglosser has dried, the primer won’t stick to the cabinets, which can cause the paint to peel.
- If the paint you’re using on the cabinets has a built-in primer, skip priming altogether.
-
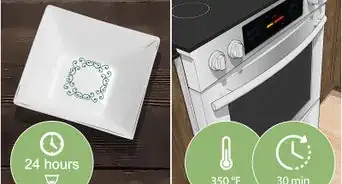
2Wait 30 to 90 minutes and then turn the doors over to prime the backs. Once the fronts of the doors are dry, use a medium bristle brush to apply a light coat of primer to the backs of the drawers. Then, wait at least 24 hours for the primer to dry completely before adding your first coat of paint.[7]
- Keep in mind that you want to have the doors and drawers primed within 1 hour after the deglosser dries.
-
3Add a coat of cabinet enamel paint to the backs of the doors and drawers. Fill a paint pan with paint and lightly glide a paint roller through the paint. Then, roll the paint onto the flat surfaces of the doors and drawers. Once most of the surface is covered with paint, lightly go over the paint layer with a brush to prevent bubbles and fill in any nooks and crannies. Let the paint dry for 4 to 6 hours (or until it’s dry to the touch) before flipping them over to paint the fronts.[8]
- Cabinet enamel paint is specifically designed for painting cabinets, as the enamel base is strong and long-lasting.[9]
- You don’t have to paint the interior parts of the drawers since they’ll mostly have items inside them. Instead, consider painting the outer sides that’ll be visible when you open the drawer.
-
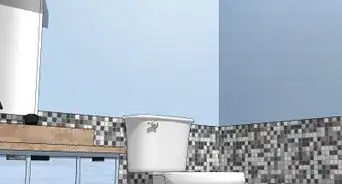
4Brush paint over the inside frames of the cabinets. Start at the back panel and work your way to the front using a fine bristle paintbrush. In other words, paint the back wall first, then the side wall, and lastly the bottom of the cabinet.[10]
-
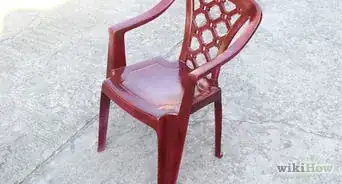
5Roll and brush paint onto the fronts of the cabinets. Use your smaller, fine bristle brush to paint the molding on the cabinet doors.[11] Once the molding is painted, apply an even coat of paint over the flat surfaces of the doors, drawers, and shelves with a paint roller. Then, go back over the paint while it’s wet with a paintbrush to even the paint and remove air bubbles.[12]
- Keep the painted pieces in a well-ventilated area at all times. This will help to speed up the drying process.
-
6Add a second coat of paint to the cabinets once they dry. For a brighter color and even coverage, apply a second coat to all of the doors, drawers, shelves, and inside frames. Wait 4 to 6 hours for the paint to dry, then start the painting process again.[13] Be sure to use the same roller and brush technique to keep your strokes the cohesive.
- If you’re painting very dark cabinets a lighter color, use 2 or more coats of paint to prevent the darker color from showing through the light paint.
-
7Wait at least 48 hours for the paint to dry and reattach the hardware. Let the paint dry and set for at least a day before you put the hardware back on the doors and drawers. If you put the hardware on too early, it can easily dent or scratch the paint.[14]
- When you reattach the hardware, use a screwdriver to avoid potentially tightening the hardware too much, as this could also peel or crack the paint.
- If your hinges are dirty, clean them while you’re waiting for the cabinets to dry.
-
8Rehang the doors and replace the drawers to finish the room. Gather the hinges and position the doors and drawers where they need to be hung. Screw the hinges back onto the doors and into the frames, and test the doors and drawers to make sure they open and close smoothly.[15]


Expert Q&A
Did you know you can get premium answers for this article?
Unlock premium answers by supporting wikiHow
-
QuestionCan you paint over kitchen cabinets without sanding them first?
 Andres MatheuAndres Matheu is the Owner of Hömm Certified Painting Systems, an Interior and Exterior Residential painting business based in the Washington, DC Metro area. Andres specializes in interior and exterior residential painting, color consultations, cabinet refinishing, wallpaper removal, and epoxy flooring among other services. An EPA Lead-safe Certified Firm, Hömm Certified Painting Systems has been awarded the Best of Houzz 2019 Service, Angie's List Super Service Award 2019, and Northern Virginia Magazine's 2018 Best Home Experts (painters) award.
Commercial PainterIt's best to sand cabinets at least slightly before you paint them. That way, you're making sure they're clean, but you're also opening the pore of the wood slightly. That will help the primer and paint adhere better to the surface. If you skip sanding, there's a risk that your paint coat will fail.
Support wikiHow by unlocking this expert answer.
-
QuestionWhat deglossers are the best?
 wikiHow Staff EditorThis answer was written by one of our trained team of researchers who validated it for accuracy and comprehensiveness.
Staff AnswerwikiHow Staff EditorStaff AnswerAlways read the label on a deglosser before purchasing it. Deglossers that strip paint and varnish will work best for removing finishes on wooden cabinets.Support wikiHow by unlocking this staff-researched answer.
-
QuestionA product called "Gripper" was recommended to me to use before painting my cabinets. Is this better than using a deglosser? It looks like white paint & is a sealer/primer.wikiHow Staff EditorThis answer was written by one of our trained team of researchers who validated it for accuracy and comprehensiveness.
Staff AnswerwikiHow Staff EditorStaff Answer"Gripper" is a bonding primer and sealer, not a deglosser. Deglossing works similarly to sanding as it strips the cabinets of their finish, making the primer and paint adhere to the wood. Using a primer or sealer without deglossing can lead to chipping and peeling paint.Support wikiHow by unlocking this staff-researched answer.
Things You’ll Need


References
- ↑ https://youtu.be/7LW0IYDW4Jc?t=20
- ↑ https://youtu.be/NfbHyYLGeIw?t=16
- ↑ https://youtu.be/NfbHyYLGeIw?t=36
- ↑ https://youtu.be/7LW0IYDW4Jc?t=62
- ↑ https://youtu.be/vnrATzsXXjY?t=138
- ↑ https://youtu.be/HeIT8gTwAP8?t=241
- ↑ https://www.forbes.com/advisor/home-improvement/time-for-paint-to-dry/
- ↑ https://youtu.be/HeIT8gTwAP8?t=341
- ↑ https://fantastichandyman.com.au/blog/acrylic-enamel-paint-differences/
- ↑ https://youtu.be/HeIT8gTwAP8?t=261
- ↑ https://youtu.be/HeIT8gTwAP8?t=350
- ↑ https://www.hgtv.com/design/rooms/kitchens/how-to-paint-kitchen-cabinets-without-sanding-or-priming-pictures
- ↑ https://www.forbes.com/advisor/home-improvement/time-for-paint-to-dry/
- ↑ https://www.realsimple.com/home-organizing/home-improvement/painting/kitchen-cabinet-painting-mistakes?slide=e0413ff6-40a2-4161-b595-9a75363d90df#e0413ff6-40a2-4161-b595-9a75363d90df
- ↑ https://www.hgtv.com/design/rooms/kitchens/how-to-paint-kitchen-cabinets-without-sanding-or-priming-pictures
About This Article

If you want to paint your kitchen cabinets without sanding, start by pulling the drawers out and using a drill to remove any hinges or hardware. Once these pieces are removed, apply a degreaser to the doors and frames with a scrubbing sponge and wipe down all of the components with a cloth soaked with water. After giving them an hour to dry, use a clean cloth to apply deglosser to the doors and drawers, then wait 30 minutes for it to set. Within an hour of the deglosser drying, paint the primer onto the front of the doors and let them dry for 30 minutes. Then, paint primer on the back of the doors and wait 2 hours for everything to dry. Finally, paint the cabinet pieces and give them 24 hours to dry before reattaching them. For more tips, like how to paint cabinets with molding, read on!