This article was co-authored by Norman Raverty. Norman Raverty is the owner of San Mateo Handyman, a handyman service in the San Francisco Bay Area. With over 27 years of experience, Norman has expertise in all five of the general building trades (carpentry, ceramic tile, drywall, electrical, plumbing).
There are 8 references cited in this article, which can be found at the bottom of the page.
This article has been viewed 105,996 times.
Painting a ceiling can be challenging, even for an experienced painter. The job becomes especially difficult when painting over a staircase, where you can’t easily set up a ladder to reach the ceiling. However, you can make this task easier by constructing a simple scaffold out of 2 ladders and a long board, or making a stair leveler with some plywood and a few short boards. Use a brush to cut in your edges and apply the paint with a roller brush, and you’ll save time and money doing this home improvement task yourself.
Steps
Making a Scaffold
-
1Cover the stairs and railing with drop cloths. No matter how careful you are, there’s a good chance a few drips will fall on the stairs when you paint. Use drop cloths or old sheets to protect the stairs.[1]
- If there are any hanging pictures or removable fixtures on the walls of your staircase, you may want to remove them before you begin painting.
- Be very careful when walking on the stairs, especially if they are wooden, as the cloth will make them slippery.[2]
-
2Place a step ladder at the top of the stairs. To construct a scaffold, you will need ladders on the floor above and the floor below the stairs you will be painting. A step ladder is the most stable option, and should be able to fit on the floor at the top of your stairs.[3]
- The step ladder should be parallel with the stairs, and set back at least 6 in (15 cm) from the top stair to avoid any risk of falling.
- It’s a good idea to place cinderblocks or weights on the inner side of each ladder leg to keep it from moving, laying down a cloth first to protect your floors.
Advertisement -
3Prop an extension ladder against the wall at the bottom of the stairs. There will most likely not be room to fit another step ladder at the bottom of the stairs that is high enough to make a scaffold. Instead, prop the top of an extension ladder against the wall opposite your stairs. Prop the bottom against 1 of the stairs so that the ladder is angled enough that you could climb it.[4]
- Position the extension ladder so that its rungs are even with the rungs of the step ladder, so that your scaffold will be level.
- You may want to wrap the top arms of the ladder in cloth or foam to protect your wall.[5]
-
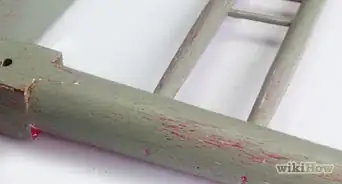
4Lay a 2- by 12- inch (5.1-cm x 30.5-cm) board between the ladders. Find a board that is at least 2 inches (5.1 cm) thick and about 12 inches (30 cm) wide, or wide enough to stand on. It should be long enough that you can set 1 end on a rung of your step ladder and the other end on a rung of your extension ladder. This will be your scaffold to stand on while you paint the ceiling.[6]
-
5Clamp the board to the ladder rungs on each side. Use clamps to secure the board to the ladder and keep it from slipping when you stand on it. You can also nail stops on the underside of the board on either side of where it will rest on the rung.[7]EXPERT TIP
"Climbing on a ladder can lead to a fall, so be cautious before proceeding."
Norman Raverty is the owner of San Mateo Handyman, a handyman service in the San Francisco Bay Area. With over 27 years of experience, Norman has expertise in all five of the general building trades (carpentry, ceramic tile, drywall, electrical, plumbing).
Norman Raverty
Professional HandymanNorman Raverty
Professional Handyman


Constructing a Stair Leveler
-
1Measure the depth of 3 stairs. Your leveler should be deep enough that it spans 3 stairs. Put the end of your measuring tape on the inner edge of any stair and pull it out so that it measures the depth of 3 stairs. You may want to use a level to make sure that you are holding the measuring tape straight when you pull it out.[8]
-
2Use a level and measuring tape to find the height your leveler should be. Hold the end of your measuring tape against the surface of 1 of your stairs. Set a level on the 2nd stair up from that one (so that there is 1 stair between them) and measure the distance between the lower stair and where the level sticks out from the higher stair. This will be the height of your leveler’s legs.[9]
-
3Measure the width of your stairs. Use measuring tape to find the width of your stairs. Your platform should be about 6–10 inches (15–25 cm) narrower than the width of the stairs, to allow for some room to step around it while it’s in place.[10]
- For instance, if your stairs are 3 feet (0.91 m) wide, your platform should be no wider than 2.5 feet (0.76 m).
-
4Cut legs for your platform from 2- by 4-inch (5.1-cm x 10.2-cm) boards. Use a circular saw or miter saw to cut legs that are as long as the height you measured with the level and measuring tape. You may want to use a speed square to make sure you are cutting in a straight line.[11]
-
5Cut a platform out of thick plywood using a circular saw and a guide. Use plywood that is thick enough to support your weight, at least 1 inch (2.5 cm) and medium density. Use a ruler to trace a straight line where you will cut, or fasten a board over the plywood to use as a guide while you cut. The platform should be the width of your stairs minus 6–10 inches (15–25 cm), and the depth of 3 stairs.[12]
-
6Mark where the legs will go on the platform and drill the holes. Place the legs that you cut in 2 corners of the platform. The legs will support half of the platform while the other half is supported by a stair. Use a carpenter’s pencil to trace where the legs will go on the platform, and drill 2 holes inside both of the spaces you traced.[13]
- The edge of each leg should be flush with the edge of the platform, and the width of the legs should be running parallel to each other.
- You may want to use a countersink drill to make your holes, which will make a slight depression around the hole and allow the top of the screw to be flush with the board instead of sticking out slightly. This is especially useful if you are working on wooden stairs and don’t want to scuff the wood.
-
7Use screws to fasten the legs to the platform. Use a drill to screw through the pilot holes in the platform and into the tops of the 2 legs. You may find it helpful to clamp another board onto your work surface to use as a brace when you screw the legs in. You can brace the leg against the clamped board while holding the platform against it and inserting the screws.[14]
-
8Measure the distance between the legs for support boards. To make your leveler more stable, it’s a good idea to put support boards between the legs. Measure the width between the 2 legs to find out how long your support boards should be.[15]
-
9Cut two 2- by 4-inch (5.1-cm x 10.2-cm) boards to fit between the legs. Using a circular saw or miter saw, cut 2 boards to fit the width between the legs. These will be your support boards, which will keep the legs from wobbling when you use the leveler.[16]
-
10Drill pilot holes in the legs and screw the first support board into place. The 1st support board will go at the top of the legs against the platform. Make 2 pilot holes in each leg where you will fasten the 1st support board in place.[17]
-
11Cut two 2- by 4-inch (5.1-cm x 10.2-cm) boards to brace the 2nd support board. These braces should be about 4 inches (10 cm) long. They will fit between the 1st and 2nd support boards, and will attach to the insides of the legs. In other words, the 2 support boards and 2 braces will form a rectangle inside the legs.[18]
-
12Set the 2nd support board on top of the braces and fasten it to the legs. Put the braces in place without screwing them in yet, and place the 2nd support board on top of them. Drill 2 pilot holes in each leg where it will attach to the 2nd support board, then screw the board into place. Screw the 2 braces into the legs with 2 screws each.[19]
- The braces should attach to the legs with 1 screw towards the top and 1 screw towards the bottom. Drill pilot holes through the braces first from the inside, then use screws to attach them to the legs.[20]
-
13Cut four 1- by 2-inch (2.5-cm x 5.1-cm) boards to fit the edges of the platform. These boards will serve as safety rails to keep your ladder from slipping off the platform. Cut 2 boards that are as long as the width of your platform, and 2 boards that are as long as the depth minus 2 inches (5.1 cm). They should fit on the edges of the top of the platform.[21]
-
14Use wood glue and screws to attach the safety rails to the edges of the platform. Drill pilot holes through the safety rails in at least 2 points per rail. Then put a layer of wood glue on the bottom of each safety rail, set the rails in place, and use screws to fasten them to the platform.[22]
- Once the wood glue has dried, you can set your leveler at any point on the stairs and use it as a platform. Prop an extension ladder on the leveler and brace it against the wall.[23]


Using an Extension Roller
-
1Use a broom and cloth to dust before painting. Ceilings and high areas often accumulate dust and cobwebs, which will make it difficult to paint. Wear a dust mask and use a rag to brush any dust off the ceiling, laying a rag over the end of a broom for hard-to-reach spots.[24]
-
2Cover your walls with plastic sheeting. Even if you will be painting the walls the same color as the ceiling, you want to protect them from drips that can dry into visible bumps on the wall’s surface. Use painter’s tape to hang plastic sheeting on the walls, making the tape even with the top of the wall against the ceiling.[25]
-
3Use tape to mask off any fixtures on your ceiling. To keep your lights, fans, smoke alarms, and any other fixtures safe from accidental painting, cover their edges with painter’s tape. Make sure the tape is only on the fixture and does not cover any of the ceiling itself.[26]
-
4Use an edging tool to cut in the edges of a 10 feet (3.0 m) section. Using an edging tool, rather than a roller, will allow you to get paint along the edge of the ceiling without pushing it onto the wall. Edging tools are designed to apply paint close to ceiling edges and may even attach to extension poles.
- Roll your edging tool against the grooved part of the paint tray a few times to remove excess paint, which can cause drips.
-
5Use a roller to paint inward from the section you cut in. Working in 10 feet (3.0 m) sections will allow you to paint over the brush strokes with the roller before they dry, making a more smooth texture. Rolling several horizontal strokes and then rolling over them with vertical strokes will also help create an even texture.[27]
- Run your roller over the grooved section of your paint tray a few times after you dip it in the paint. This will squeeze out some of the excess paint and help you avoid drips.
- If the ceiling is still hard to reach even on your scaffold, you may need an extension pole for your roller. For edging and corners, you can secure a paintbrush to the end of the extension pole.
- A lambswool roller cover with at least 0.5 inches (1.3 cm) nap is ideal for painting ceilings, as it will hold the most paint without spattering.[28]
-
6Continue edging and painting in sections until the ceiling is complete. If necessary, move your ladder once you are done with 1 side so that you can reach the other. It’s best to do all your painting in 1 session, so that the paint doesn’t dry and leave unsightly ridges or laps.
- Check your paint can’s label for typical drying times.
- You can test whether the paint is dry by gently dabbing it with a dry, clean cloth in an inconspicuous spot to see if any paint comes off.
- Once the paint is dry, you can remove the painter’s tape and begin painting the walls if desired.


Warnings
- You should only work on ladders when someone else is in the house, in case you fall and become injured.⧼thumbs_response⧽
Things You’ll Need
Scaffold
- Drop cloths or old sheets
- Roller
- Extension pole
- Edging tool
- Paint tray
- Paint
- Masking tape
- Plastic sheeting for walls
- Scaffold:
- Step ladder
- Extension ladder
- 2- by 12- inch (5.1-cm × 30.5-cm) board, long enough to set on rungs of step ladder on higher floor and extension ladder on lower floor
- 4 clamps
Stair leveler
- Measuring tape
- Level
- Miter saw or circular saw
- Countersink drill
- Speed square
- Two 2- by 4-inch (5.1-cm × 10.2-cm) boards to fit height of 3 stairs
- Plywood at least 1 inch (2.5 cm) thick and medium density, as wide as stairs minus 6–10 inches (15–25 cm), as long as depth of 3 stairs
- Two 2- by 4-inch (5.1-cm × 10.2-cm) boards to fit distance between leveler legs
- Two 2- by 4- by 4-inch (5.1- × 10.2- × 10.2-cm) boards for support braces
- 1- by 2-inch (2.5-cm × 5.1-cm) boards to fit edges of platform for support rails
- 2.5 inches (6.4 cm) screws (about 16-20)
- 1.5 inches (3.8 cm) screws (about 8-12)


References
- ↑ https://youtu.be/ahbOwE6ik7E
- ↑ https://youtu.be/ahbOwE6ik7E
- ↑ https://www.thisoldhouse.com/ideas/25-diy-fundamentals
- ↑ https://www.thisoldhouse.com/ideas/25-diy-fundamentals
- ↑ https://youtu.be/ahbOwE6ik7E
- ↑ https://youtu.be/NcdHc7lZjlE
- ↑ https://www.thisoldhouse.com/ideas/25-diy-fundamentals
- ↑ http://mattandshari.com/how-to/shop-projects/build-a-ladder-platform-to-use-on-stairs/
- ↑ http://mattandshari.com/how-to/shop-projects/build-a-ladder-platform-to-use-on-stairs/
- ↑ http://mattandshari.com/how-to/shop-projects/build-a-ladder-platform-to-use-on-stairs/
- ↑ https://youtu.be/X2MYQdg-amQ
- ↑ http://mattandshari.com/how-to/shop-projects/build-a-ladder-platform-to-use-on-stairs/
- ↑ https://youtu.be/X2MYQdg-amQ
- ↑ https://youtu.be/X2MYQdg-amQ
- ↑ https://youtu.be/X2MYQdg-amQ
- ↑ https://youtu.be/X2MYQdg-amQ
- ↑ https://youtu.be/X2MYQdg-amQ
- ↑ http://mattandshari.com/how-to/shop-projects/build-a-ladder-platform-to-use-on-stairs/
- ↑ https://youtu.be/X2MYQdg-amQ
- ↑ https://youtu.be/X2MYQdg-amQ
- ↑ https://youtu.be/X2MYQdg-amQ
- ↑ https://youtu.be/X2MYQdg-amQ
- ↑ https://youtu.be/b1TI15As5qY
- ↑ http://www.popularmechanics.com/home/interior-projects/how-to/a4588/4330365/
- ↑ https://youtu.be/ahbOwE6ik7E
- ↑ https://youtu.be/ahbOwE6ik7E
- ↑ https://www.familyhandyman.com/painting/tips/how-to-paint-a-ceiling/view-all/
- ↑ https://www.familyhandyman.com/painting/tips/how-to-paint-a-ceiling/view-all/
- ↑ https://www.familyhandyman.com/painting/tips/how-to-paint-a-ceiling/view-all/
- ↑ https://www.familyhandyman.com/painting/tips/how-to-paint-a-ceiling/view-all/
About This Article
Painting a high ceiling over stairs can be a challenge, but you can use an extension roller to make things easier. An extension roller is a paint roller with a long handle that will allow you to reach your high ceiling. Alternatively, you can buy a stair leveler, which is a small platform that fits onto your stairs so you can prop your extension ladder on it and reach the ceiling. You can also make a secure scaffold with a step ladder, extension ladder, wooden boards, and clamps to reach your ceiling. Whichever method you use, cover the railings and stairs with drop cloths before you start working to protect them from drips. You should also wear goggles in case paint drips down into your eyes. For more tips from our Home Improvement co-author, including how to protect your walls and light fixtures from paint, read on!