This article was co-authored by wikiHow staff writer, Hunter Rising. Hunter Rising is a wikiHow Staff Writer based in Los Angeles. He has more than three years of experience writing for and working with wikiHow. Hunter holds a BFA in Entertainment Design from the University of Wisconsin - Stout and a Minor in English Writing.
There are 7 references cited in this article, which can be found at the bottom of the page.
This article has been viewed 65,610 times.
Learn more...
Painted saw blades are a great way to make decorative and rustic art. Many artists paint decorative landscapes, but you can paint whatever you'd like on your saw blade. After cleaning the blade, you can use either acrylics or oils to make a new piece of art that's sure to be a conversation piece!
Steps
Cleaning the Saw Blade
-
1Remove any rust with sandpaper or steel wool. Use a 300-grit sandpaper or a pad of steel wool and work across the blade in small circles. Apply a firm pressure to scrub the blade, so as to completely remove the rust.
- For extra tough spots or oil on the blade, use a small amount of dish detergent along with your scouring pad to fight through the grease.
- Consider wearing eye and mouth protection to keep yourself safe from rust particles.
-
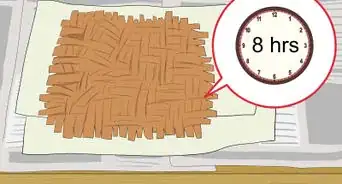
2Spray the saw blade with a coat of metal primer. Apply the primer with a clean cloth in a thin layer across the surface of the blade. Wipe off any excess primer that pools up on the surface. Let the primer dry for at least 15 minutes before continuing.[1]
- Metal primer can be purchased at your local hardware store.
- Primer not only protects the saw blade from rust, but it also helps paint stick better.
Advertisement -
3Cover the blade with black or white acrylic paints as a base coat. Use a wide paintbrush or spray paint to coat the surface of the saw blade. Work from left to right on the saw blade. Let it dry completely before applying a second coat in the opposite direction.[2]
- The underlayer color depends on what colors you want to paint the saw blade. Use white for lighter colors and black for darker colors.


Decorating the Saw Blade
-
1Draw your design on the saw blade. Use a soft pencil to draw the designs that you want to paint. If you painted your underlayer black, use a white charcoal pencil to make your marks.[3]
- Don’t make your drawings too detailed since you’re going to paint over them. Instead, make a loose sketch of the main shapes and forms.
-
2Set the blade on a scrap piece of wood or paper. Set the saw blade in the middle of the sheet so paint doesn’t get on another surface. When you lift the saw blade off the sheet, the edges will look neat and clean.[4]
- Clamp the saw blade in an easel if you have access to one.
- Be careful when you handle the saw blade so you don’t accidentally cut yourself.
-
3Use acrylic paints for a fast-drying medium. Acrylic paints tend to dry between 15 minutes and an hour. Choose a variety of colors along with black and white so you are able to mix different values. If you work quickly with paints, acrylics may be the right choice for you.[5]
- Paintbrushes you use with acrylics can be cleaned easily with water, but they need to be cleaned within 10 minutes of using them.
- Acrylics tend to be less expensive than oil paints.
-
4Paint with oils if you want a longer working time. Choose oil paints if you work slowly and want more control over when you can mix colors. Depending on the humidity in the area you paint, oil paints could take up to a week to completely dry.[6]
- Make sure to work in a well-ventilated area when working with oil paints.
- Brushes used with oil need to be cleaned with mineral spirits or turpentine.
-
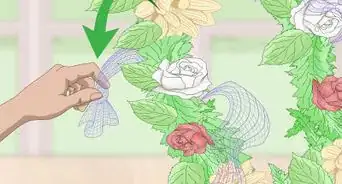
5Start with the background and work towards the foreground. Work from light colors to darker shades. Keep your background hazy so it looks like it’s in the distance. As you paint closer to the foreground, start to add more details to your painting. [7]
- Work with complementary color schemes, like orange and blue, yellow and purple, and red and green.


Finishing Your Art
-
1Let the paint dry completely. Leave your saw blade in a safe, dry place until it completely dries. If you used acrylic, leave it to dry for 1 day. When you use oils, leave it to dry for at least 1 week.[8]
- Test a small, unnoticeable area with a toothpick to see if the paint is dry.
-
2Spray a UV-protectant varnish over the paint. Spray a thin layer of the varnish onto the saw’s surface. A UV-resistant varnish will help protect your painting from the sun by reflecting the light and preserve the colors.
-
3Hang your art on the wall securely. Use a stud finder to a secure place to hang your saw blade. Drive a nail into the wall with a hammer so 1⁄2 inch (1.3 cm) sticks out. Hang the saw blade so the nail goes through the hole in the middle.[9]
- Put the blade high enough so that children can’t reach it.
- Saw blades can be hung inside or outdoors.


Warnings
- Be careful handling your saw blade so you don’t cut yourself.⧼thumbs_response⧽
- Work in a well-ventilated area if you work with oil paints.⧼thumbs_response⧽
- Keep the saw blade out of the reach of children.⧼thumbs_response⧽
Things You’ll Need
- Sandpaper or steel wool
- Dish detergent
- Metal primer
- Paintbrushes
- Acrylic or oil paints
- Scrap wood or paper
- Stud finder
- Nails
- Hammer


References
- ↑ https://www.tremcosealants.com/fileshare/DataSheets_Hyland/Primer_Selection_Usage_Guide_DS.pdf
- ↑ https://youtu.be/lmKAwKrONmE?t=57s
- ↑ https://youtu.be/lmKAwKrONmE?t=1m2s
- ↑ https://youtu.be/lmKAwKrONmE?t=1m2s
- ↑ http://emptyeasel.com/2007/01/16/how-to-choose-between-using-oil-paints-or-acrylics/
- ↑ http://emptyeasel.com/2007/01/16/how-to-choose-between-using-oil-paints-or-acrylics/
- ↑ http://emptyeasel.com/2009/10/08/how-to-paint-landscapes-with-depth-6-tips-for-creating-distance-in-any-painting/
- ↑ https://www.finearttips.com/2010/01/painting-with-acrylics-the-mystery-explained/
- ↑ https://youtu.be/PYjE0tvbBIw?t=1m42s
About This Article