This article was co-authored by Mitchell Newman. Mitchell Newman is the Principal at Habitar Design and its sister company Stratagem Construction in Chicago, Illinois. He has 20 years of experience in construction, interior design and real estate development.
There are 14 references cited in this article, which can be found at the bottom of the page.
This article has been viewed 19,243 times.
Painting your vanity is the perfect way to give your bathroom a facelift. To prep the vanity for painting, remove all of the drawers, doors, and hardware. Fill in any imperfections with wood putty, then sand and wipe down the surface. Apply primer for a smooth finish and leave it to dry overnight. Apply 2 light layers of paint and let them dry overnight as well. Once you’ve removed the tape and reassembled your vanity, the transformation is complete!
Steps
Prepping the Vanity
-
1Empty out all of the cabinets and drawers. Take out all of vanity’s contents, such as personal products, towels, and styling tools. Set these aside where they will be out of the way while you work on the vanity. This will help prevent mess and damage from the paint.
-
2Spread a dropcloth on the floor around the vanity. Use a plastic or canvas sheet to help protect against any paint drips or spills. Tape down the edges of the dropcloth with painter’s tape to keep it from moving around.[1]
- To keep debris from getting trapped under the dropcloth and scratching the floor, vacuum the floor area before laying down the cloth.[2]
Advertisement -
3Take apart all of the pieces of the vanity. Remove any drawers, doors, and false door fronts. Lay these on the dropcloth to paint separately. Remove all hardware, such as hinges and knobs, and store them in a plastic bag for safekeeping.[3]
- You should also clearly label where each piece goes in the cabinet so they’re easy to replace once the paint job is complete.
-
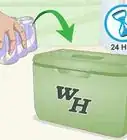
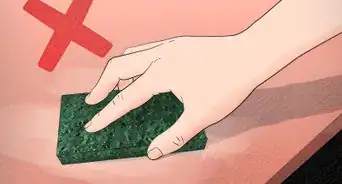
4Wash all cabinetry surfaces with dish soap and water. Wet a sponge or scrubbing pad and add a drop or 2 of dish soap to remove any built-up oil and grime. Make sure to wash all of the pieces, including the removed drawer fronts. Rinse at least twice with fresh water and a sponge. Let all surfaces dry completely.
-
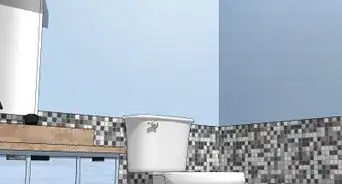
5Mask off areas you don’t want painted with painter’s tape. Place tape around the underside of the vanity top, any adjoining walls, the edge where the vanity meets the floor, and inside the cabinet frame. This will help keep these surfaces from accidentally being painted.[4]
-
6Patch up any surface flaws with wood putty, then let it dry. Fill in any dings, gouges, or deep scratches with wood putty and a putty knife. Make sure to overfill the imperfections so that when the putty dries down, it’ll still fill the damaged area.[5] Wait for the putty to dry and harden before continuing your project.
- For shallow imperfections that are less than 0.25 inches (0.64 cm), you can usually sand after 15 minutes. However, with gouges that are deeper than 0.25 inches (0.64 cm), you’ll need to wait 2-8 hours before sanding.[6]
-
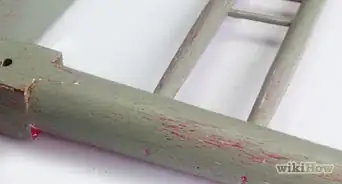
7Sand down any extra putty, clear finish, or loose paint. Use 220-grit sandpaper to even out the level of the putty and rub off any gloss finish on the wood.[7] You can also use it to remove spots of loose or damaged paint. Make sure to sand the inside corners of the cabinet as well.
- This will help create a good base for the paint to stick to.[8]
-
8Clean up the dust with a vacuum and a damp rag. Remove the sanding dust by gently vacuuming the vanity surfaces and the surrounding area. Use a brush extension and a low setting when vacuuming. Lightly dampen a rag with water and use it wipe down the vanity surfaces. This will help pick up any leftover dust. Let the vanity surface dry before moving on to priming.[9]


Applying Paint
-
1Apply a thin coat of primer to the vanity and drawers/doors. Use a brush to cover the edges with primer, then finish by covering the flat surfaces with a foam roller. Let the primer dry overnight so the paint can sit and harden. Remember to apply primer to the drawers and doors as well.[10]
- Only use primer if you’re painting with latex or oil-based paint. If you’re using chalk paint, skip priming and go straight to painting.
- Older paint and primer formulas needed to be paired by type, such as oil-based with oil-based or latex with latex, but current formulas can be mixed and matched.[11]
- If you chose a glossy finish paint, make your priming layer as smooth as possible. Glossy paint shows imperfections much more visibly than flat finish.
-
2Pick from oil-based, latex, or chalk-finish paint. Keep in mind that oil-based and latex paints require a primer, while chalk-finish paint does not.
- Oil-based paint is strong and durable, resists chipping, and levels out any imperfections. However, it has a strong odor and is difficult to clean up.[12]
- Latex paints are water-based and very durable. Choose a satin finish to have a nice, light sheen that’s not too shiny.[13]
- Chalk paint is a quick, easy option with a smooth, flat finish. It dries fast and because it’s thick, it requires fewer coats of paint. However, its thick consistency also means it’s easy to leave brush marks.[14]
-
3Apply a coat of paint to the vanity and let it dry overnight. You can use a brush or foam roller to paint or a combination of the two. Foam rollers also create a more even coat of paint, so use them for larger, flat areas, then paint over any detailing or edges with a brush. Start by filling a tray with paint, then add more as needed.
- Remember to paint the drawers and doors as well, keeping them on the dropcloth to prevent mess.
- Always paint in the direction of the wood grain.
-
4Add another coat if the paint looks patchy and let it dry overnight. After letting the first layer dry overnight, you may notice that the paint has some patchy areas. Apply a second coat, brushing on paint over edges and corners and using a foam roller on flat surfaces. Let the vanity and all of the painted pieces sit undisturbed for a full night and check them in the morning.[15]
- Patchiness often occurs with darker paint colors.
- When applying extra coats of paint, you may need to let the vanity dry for up to 48 hours.[16]


Maintaining Your New Vanity
-
1Reassemble the vanity after it’s dry. When all the pieces are dry, you can remove the painter’s tape and reassemble the vanity pieces with the hardware you stored. Re-stock it with your products, and then it’s ready to be used!
-
2Take the opportunity to do some spring cleaning. As you’re putting items back into the vanity, think about how often you use them. If you’ve barely or never used them, get rid of them to make more space inside your new vanity.
-
3Revamp the hardware to give the vanity a whole new look. Switch out your drawer and cabinet handles for new hardware. Try hardware in a different metal, glass knobs, or handles instead of knobs. This will complete the vanity’s transformation and make it feel brand-new.[17]
-
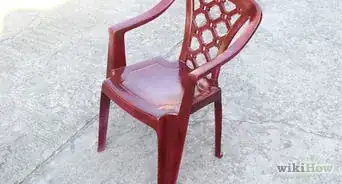
4Patch up scratches by gently sanding and painting over them. Use a very fine grit sandpaper to lightly sand the chipped area. Then use a brush with the same paint that’s already on the vanity and paint over the scratch. Try to fill the scratch in with the paint so it looks level with the rest of the surface. Let the paint dry for a few minutes, and the vanity should look as good as new.[18]
- Very fine sandpaper includes grits of 240, 320 and 400.[19]


Expert Q&A
-
QuestionWhat kind of paint do you use on bathroom cabinets?
 Mitchell NewmanMitchell Newman is the Principal at Habitar Design and its sister company Stratagem Construction in Chicago, Illinois. He has 20 years of experience in construction, interior design and real estate development.
Construction ProfessionalIn a bathroom, it helps to use slightly glossier paints, because they're more durable, and your cabinet is going to get a lot of traffic. For the finish, you might want to choose a semi-gloss, eggshell, or matte finish. You can even find paints that are specifically made for painting cabinets. They go on similar to an oil-based paint, but they're actually water-based, so they have very low VOC and are extremely durable.
Things You’ll Need
- Plastic or canvas dropcloth
- Painter’s tape
- Kitchen soap
- Sponge or scrubbing pad
- Wood putty
- Putty knife
- 220-grit sandpaper
- Vacuum
- Rag
- Primer
- Paint
- Foam roller or paint brush


References
- ↑ https://www.houselogic.com/remodel/painting-lighting/using-a-drop-cloth/
- ↑ https://www.houselogic.com/remodel/painting-lighting/using-a-drop-cloth/
- ↑ http://www.dwellinginhappiness.com/how-to-paint-your-bathroom-vanity-the-easy-way/
- ↑ https://theturquoisehome.com/guide-painting-cabinets/
- ↑ https://www.thisoldhouse.com/how-to/how-to-choose-and-use-wood-filler
- ↑ https://www.bobvila.com/articles/how-to-use-wood-filler/#.WgStZnfMw1g
- ↑ http://homeguides.sfgate.com/220-grit-sandpaper-normally-used-for-96897.html
- ↑ http://www.dwellinginhappiness.com/how-to-paint-your-bathroom-vanity-the-easy-way/
- ↑ http://www.dwellinginhappiness.com/how-to-paint-your-bathroom-vanity-the-easy-way/
- ↑ https://www.lowes.com/n/how-to/paint-a-bath-vanity
- ↑ https://www.todayshomeowner.com/homeowners-guide-paint-primer/
- ↑ https://www.thisoldhouse.com/how-to/how-to-paint-kitchen-cabinets
- ↑ http://www.bhg.com/bathroom/vanities/bathroom-vanity-makeover-ideas/?slideId=87bc7329-32c4-49cb-a252-ba92f1341a30
- ↑ https://abeautifulmess.com/2017/09/painting-cabinets-with-chalk-paint-pros-cons.html
- ↑ http://providenthomedesign.com/2014/10/18/paint-bathroom-vanity-like-professional/
- ↑ http://providenthomedesign.com/2014/10/18/paint-bathroom-vanity-like-professional/
- ↑ http://www.dwellinginhappiness.com/how-to-paint-your-bathroom-vanity-the-easy-way/
- ↑ http://www.hometalk.com/9577874/how-to-touch-up-chipped-paint-and-maintain-painted-cabinets?expand_all_questions=1
- ↑ https://www.bobvila.com/articles/2145-quick-tip-choosing-sandpaper/#.WjnObiPMzPA
About This Article