This article was co-authored by Patrick Coye. Patrick Coye is the owner and operator of Patrick’s Painting & Home Improvement in Alexandria, Virginia. With over 15 years of experience in residential construction, Patrick specializes in painting, wallpaper removal/installation, drywall, staining decks and fences, and kitchen cabinetry painting. To date, Patrick and his team have painted over 2,000 houses and stained over 800 decks. Patrick's Company won a "Top Job" award from the American Painting contractor magazine in 2020.
There are 8 references cited in this article, which can be found at the bottom of the page.
This article has been viewed 41,380 times.
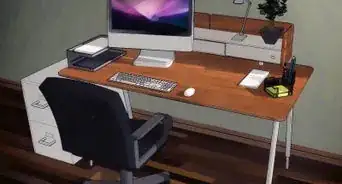
Whether you are fixing up your childhood desk to pass down as an heirloom, or you are putting together a home office, painting a desk can be both fun and rewarding. With a little bit of a paint and patience, your freshly painted desk is just a few steps away.
Steps
Sanding the Desk
-
1
-
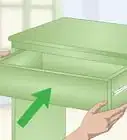
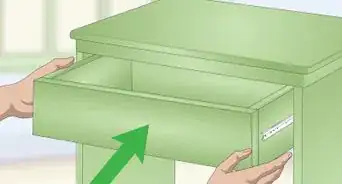
2Remove the hardware.[3] Once you have detailed the desk, remove any metal handles or doorknobs. This will eliminate any possibility of damaging them during sanding.[4]Advertisement
-
3
-
4Press the sander gently back and forth. The sander has a fair amount of power on its own, so there is no need to bear down, just glide the machine over the surface.[7]


Priming the Desk
-
1Wipe the desk down using cheesecloth or paper towels. If dust is still clinging to the surface of the desk after sanding, then it could lead to a rough paint job. Wipe all the sawdust off before applying any primer.[8]
-
2Choose a primer. There are three kinds of primer: oil, pigmented shellac, and latex. Different primers work better on different surfaces, so the kind of primer you choose should be based on the material your desk is made of.[9]
- If your desk is made of unfinished, weathered, varnished wood or wood that bleeds tannins, such as cedar, you should opt for an oil-based primer.[10]
- Use a latex-based primer if you are painting pine, brick, or concrete.[11]
- Try a pigmented shellac primer for dealing with water, tannin, or smoke stains.[12]
-
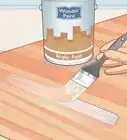
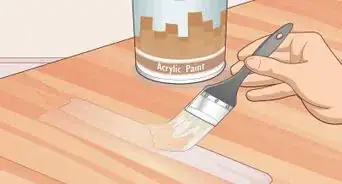
3Apply primer to the desk. Many people paint the primer on using a roller brush, but you can also purchase spray cans of primer for added convenience.[13]
- Unless the wood is unfinished or damaged, you should only need one coat of primer. If the wood has stains or has never been primed you should opt for two coats.[14]
-
4Sand the desk using fine grit sandpaper. Lightly sand the desk again. A light sand in between primer and paint will help your desk look as professional as possible.
- Be sure you wipe the desk down following the second sand. Use tack cloth for the best results.[15]
-
5Wait a week between priming and painting. It's hard to be patient when you have all the tools ready to go, but primer is most effective when it has 7 days to seal.


Painting the Desk
-
1Select an interior latex paint with a glossy finish. Avoid paints with a flat finish because the surface will then be hard to clean. Any paint that has a glossy finish will be aesthetically pleasing and easy to wash.
-
2Choose an application tool. You can either apply the paint via roller and paintbrush, or via paint sprayer. The roller and paintbrush work great if you are working on a budget. The paint sprayer is costly but convenient.
-
3
-
4Practice using the paint sprayer. Before using the paint sprayer on your desk, practice painting a piece of cardboard. This will help you get used to the paint sprayer's strength and help you determine how far you should stand from your target.[18]
-
5Spray in straight, long strokes. Start making the strokes before you turn the sprayer on. Once the sprayer is on keep your strokes as even as possible. You should cover 2–3 feet (61–91 cm) per second.[19]
- You should be between 10–12 inches (25–30 cm) from your target. The closer you move to the desk, the thicker the paint will be and the harder to keep even.[20]
- Keep the nozzle of the paint sprayer perpendicular to the surface you are painting. If you arc the gun, then it will cause the paint to layer unevenly.[21]
- Remember to paint in thin coats. The thicker the coat, the more prone to a rough finish.
- 2-3 coats of paint will be appropriate for most desks.
- If you are trying to achieve an antique look, then rub the painted edges with a bit of sandpaper.[22]
-
6Sand between coats. In order to achieve a smooth finish, you should lightly sand using the fine grit sandpaper between each coat of paint.


Protecting the Desk
-
1Let the paint dry or cure. After the last coat of paint, you should let the desk dry for around 24 hours. You can also choose to let the furniture cure, a process which will naturally protect the coat of paint, but this process takes around 30 days.
- If you choose to cure, be sure the desk remains completely contact-free for the 30-day dry period, otherwise the process will not work.[23]
-
2
-
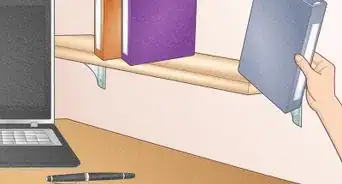
3Put on the finishing touches. After you have let the protectant dry for around 24 hours, it's time to screw the metal handles or doorknobs back in. You can also line the drawers with some colorful paper as well to add an extra touch.[26]


Warnings
- Painting in a well ventilated garage is better than painting outside, as the wind or breeze tends to carry unwanted grit into your paint.⧼thumbs_response⧽
References
- ↑ Patrick Coye. Painting Specialist. Expert Interview. 22 July 2020.
- ↑ https://www.erinspain.com/how-to-paint-furniture-a-beginners-guide/
- ↑ Patrick Coye. Painting Specialist. Expert Interview. 22 July 2020.
- ↑ https://centsationalstyle.com/2009/05/diy-painted-thrift-store-desk/
- ↑ Patrick Coye. Painting Specialist. Expert Interview. 22 July 2020.
- ↑ https://www.erinspain.com/how-to-paint-furniture-a-beginners-guide/
- ↑ https://diycandy.com/how-to-use-an-electric-sander/
- ↑ https://www.justmeasuringup.com/painting-desk/
- ↑ Patrick Coye. Painting Specialist. Expert Interview. 22 July 2020.
- ↑ https://www.todayshomeowner.com/homeowners-guide-paint-primer/
- ↑ https://www.todayshomeowner.com/homeowners-guide-paint-primer/
- ↑ https://www.todayshomeowner.com/homeowners-guide-paint-primer/
- ↑ https://centsationalstyle.com/2009/05/diy-painted-thrift-store-desk/
- ↑ https://www.bobvila.com/articles/how-many-coats-of-primer/
- ↑ https://www.erinspain.com/how-to-paint-furniture-a-beginners-guide/
- ↑ https://www.erinspain.com/how-to-paint-furniture-a-beginners-guide/
- ↑ https://www.erinspain.com/how-to-paint-furniture-a-beginners-guide/
- ↑ https://www.dummies.com/home-garden/home-painting/how-to-paint-with-a-sprayer/
- ↑ https://www.dummies.com/home-garden/home-painting/how-to-paint-with-a-sprayer/
- ↑ https://www.dummies.com/home-garden/home-painting/how-to-paint-with-a-sprayer/
- ↑ https://www.dummies.com/home-garden/home-painting/how-to-paint-with-a-sprayer/
- ↑ https://centsationalstyle.com/2009/05/diy-painted-thrift-store-desk/
- ↑ https://www.erinspain.com/how-to-paint-furniture-a-beginners-guide/
- ↑ Patrick Coye. Painting Specialist. Expert Interview. 22 July 2020.
- ↑ https://www.erinspain.com/how-to-paint-furniture-a-beginners-guide/
- ↑ https://centsationalstyle.com/2009/05/diy-painted-thrift-store-desk/
About This Article