This article was co-authored by Veronica Winters. Veronica Winters is a Figurative Artist who owns an online art gallery and studio in Naples, Florida. With over 20 years of experience, Veronica specializes in surreal figurative oil paintings and colored pencil drawings. In 2022, she won the Award for Distinction at the 30th Annual Colored Pencil Society of America International Exhibition. Veronica is also a published author of two art books: How to Color Like an Artist and The Colored Pencil Manual. She received her BFA in Studio Art at Oklahoma State University and her MFA in Painting at Pennsylvania State University. Veronica also studied classical drawing at the Grand Central Academy of Art and the Art Students League of New York.
This article has been viewed 141,741 times.
Ready to craft a realistic, beautiful portrait? People have been creating portraits for as long as the art of painting has existed, and this is a key skill in any artist’s repertoire. If you’re new to portrait painting, don’t worry. Practice goes a long way when it comes to mastering the human form, and you’ll be crafting elegant portraits in no time. Read on to learn everything you need to know about painting portraits.
Steps


Community Q&A
-
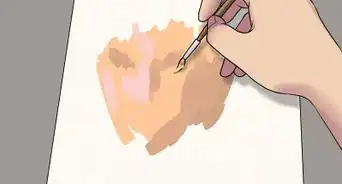
QuestionHow do I mix realistic skin colors?
 Community AnswerI recommend checking out a book from the library on portrait painting in the media you'll be using (oils, acrylics, watercolor). The colors will vary depending on the skin tone of the person who's portrait you are painting.
 -
QuestionWhich acrylic colors do I mix to make red hair?
 Community AnswerYou can try to play around with some red and brown acrylics to get the right shade of red that you want.
 -
QuestionHow do I make skin color?
 PurpleHoodieCommunity AnswerIt varies, depending on which type of paint you will be using. For acrylic, mixing equal amounts of red, yellow, blue and white will create a flesh tone. You can adjust the amount of white to lighten the tone, or add blue and red to darken.


References
- ↑ https://shop.mybluprint.com/art/article/painting-a-self-portrait/
- ↑ https://emptyeasel.com/2013/09/16/how-to-paint-portraits-from-photographs-a-step-by-step-oil-paint-tutorial/
- ↑ http://www.artyfactory.com/portraits/acrylic-portrait-painting/acrylic-portrait-painting-3.html
- ↑ https://idahoartclasses.com/category/portrait-drawing/
- ↑ https://idahoartclasses.com/category/portrait-drawing/
- ↑ https://idahoartclasses.com/category/portrait-drawing/
About This Article