This article was co-authored by wikiHow Staff. Our trained team of editors and researchers validate articles for accuracy and comprehensiveness. wikiHow's Content Management Team carefully monitors the work from our editorial staff to ensure that each article is backed by trusted research and meets our high quality standards.
There are 8 references cited in this article, which can be found at the bottom of the page.
wikiHow marks an article as reader-approved once it receives enough positive feedback. In this case, 93% of readers who voted found the article helpful, earning it our reader-approved status.
This article has been viewed 111,204 times.
Learn more...
An old or rusted hood can be reconditioned to look as good as new by applying a fresh coat of paint. First, wash the car and treat any rust stains so the paint sticks properly. Either spray paint or liquid paint can be used, but always work slowly to apply several even layers of primer and paint. Then take your car on the road to show off the new look!
Steps
Cleaning the Hood
-
1Wash the hood with soap and water. Pick a day when you have time to devote to painting the car. Start by washing the hood to clear away grime. Use a car wash soap purchased from an automotive store, then rinse it off with water from a hose.[1]
- Household soaps aren’t recommended since they tend to damage the finish.
-
2Rub the hood with a sanding sponge. You can find sanding sponges at any home improvement store. While the car is wet, gently rub the sponge over the hood. This cuts into the paint, which helps the new coating adhere better when you apply it later.[2]Advertisement
-
3Dry the car completely in sunlight. You can use a clean microfiber cloth to absorb most of the moisture. No matter what, leave the car out in direct sunlight until all the water is gone. This can take a few hours, depending on the weather.[3]
- The car has to be dry or else your new coat of paint won’t look very good.
-
4Use sandpaper to rub off any rust spots you notice. Pick up some 40 to 60-grit sandpaper from a home improvement store. Rub it back and forth over the rusted spots. You will notice the orange-colored rust begin to flake off. Continue working until it’s gone and all you’re left with is bare metal.[4]
- It’s important to remove rust now so it doesn’t damage your car later.
- A grinder can be used in place of sandpaper if you have one.
-
5Wipe the sanded areas with a damp cloth. Find a clean microfiber cloth and hold it under running water. Avoid soaking the cloth, since introducing too much water to the metal leads to more rust. Use the cloth to remove debris from the spots you sanded.[5]
-
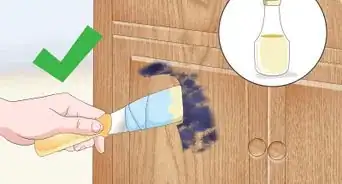
6Spray the rusted areas with a rust converter. Next, pick up a can of a rust converter and primer product from a home improvement center or automotive store. It operates like spray paint. Press the plunger on top of the can and move it from side to side over the exposed metal. Create a nice, even coat to protect the metal.[6]
- This product acts as a primer. You can paint over it.


Applying Primer to the Hood
-
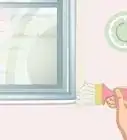
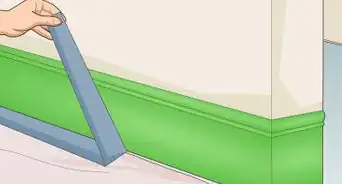
1Cover the rest of the car with tape and plastic sheeting. Home improvement stores usually stock sheeting, as do some paint stores and auto parts shops. Cover up any areas near the hood that you don’t want painted. Masking tape is good for covering the edges around the hood. Plastic sheeting is better for covering large areas.[7]
-
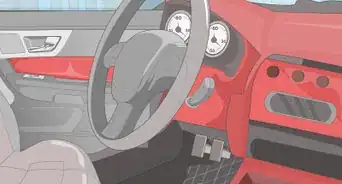
2Wear a respirator when painting the car. No matter what type of paint you use, the fumes are unpleasant and dangerous to inhale. Moving the car to an open, outdoor location is a good idea, but you should still put on a respirator mask to be safe.
- Safety goggles and gloves are also helpful.
-
3Use spray paint for a quicker and cheaper paint job. You have most likely seen spray paint for sale at various stores. Using it is as simple as pointing and spraying. You will need a can of primer and a can of colored paint.[8]
- If you want to add more detail to the hood, also get another color of paint.
-
4Purchase a paint gun for a more professional paint job. You can get paint guns relatively cheaply online or at home improvement stores. A gun gives you more control, helping you create more even paint layers. You will need to get liquid paint and mix it according to the instructions on the label.[9]
-
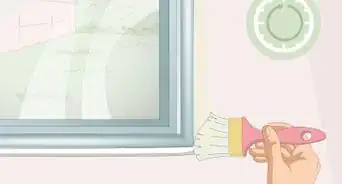
5Spray primer over the hood. Hold the primer canister about 8 to 12 in (20 to 30 cm) above the hood. Start at 1 end and slowly move the can or gun in a straight line towards the other end. Then reverse, overlapping this second stroke with your first one. Continue spraying back and forth to cover the entire hood.[10]
- Another way to do this is with a quality liquid primer. Spread it over the hood with a plastic paint spreader.
-
6Wait up to 5 minutes after applying a layer. For primer, wait between 2 to 5 minutes before applying more. Each can of primer or paint requires some waiting for the product to settle on the hood. Check the instructions on the can to remind yourself of how long to wait.
- Don’t wait too long, though. The primer should only be allowed to dry after you’re done adding more of it.
-
7Add 3 or more layers of primer. Spray on more primer, waiting a few minutes after each layer. Apply it the same way you did the first one. Move in slow, even strokes. The primer should be nice and thick before you paint.
-
8Wait 24 hours for the primer to dry. Wait a whole day to ensure that the primer settles. To protect it, cover the car with a drop cloth purchased online or from any stores that sell paint supplies.


Painting the Car
-
1Apply the main coat of paint. This mid coat is the color you primarily want your car to be. Apply it the same way you did the primer. Start at 1 end of the hood and move across it in an even stroke. If you’re using spray paint, try releasing the plunger when you reach the hood's edges.[11]
- Slow, straight lines are the way to get good coloring. Moving too fast means thin, faded streaks that will make you want to hide your car in the garage forever.
-
2Apply up to 3 coats of paint. Again, read the instructions on the paint can to find out how long to wait between coats. Usually it’s about 10 to 15 minutes. Once that time has elapsed, apply another coat of paint to the hood. It will take you 2 or 3 coats to make the hood look perfect.[12]
-
3Wait another 4 hours for the paint to dry. Again, you have to wait to finish the paint job. This layer shouldn’t take as long as the primer. You can test it by touching it with a covered finger. If the weather changes or you prefer to wait another day, cover the car with the drop cloth.
-
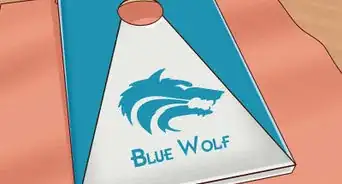
4Paint on different colors as needed. If desired, use additional colors to customize your hood. Cover areas you don’t want to paint with tape and plastic sheeting. Then apply the paint using the same method as above. This is how you paint unique designs. Use your imagination to make your hood stand out![13]
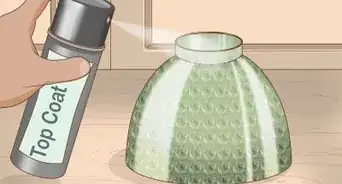
- You can spray on a layer of clear coat paint to protect the coloring.


Things You’ll Need
- Water
- Car soap
- Sanding sponge
- 40-grit sandpaper for rust spots
- Microfiber cloth
- Primer
- Paint
- Clear coat paint
- Paint gun if you use liquid paint

References
- ↑ https://www.familyhandyman.com/automotive/diy-car-paint/how-to-repair-chipped-car-paint/view-all/
- ↑ http://www.hotrod.com/articles/mopp-0612-how-to-paint-a-car/
- ↑ http://www.complex.com/sports/2013/03/10-car-washing-dos-and-donts/use-proper-towel-drying-technique
- ↑ https://www.familyhandyman.com/automotive/how-to-repair-rust-on-a-car/view-all/
- ↑ https://www.familyhandyman.com/automotive/how-to-repair-rust-on-a-car/view-all/
- ↑ https://www.familyhandyman.com/tools/how-to-remove-rust/view-all/
- ↑ https://www.youtube.com/watch?v=ptiyZccRPZY&feature=youtu.be&t=130
- ↑ http://www.yourepair.com/2385/how-to-paint-your-car-with-canned-spray-paint.html
- ↑ http://www.hotrod.com/articles/mopp-0612-how-to-paint-a-car/
- ↑ https://www.familyhandyman.com/automotive/diy-car-paint/how-to-repair-chipped-car-paint/view-all/
- ↑ http://www.popularmechanics.com/cars/how-to/a3110/a-diy-guide-to-painting-your-car-15998013/
- ↑ http://www.popularmechanics.com/cars/how-to/a3110/a-diy-guide-to-painting-your-car-15998013/
- ↑ http://www.popularmechanics.com/cars/how-to/a3110/a-diy-guide-to-painting-your-car-15998013/
About This Article

Before you paint your car's hood, you'll need to sand down any rust spots with 40 or 60 grit sandpaper. You'll also need to clean the hood with soapy water to remove any debris. Once the hood is dry, apply a coat of primer, which will help your paint adhere. Then, add 2 to 3 coats of your chosen color of paint. Use spray paint for an easy solution. If you don't mind working a bit harder for a higher quality finish, use a paint gun instead. For tips on how to add multiple colors of paint to your hood, read on!