This article was co-authored by wikiHow Staff. Our trained team of editors and researchers validate articles for accuracy and comprehensiveness. wikiHow's Content Management Team carefully monitors the work from our editorial staff to ensure that each article is backed by trusted research and meets our high quality standards.
There are 17 references cited in this article, which can be found at the bottom of the page.
This article has been viewed 12,303 times.
Learn more...
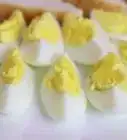
Quail eggs look similar to chicken eggs except they're much smaller and have brown spots on the shell. You may notice they taste a little more rich and fatty because of their large yolks. They're excellent for making egg salad, breakfast scrambles, and omelets. Just like chicken eggs, you have to boil them before you peel them. The shells can be tougher to get off but once you get the hang of it, you'll be able to enjoy the tiny, nutrient-rich eggs in no time!
Steps
Peeling Boiled Quail Eggs
-
1Crack the shell on a hard surface 3 to 4 times on each side. Grasp the quail egg in one hand and gently smack it on a hard, flat surface like a cutting board or tabletop. Rotate the egg 90-degrees and tap it again. Keep rotating and tapping until you have a solid crack around the perimeter of the egg.[1]
- It may help to wet your fingers before picking up the egg. Otherwise, your skin may stick to the peel and pull the egg apart.
- As an alternative, place 3 to 4 eggs in a small plastic container with a lid and fill it with water until the eggs are covered. Put the lid on and shake it for 30 seconds to loosen the shells.[2]
- You can also place the egg on a flat surface and gently roll it under your hand.
-
2Tap the top and bottom of the egg against a hard, flat surface. Hold the egg at the center and flip it over so it's upside down (with the more oblong side facing down). Gently tap it against a hard, flat surface 1 or 2 times until you see a crack. Flip it over and do the same to the bottom of the egg.[3]
- The cracked top of the egg should give a little when you poke it.
Advertisement -
3Pinch and pull away the top of the shell with your thumb and index finger. Gently pinch as much of the shell at the top as you can and pull away whatever you managed to grab. Keep pulling off bits of the shell around the top until the top half is mostly peeled.[4]
- The bottom of the shell will loosen up once you take off most of the top.
-
4Keep peeling off bands of the shell until you can slide the egg out. Use your thumb and index finger to pull the shell away from the base of the egg. It may help to gently squeeze the base of the shell until you feel the egg loosen.[5]
- Once the egg is loose, you should be able to pop it out from the base of the shell.
-
5Rinse away any small bits of the shell under running water. Hold the freshly-peeled egg under the faucet and run your fingers over the surface to remove any small bits of the shell that may be stuck on. You can also dunk the egg into a bowl of water and gently massage it with your fingers.[6]
- Don't try to dig into the egg with your fingernail to remove the small bits because your nail might puncture the whites of the egg.


Dissolving the Shells in Vinegar
-
1Place the hard-boiled quail eggs into a large wide-mouthed jar. Choose a tall, wide-mouth jar—wide enough so that you can stick your hand into it to test an egg later on. Place all of the quail eggs into the jar.[7]
- A tall plastic or glass pickling jar is perfect.
-
2Pour white vinegar into the jar until the eggs are covered. Use only distilled white vinegar—how much you need to use depends on how many eggs you're working with. Pour enough in so that there's 1 inch (2.5 cm) to 2 inches (5.1 cm) of room between the top of the vinegar and the top of the eggs.[8]
- The vinegar won't affect the flavor of the egg because it will only dissolve the shell, not the membrane between the whites and the shell.
- You'll start to see small bubbles floating up to the surface of the vinegar right away.
-
3Feel one of the eggs after 8 hours to see if the shell has dissolved. Reach into the jar and scoop out an egg to feel for any signs of the shell. If you feel any small shards on the outside or see brown spots on the egg, let them sit for 2 more hours (for a total of 10 hours).[9]
- After a while, you'll notice bubbles resting on the surface of the shells as well. This is the vinegar breaking down the calcium in the shells.
-
4Drain the vinegar away using a colander. Place a colander in the sink and carefully pour the eggs into it to drain out the vinegar. If you don't have a colander, hold the lid of the jar loosely over the top so there's a small opening and pour out the vinegar.[10]
-
5Peel the membranes off with your fingers. Hold the bottom of the egg with one hand and use your thumb and index finger to pinch the top of the egg. Pull the rubbery membrane away from the egg until it breaks. Slide the egg out of the membrane and you’re done![11]
- The membranes around the whites of quail eggs are much thicker than the membranes of chicken eggs so they’ll be easy to pull off in 1 or 2 pieces.


Boiling Quail Eggs
-
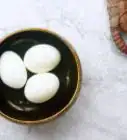
1Place the quail eggs in a deep pot and cover them with water. Put however many quail eggs you want to boil into a tall pot or saucepan and add enough water so that every egg is submerged. Use enough water so that there's 2 inches (5.1 cm) of space between the top of the eggs and the waterline.[12]
- Don't boil the water first and then drop them in—the idea is to bring them to a boil slowly.
-
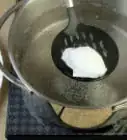
2Set the stove to high and continuously stir the eggs with a spoon. Turn the stove to high heat and use a wooden spoon to stir them around as the water comes to a boil. Stir them slowly, moving the spoon in a big circle and cutting the middle so all the eggs are in motion.[13]
- The yolks of quail eggs are large, so stirring helps keep the yolks in the middle until they harden.
- Not stirring them can cause the yolk to sit on one side of the egg, making it harder to peel the egg and keep it intact.
-
3Stop stirring the eggs when they're boiling and wait 3 minutes. Wait until you see the water is at a rolling boil and then stop stirring the eggs. Put a lid on the pot and set a timer for 3 minutes for hard-boiled quail eggs.[14]
- If you want them to be extra-firm, set the timer for 4 minutes instead.
- Stay close by so you can remove or tilt the lid in case the water starts to boil over.
- While you're waiting, feel free to prepare an ice bath for the eggs to soak in once they're done.
-
4Drain the water away and soak the eggs in ice water for 10 minutes. Pour the contents of the pot over a colander placed in your sink. Then transfer the eggs to the ice bath. Let them sit for 10 minutes or until they feel completely cool when you hold them in your palm.[15]
- The ice water stops the eggs from cooking right away so you're not over-boiling them.
- Once they're cool, you're ready to start peeling!


Warnings
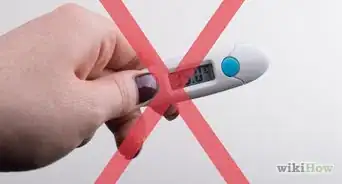
- Never eat undercooked or raw quail eggs because doing so could make you sick from salmonella (which is found in all types of eggs).[17]⧼thumbs_response⧽
Things You'll Need
Peeling a Hard-Boiled Quail Egg
- Hard, flat surface
- Water
- Small plastic container with a lid (optional)
Dissolving the Shells in Vinegar
- Large wide-mouthed jar
- Distilled white vinegar
- Colander
Boiling Quail Eggs
- Deep pot with a lid
- Water
- Stove
- Wooden stirring spoon
- Timer
- Colander
- Bowl
- Ice

References
- ↑ https://youtu.be/Vy5tGoLz8L0?t=44
- ↑ https://youtu.be/ug8kSTDtLW4?t=9
- ↑ https://youtu.be/H5DBCeog0IY?t=15
- ↑ https://youtu.be/uVuLY3C3Xr0?t=98
- ↑ https://youtu.be/UMRIlnbMkbg?t=37
- ↑ https://youtu.be/Vy5tGoLz8L0?t=71
- ↑ https://youtu.be/xtEDbTHF7Mk?t=150
- ↑ https://van.physics.illinois.edu/qa/listing.php?id=461
- ↑ https://youtu.be/xtEDbTHF7Mk?t=244
- ↑ https://youtu.be/xtEDbTHF7Mk?t=294
- ↑ https://www.cooksinfo.com/quail-eggs
- ↑ https://youtu.be/xtEDbTHF7Mk?t=54
- ↑ https://youtu.be/xtEDbTHF7Mk?t=61
- ↑ https://youtu.be/xtEDbTHF7Mk?t=92
- ↑ https://youtu.be/xtEDbTHF7Mk?t=115
- ↑ https://www.thekitchn.com/are-hardboiled-eggs-easier-to-peel-if-you-add-baking-soda-to-the-water-putting-tips-to-the-test-in-the-kitchn-202522
- ↑ https://www.ncbi.nlm.nih.gov/pmc/articles/PMC6470839/
About This Article