This article was co-authored by David Zhang. David Zhang is a Professional Wedding Photographer and the Co-Owner of A Tale Ahead based in the San Francisco Bay Area. He works with his wife Annie to capture their clients’ happiest memories in life, from surprise proposals to wedding days and beyond. David and Annie are experts at capturing moments and emotions naturally and candidly, beautifully and artistically.
There are 8 references cited in this article, which can be found at the bottom of the page.
This article has been viewed 28,829 times.
Photographing dark skin in natural lighting is simple and doable by choosing the right camera settings and placing your subject appropriately. Play around with the exposure setting on your camera, making sure you focus on getting the skin tone of the face perfect before worrying about other colors in the photo. By photographing your subject during the early morning or evening, as well as staying away from dark backgrounds, you'll be able to use natural lighting to your advantage and create beautiful photos.
Steps
Utilizing Lighting
-
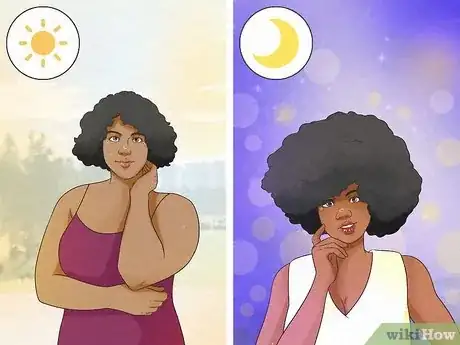
1Take the pictures in the early morning or evening for the best light. Not only does this lighting make for prettier photos, but you’ll also prevent people from having to squint in the photos due to harsh overhead sunlight.[1]
- If you have to shoot during the middle of the day, look for evenly shaded areas to photograph your subject.
-
2Have the subject stand close to a light source in a dimly-lit setting. This will give their face and figure a more 3-dimensional look without having to use flash. Ask them to stand close to the soft light source and then turn slightly so that all of the light isn’t cast down on the subject directly.[2]
- This should create a dynamic photo with slight shadows and curves, illuminating the subject softly.
- For example, if you're in a dark room, you might have the subject stand close to the window, facing out.[3]
Advertisement -
3Keep lighting off of the walls, if possible. Instead of taking a photo with the light coming in directly behind you, try to position the subject so that the light is coming at them from an angle. This will create much greater depth in your photo, and it will give their facial features more definition.[4]
-
4Use windows and doors to illuminate your subject. If you're taking the pictures indoors and trying to use natural lighting, you'll need to gravitate towards a window or an open door. Place your subject near the light but not directly in front of it to avoid a super harsh contrast.[5]
- Test out taking the pictures at different times of day—the cast of an early morning sun will be different than the sun when it's noon or early evening.
-
5Embrace the silhouette as a unique photo option. While you should definitely take photos showing the subject's features in detail, a silhouette can be a dynamic shot. If your subject is standing next to a strong light source, such as a super sunny window or a bright neon light display, capture a photo of their outline.[6]
- You can often get a little detail by positioning them at an angle, allowing the bright light to illuminate some of their face.
Finding a Good Backdrop
-
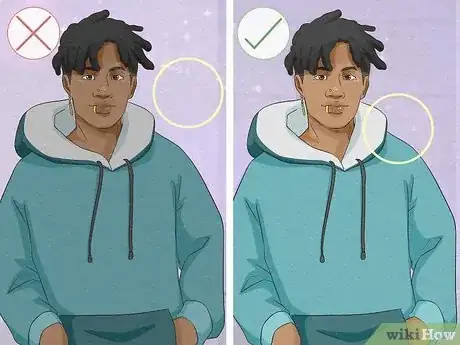
1Avoid using a dark background. Placing dark skin against a dark background won’t provide much contrast, and your picture will come out super dark if you’re using natural lighting. Try to find backgrounds that are a bit lighter than your subject.[7]
- If you want to use a darker background, you’ll need to light the background and the person separately.
-
2Work with undertones in the skin when choosing a background. If someone has orange or red undertones in their darker skin, set them up against an orange or red that will complement them and draw them out. You can also create an exciting photo by using colors that would clash with the undertones.[8]
- This doesn’t mean that you should make the entire background a color that would match the undertones—just a small piece of the background, so that it stands out.
- For example, if someone has orange undertones in their skin, have them stand beside a store that happens to have an orange-toned sign.
-
3Pay attention to the clothing colors when choosing a backdrop. If your darker-skinned subject is wearing white or super light clothing, you'll need to find the medium when taking the photo to ensure there's detail in both the light and dark colors.[9]
- If you're photographing for a photo shoot, encourage the subject to bring multiple outfits to choose from.
Choosing the Camera Settings
-
1Select a focus point if you're using a camera phone. For taking quick pictures, cameras on cell phones such as iPhones can work well. Use your finger to touch the point you'd like to focus on in the picture, and this will adjust the lighting so that the focus point is better lit.[10]
- For example, if you're taking a picture of dark skin outdoors and are getting bad backlight, touch where the person's face is on the phone screen to make the camera focus on that spot.
- Your cell phone won't be able to adjust the lighting as well as a real camera can, so experiment with different focus points until you find one that works.
-
2Browse camera apps for your phone to enhance your photos. Apps such as PureShot or ProCamera 7 have additional features that let you choose settings to take better phone pictures. Most importantly, they have different exposure settings, letting you balance out dark skin against a lighter background, for example.[11]
- Look at the app store on your phone to see which other camera apps are available.
-
3Set your camera to manual exposure mode. You’re not going to get the perfect photo if your camera is left on auto—you need to be able to play around with the exposure until you find the perfect setting. You’ll likely need to open up the apertures to let more light in, so take some test shots to find the right f-stop.[12]
- Try overexposing by two thirds to 1 full stop.
-
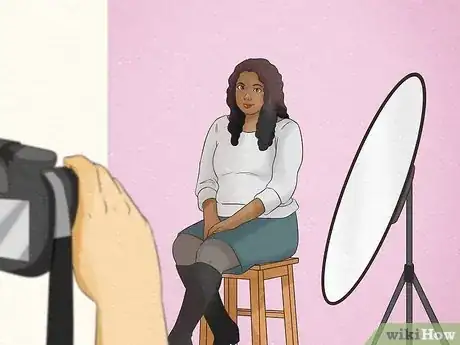
4Bounce light off of darker skin as opposed to shining light directly onto it. This will make the figure look more 3-dimensional and complex. Bring a reflector to bounce the light, or you can also use a flash diffuser to create light that’s less harsh.
- Reflectors are large and white, placed next to the subject so that the flash will bounce off of the reflector onto the subject, casting a nicer light.
- Flash diffusers attach to your camera and help scatter the light once the camera goes off.
-
5Adjust exposure settings to get the lighting of the subject’s face perfect. You want your photo to revolve around getting the subject’s face just right, since this will most likely be the focus of the picture. Find the right exposure setting and focus on getting the color of the skin tone perfect above all else.[13]
- You can edit other colors in the photo, such as the background or clothing, later on in Photoshop.
-
6Use fill flash when photographing darker skin against lighter backdrops. Fill flash will give enough exposure for the background so that it doesn’t come out a blur of white, while also lighting up the subject. So instead of getting a dark-toned silhouette against a detailed lighter background or vice versa, you get details in both the subject and background.[14]
- The fill flash casts light on the subject, illuminating their details and highlighting their face.
- This works well if you’re photographing darker skin against a background such as the sky.
-
7Go for the mid-range if you’re photographing great contrast. It can be hard to get a good photo of dark tones next to light ones—if you focus entirely on the darker skin, you end up blowing out the whites, and if you focus on the lighter color, you lose the detail of the darker tone. By setting your focus somewhere in the middle, you’ll get a much better photo with equal detail.[15]
- You can sharpen specific colors in the photos in Photoshop later on, if desired.
- This is especially important if you're photographing white clothing on darker skin, or a dark skinned subject next to a lighter skinned one.
Expert Q&A
Did you know you can get expert answers for this article?
Unlock expert answers by supporting wikiHow
-
QuestionHow do you set up lighting for dark skin?
 Or GozalOr Gozal has been an amateur photographer since 2007. Her work has been published in, most notably, National Geographic and Stanford University's Leland Quarterly.
Photographer
-
QuestionWhat background color is best for pictures?
 Or GozalOr Gozal has been an amateur photographer since 2007. Her work has been published in, most notably, National Geographic and Stanford University's Leland Quarterly.
Photographer
-
QuestionHow do you photograph a person with lighter skin next to a person with darker skin?
 David ZhangDavid Zhang is a Professional Wedding Photographer and the Co-Owner of A Tale Ahead based in the San Francisco Bay Area. He works with his wife Annie to capture their clients’ happiest memories in life, from surprise proposals to wedding days and beyond. David and Annie are experts at capturing moments and emotions naturally and candidly, beautifully and artistically.
Professional Photographer
References
- ↑ https://digital-photography-school.com/how-to-photograph-mixed-skin-tones/
- ↑ https://mic.com/articles/184244/keeping-insecure-lit-hbo-cinematographer-ava-berkofsky-on-properly-lighting-black-faces#.uaMicCXev
- ↑ David Zhang. Professional Photographer. Expert Interview. 26 January 2021.
- ↑ https://create.adobe.com/2017/11/28/_10_tips_for_photographing_darker_skin_tones.html
- ↑ https://digital-photography-school.com/12-tips-indoor-natural-light-photography/
- ↑ https://create.adobe.com/2017/11/28/_10_tips_for_photographing_darker_skin_tones.html
- ↑ https://create.adobe.com/2017/11/28/_10_tips_for_photographing_darker_skin_tones.html
- ↑ https://create.adobe.com/2017/11/28/_10_tips_for_photographing_darker_skin_tones.html
- ↑ https://digital-photography-school.com/how-to-photograph-mixed-skin-tones/
- ↑ https://iphonephotographyschool.com/exposure/
- ↑ https://iphonephotographyschool.com/exposure/
- ↑ https://www.youtube.com/watch?v=ICJOFpU4PDI
- ↑ https://digital-photography-school.com/how-to-photograph-mixed-skin-tones/
- ↑ https://ethiopia.limbo13.com/index.php/photographing_people_with_dark_skin_i/
- ↑ https://create.adobe.com/2017/11/28/_10_tips_for_photographing_darker_skin_tones.html


