This article was co-authored by Andrew Carberry, MPH. Andrew Carberry is a Food Systems Expert and the Senior Program Associate at the Wallace Centere at Winrock International in Little Rock, Arkansas. He has worked in food systems since 2008 and has experience working on farm-to-school projects, food safety programs, and working with local and state coalitions in Arkansas. He is a graduate of the College of William and Mary and holds a Masters degree in public health and nutrition from the University of Tennessee.
wikiHow marks an article as reader-approved once it receives enough positive feedback. In this case, 94% of readers who voted found the article helpful, earning it our reader-approved status.
This article has been viewed 293,418 times.
Growing your own garlic is easy to do in most climates. It has a long growing season, but at the end you'll have a fresh crop of garlic to store for the winter or share with friends. Garlic can be grown in the ground or in a pot, and it's ready to harvest in mid to late summer.
Steps
Preparing to Plant
-
1Source garlic to plant. You can always try planting garlic you bought from the grocery store, but you'll have a much higher chance of having a successful crop if you buy garlic cloves, or seeds, from a plant nursery that stocks varieties that grow well in your area. Shop online for a wider selection of garlic and choose one to your liking. Some strains are stronger, some are hardy during cold temperatures, and so on.
- The garlic stocked in grocery stores is often shipped in from faraway places, so it won't necessary be a strain that works with your climate and soil type.
- Garlic sold in grocery stores has usually been treated with chemicals to make it last longer on the shelf. It's harder to grow treated garlic than untreated garlic.
-
2Get ready to plant in the fall or the spring. If you live in a northern area that gets a hard frost, it is recommended that you plant garlic in the fall. Garlic overwinters well, and planting it early will cause the bulbs to be larger and more flavorful than a spring-planted crop.[1] However, if you live in a southern area that doesn't have cold winters, plant your garlic early spring instead.
- If you're planting garlic in the fall, plan to plant it 6 - 8 weeks before the ground freezes.
- If you're planting garlic in the spring, plant it as soon as the ground can be worked in February or March.
Advertisement -
3Prepare a planting site. Choose a spot with full sun and well-draining soil. Work the soil to a depth of 4 inches using a garden rake or hoe. Enrich the soil with compost to add nutrients that will help the garlic grow strong and healthy.
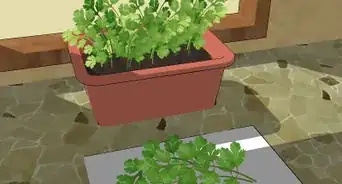
- If you wish, prepare to grow the garlic in a pot. Choose a pot wide and deep enough to hold the garlic you wish to grow, and fill it with rich potting soil.
-
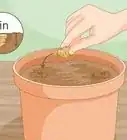
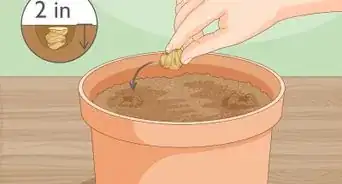
4Plant the garlic cloves. Divide the bulb into individual cloves, keeping the papery skin intact. Plant the cloves 4 inches apart and about 2 inches deep. Make sure that the flat root side is pointing down and the tapered side is pointing up - otherwise the garlic will grow in the wrong direction. Cover the planted garlic cloves with soil and pat gently.


Caring for Garlic
-
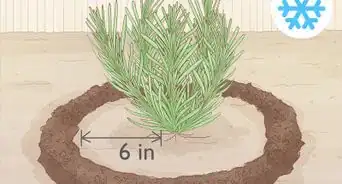
1Mulch the area heavily. If you're planting your garlic in the fall, cover the area with 6 inches of straw to protect the garlic during the winter. In the spring, the mulch can be removed. If you're planting your garlic in the spring, be sure to mulch it to retain soil moisture.
-
2Cut off flower shoots in the spring. You should see the garlic scapes emerge from the ground in early spring. Cut off any flower shoots you see, since if they're left to grow they'll take energy away from the bulb formation and result in smaller bulbs.
-
3Keep the garlic watered. Water the garlic every 3 to 5 days throughout the growing season. When you see the soil get dry and dusty, that means it's time to water. Garlic plants don't need to be water during the fall and winter.
-
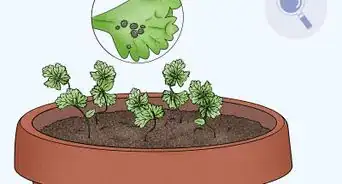
4Fertilize and weed as necessary. If the garlic shoots look yellowish or limp in the middle of the growing season, you can dress the plants with fertilizer to help them perk up. Keep the garlic bed weeded so that the garlic doesn't have to compete with other plants for nutrients and water.


Harvesting and Curing Garlic
-
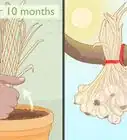
1Harvest when the tops turn yellow and begin to die off. At the end of the growing season, in July or August, the tops of the garlic plants will start looking yellow and begin to fall over and die. This means it's time to harvest the garlic.
- Don't harvest the garlic too late in the season - the bulbs will shrivel and the garlic won't be good to eat.
- Garlic harvested too early won't cure properly.
-
2Remove the bulbs from the ground without breaking them. Use a spade to dig around the garlic bulbs without breaking through the cloves. Brush off excess dirt. You can leave the garlic stem attached to the bulb.
-
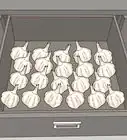
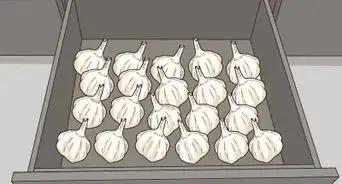
3Let the bulbs cure for 2 weeks. Before you use the garlic, it's necessary to let it cure. During this time the skin will dry and the bulb will become firm. Store the harvested garlic in a cool, dry place for curing.
- You can cut off the stem and cure the garlic bulbs individually in a storage bin. Make sure they get plenty of air circulation.
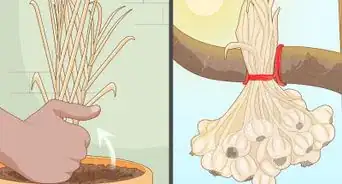
- Another common way to cure and store garlic is to leave the stems attached and braid them, then hang the garlic in a cool, dry place.
- You can also cure your garlic by hanging the cloves upside down in a warm, shaded area with the leaves attached.
-
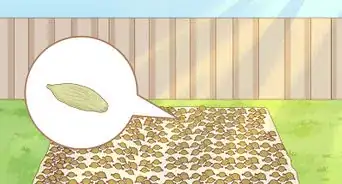
4Use the garlic when the skin is dry and papery. The cloves should be firm to the touch, and easy to pull apart.
-
5Save the best bulbs for next season's planting. Pick out a few large bulbs to plant either in the fall before the ground freezes or in early spring. Choose the best-looking bulbs to ensure that next season's plants are big and flavorful.


Expert Q&A
Did you know you can get expert answers for this article?
Unlock expert answers by supporting wikiHow
-
QuestionI live in a very hot country. When is it best to plant?
 Andrew Carberry, MPHAndrew Carberry is a Food Systems Expert and the Senior Program Associate at the Wallace Centere at Winrock International in Little Rock, Arkansas. He has worked in food systems since 2008 and has experience working on farm-to-school projects, food safety programs, and working with local and state coalitions in Arkansas. He is a graduate of the College of William and Mary and holds a Masters degree in public health and nutrition from the University of Tennessee.
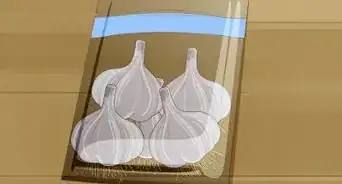
Food Systems ExpertIf you live in a tropical climate, store your cloves in a cool place, like a refrigerator, for 4-6 weeks before planting. This will simulate winter and trigger them to sprout, and you can then plant them outside.
Support wikiHow by unlocking this expert answer.
-
QuestionI planted garlic in late October. We had a very mild November and the garlic shot up 6 inches in early December. Do I need to replant?Andrew Carberry, MPHAndrew Carberry is a Food Systems Expert and the Senior Program Associate at the Wallace Centere at Winrock International in Little Rock, Arkansas. He has worked in food systems since 2008 and has experience working on farm-to-school projects, food safety programs, and working with local and state coalitions in Arkansas. He is a graduate of the College of William and Mary and holds a Masters degree in public health and nutrition from the University of Tennessee.
Food Systems ExpertNo, replanting the shoots is not necessary. However, be sure to cover the shoots with 6 inches of straw.Support wikiHow by unlocking this expert answer.
-
QuestionWhen do I plant garlic if I live in the southern hemisphere, and how long does it take before harvest?
 Community AnswerIn the southern hemisphere, garlic should be planted around mid-June, and harvested around late-July.
Warnings
- Fungal root diseases can be a problem for garlic. Never over-water.⧼thumbs_response⧽
Things You'll Need
- Soil preparation tools
- Digging implement
- Fresh garlic clove (or more, as needed)
- Container and sandy soil if planting in a container
- For colder climates: straw mulch


References
- ↑ http://www.almanac.com/plant/garlic
- Caroline Foley, Jill Nice and Marcus A. Webb, New Herb Bible, p. 51, (2001), ISBN 1-875-169-92-X – research source
- Bay Books Gardening Library, Herbs for Your Garden, p. 50, (1992), ISBN 1-86378-028-9 – research source
About This Article

To plant garlic, choose a spot with full sun and well-draining soil, and use a garden rake or hoe to work the soil to about 4 inches. Divide your garlic clove into individual cloves, keeping the papery skin intact. Plant the cloves with the flat root side pointing down and the tapered side pointing up, and space the cloves about 4 inches apart and about 2 inches deep. Water the garlic every 3-5 days, and cut off any shoots that grow to encourage the garlic bulb to develop. Harvest the garlic when the tops turn yellow and begin to die off. For more tips from our Gardening reviewer, including how to cure your garlic, read on!